Backgammon - Dice & strategy board
Roll the dice, strategize, and outmaneuver your opponent in classic backgammon
- 4.38 Version
- 4.4 Score
- 8M+ Downloads
- Free License
- 3+ Content Rating


Welcome to Backgammon
AI Factory's Backgammon stands out as the premier free Backgammon game for Android! This traditional game blends skill and strategy, capturing the essence of classic parlour board games worldwide, enjoyed for leisure and wagering. Reminiscent of Mahjong, Backgammon finds its place in social settings like coffeehouses and bars. Historically tracing back to Mesopotamia and Egypt thousands of years ago, with subsequent popularity among Romans and Indians, this game transcended borders reaching East Asia before Xiangqi (Chinese chess) overshadowed it. In contemporary times, Backgammon enjoys a strong following in the West.
Main Features: ** Enhanced Version Released in June 2023 **
-- ★★ New Feature ★★ --- Complete game evaluation! Reflect on your games and export records for analysis
-- ★★ New Feature ★★ --- Customize your Dice Seed to replay games for strategy testing, ensuring dice legitimacy
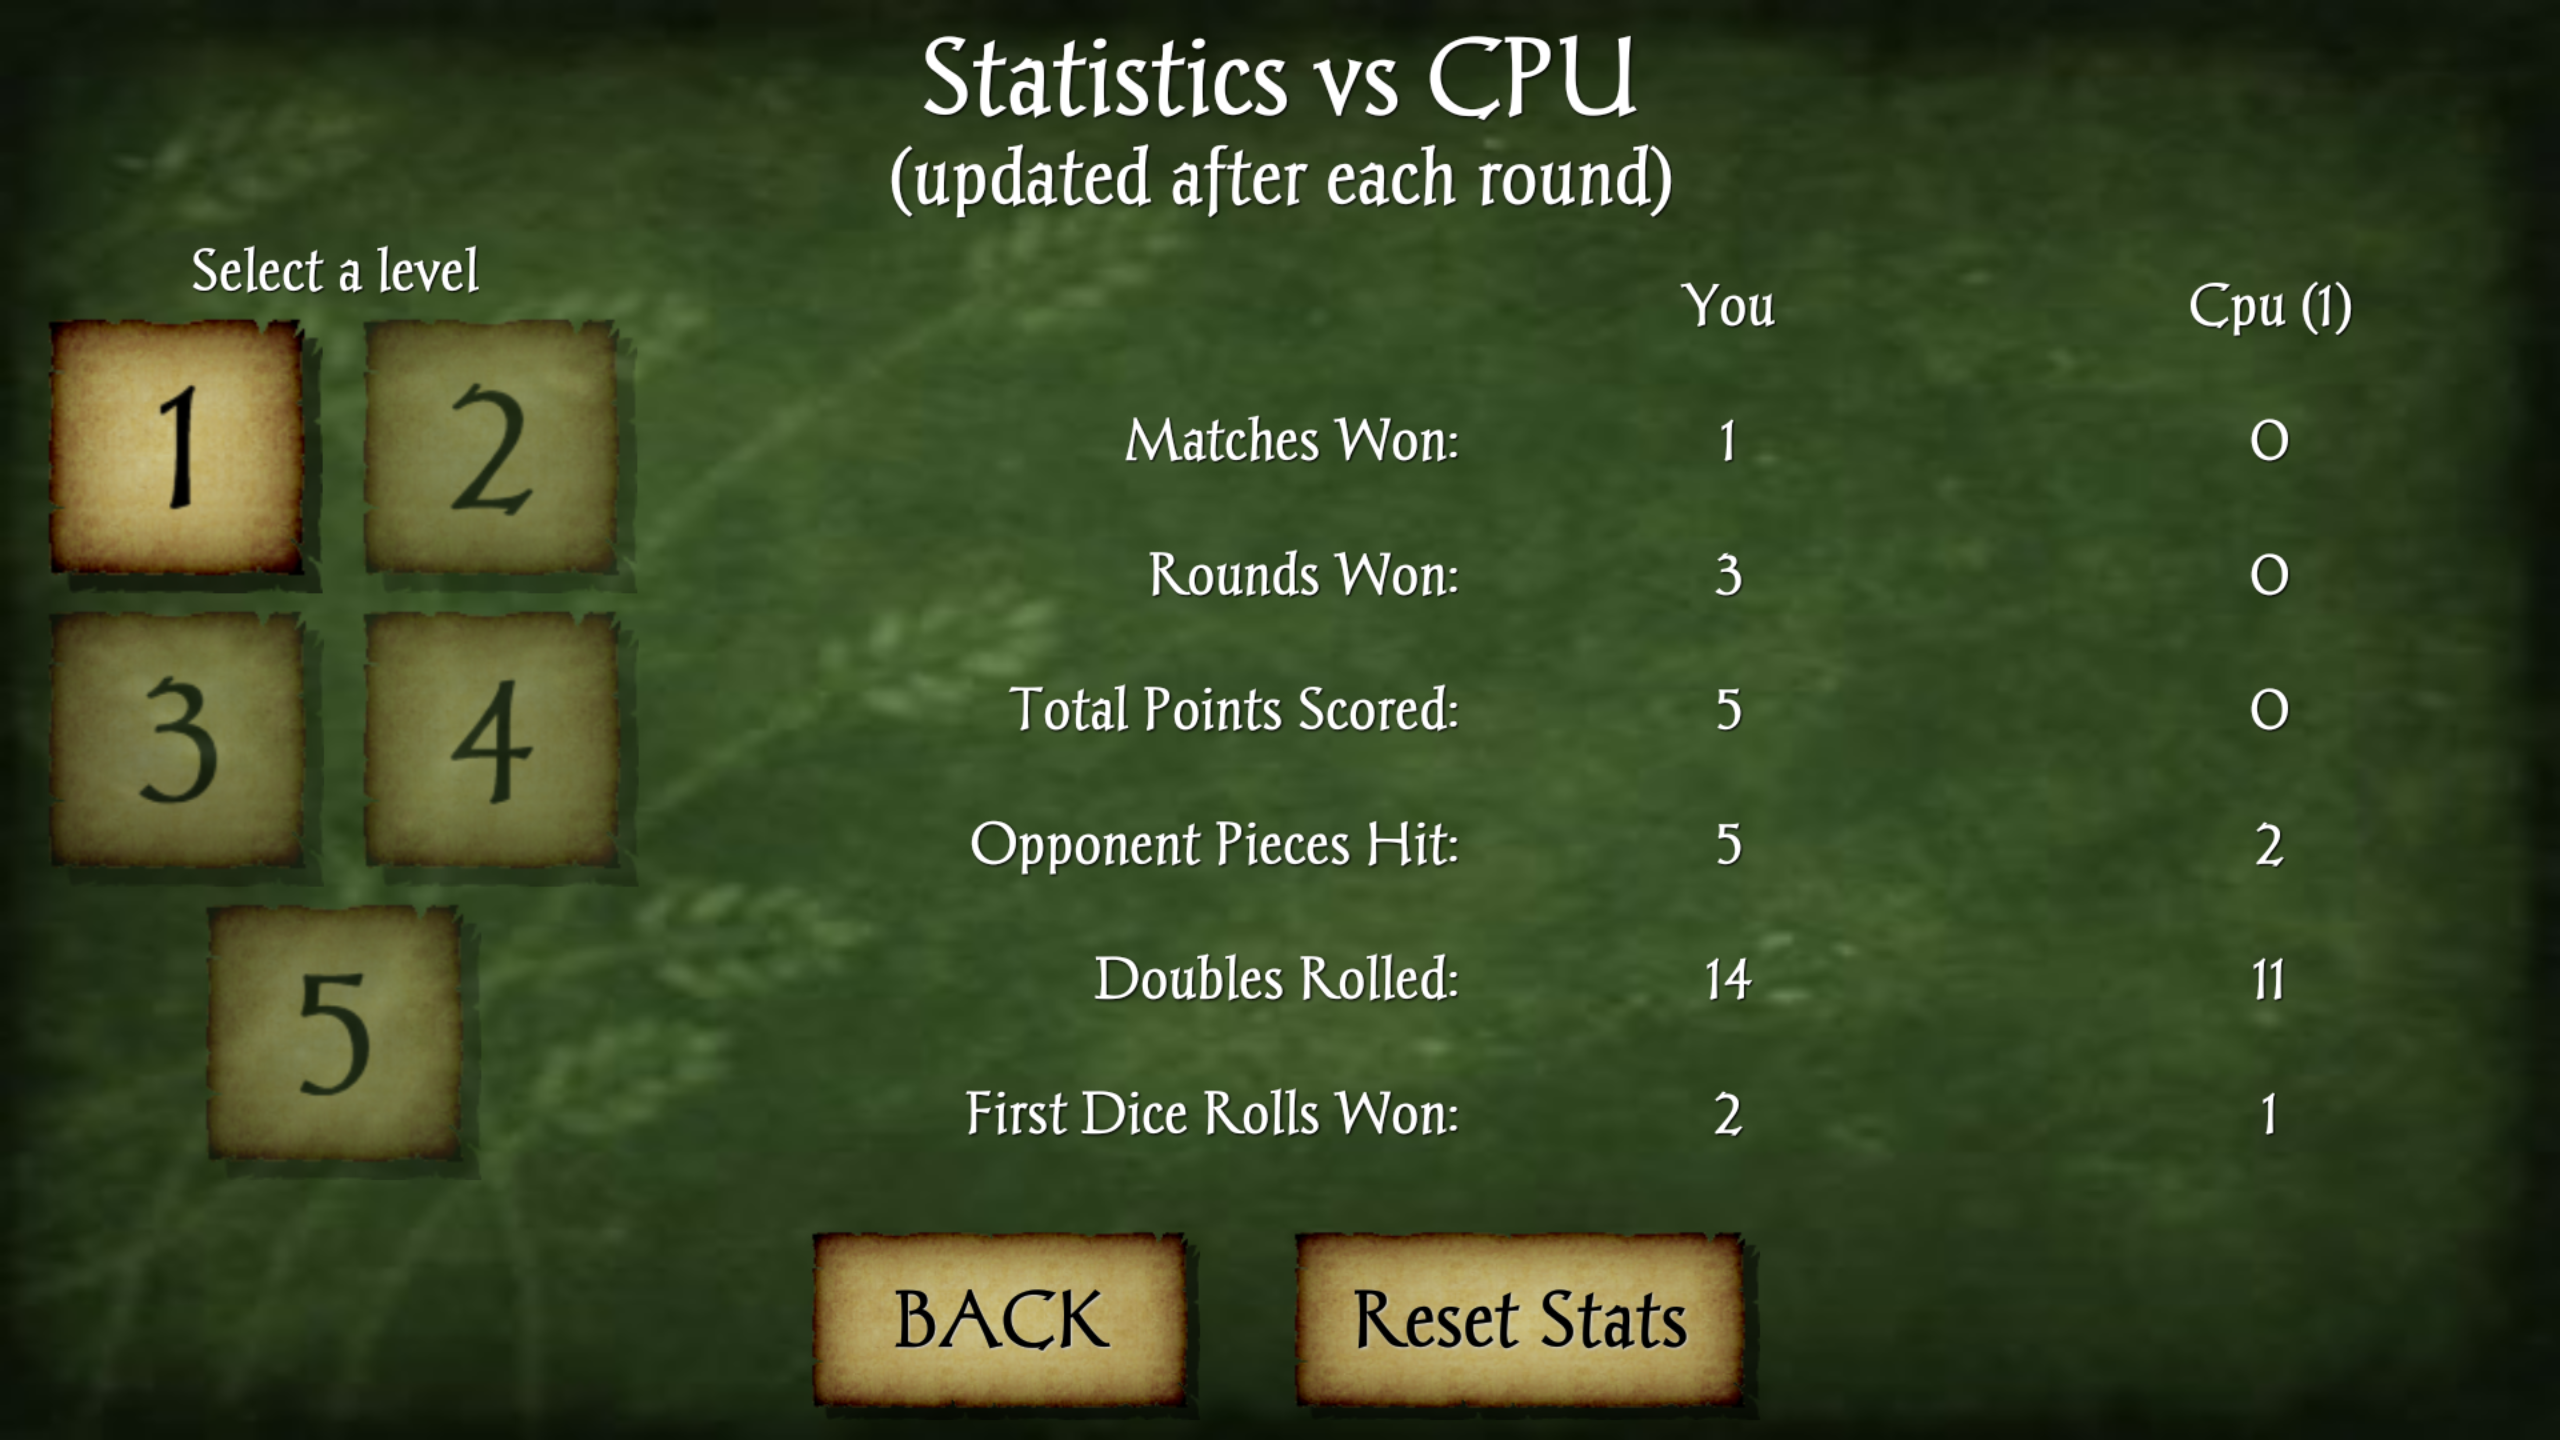
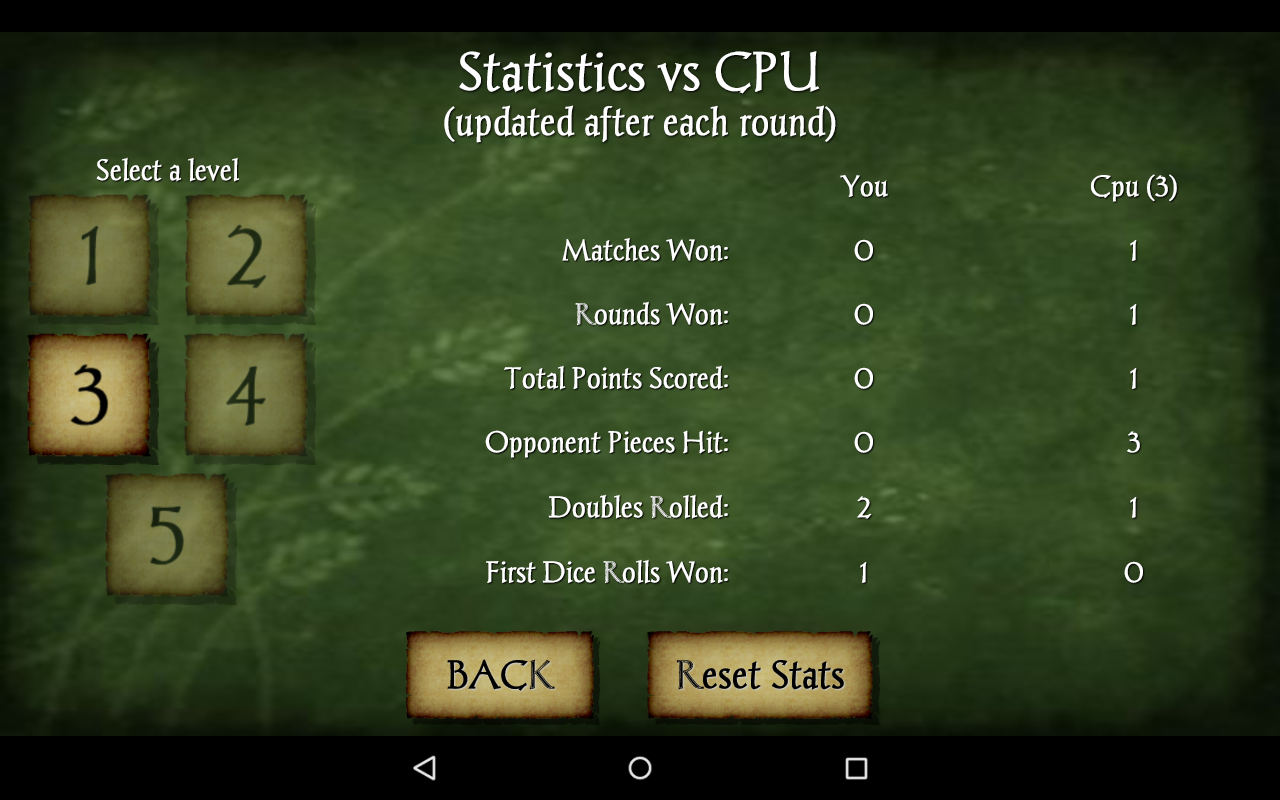
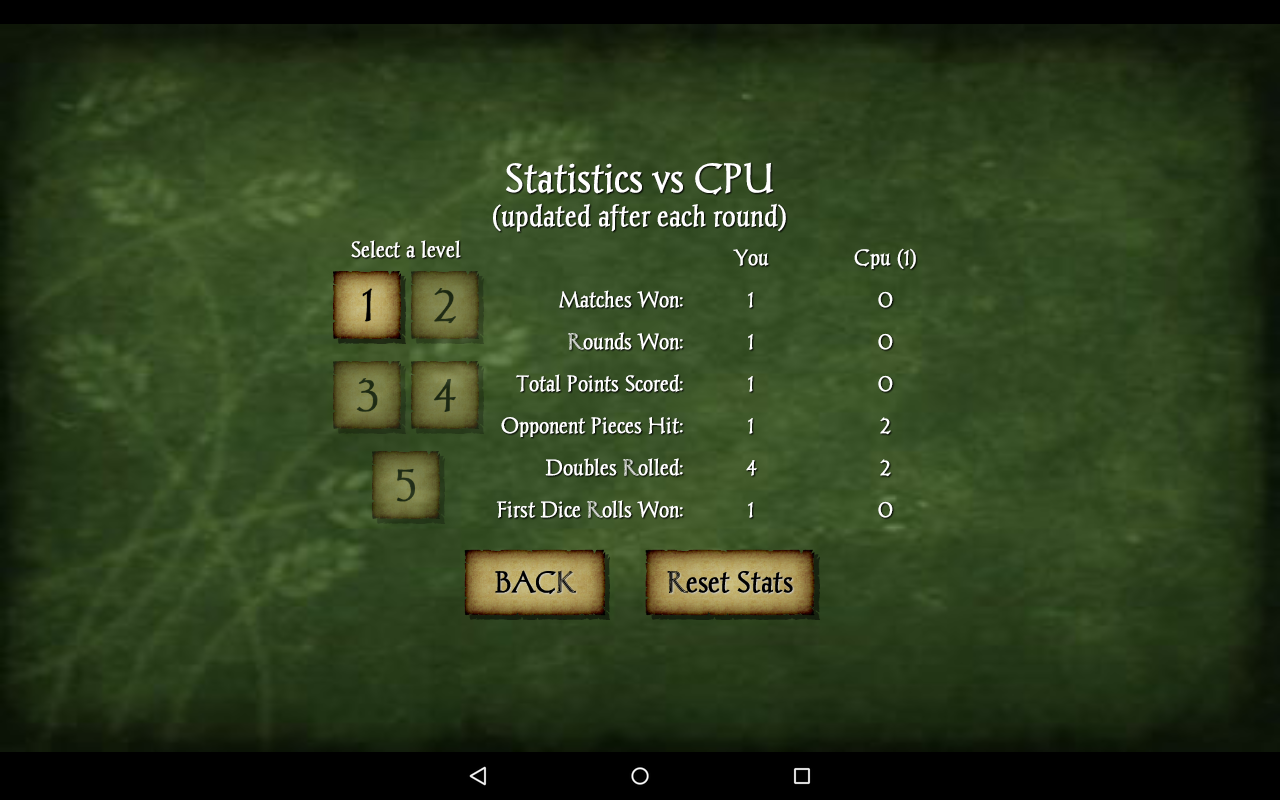
-- ★★ New Feature ★★ --- Detailed statistics offering comprehensive insights into matches and overall performance
-- ★★ New Feature ★★ --- Extensive online documentation comprising 70k content including usage guidelines
-- Superior Backgammon AI featuring 2 game engines!
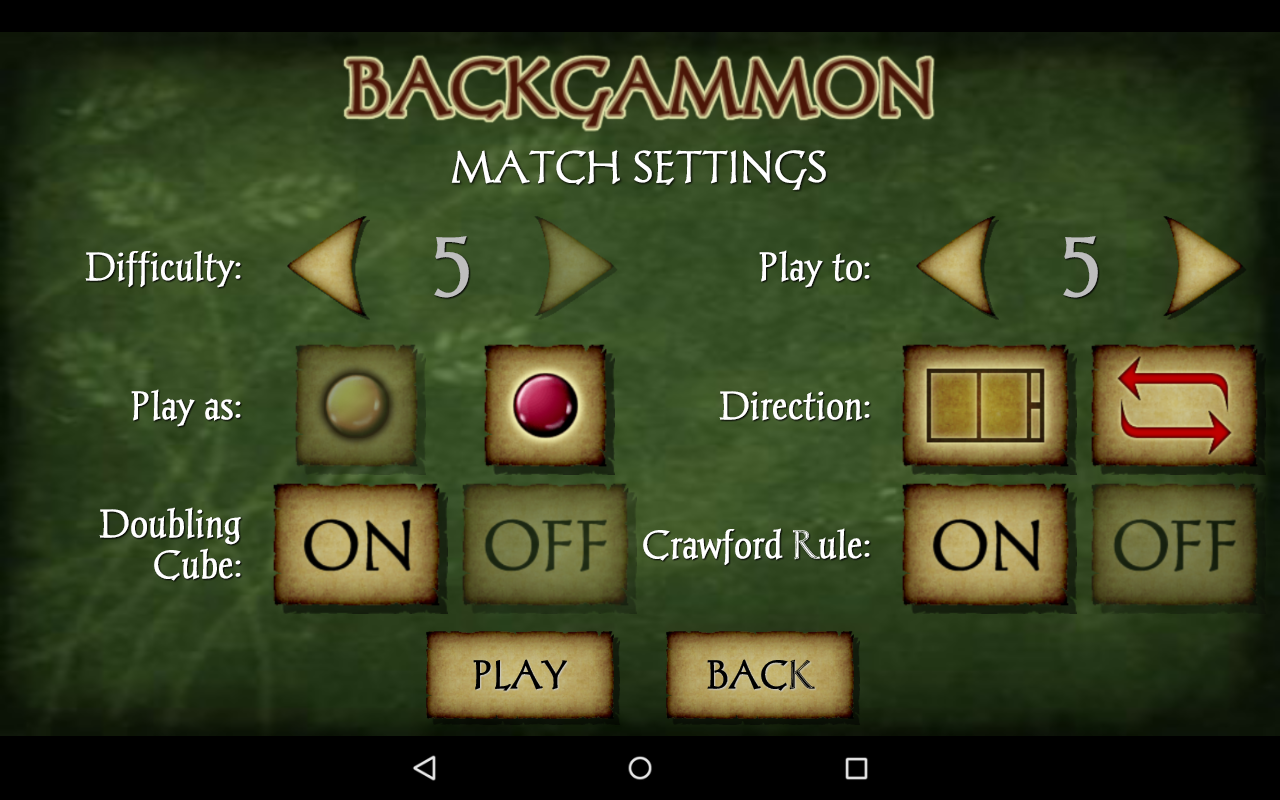
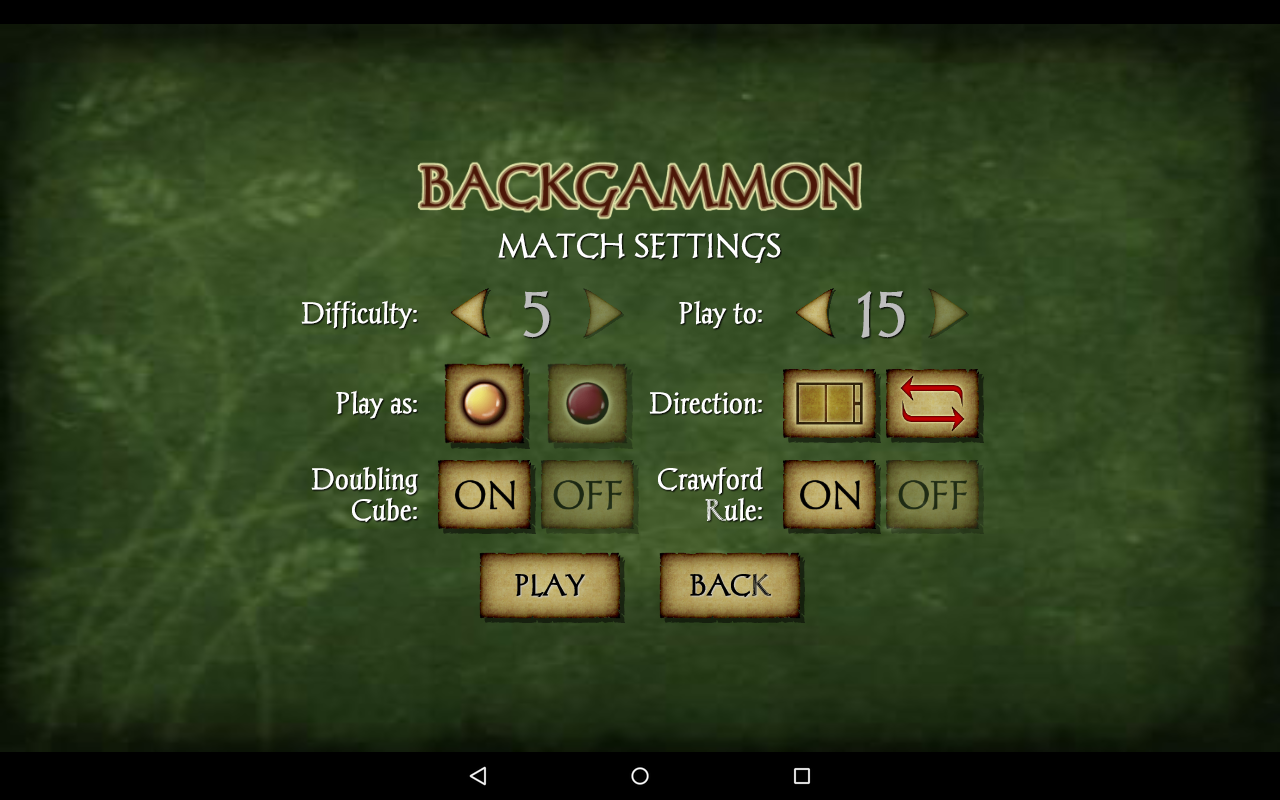
-- 7 Levels of Difficulty! Including 5 existing levels and 2 more challenging levels!
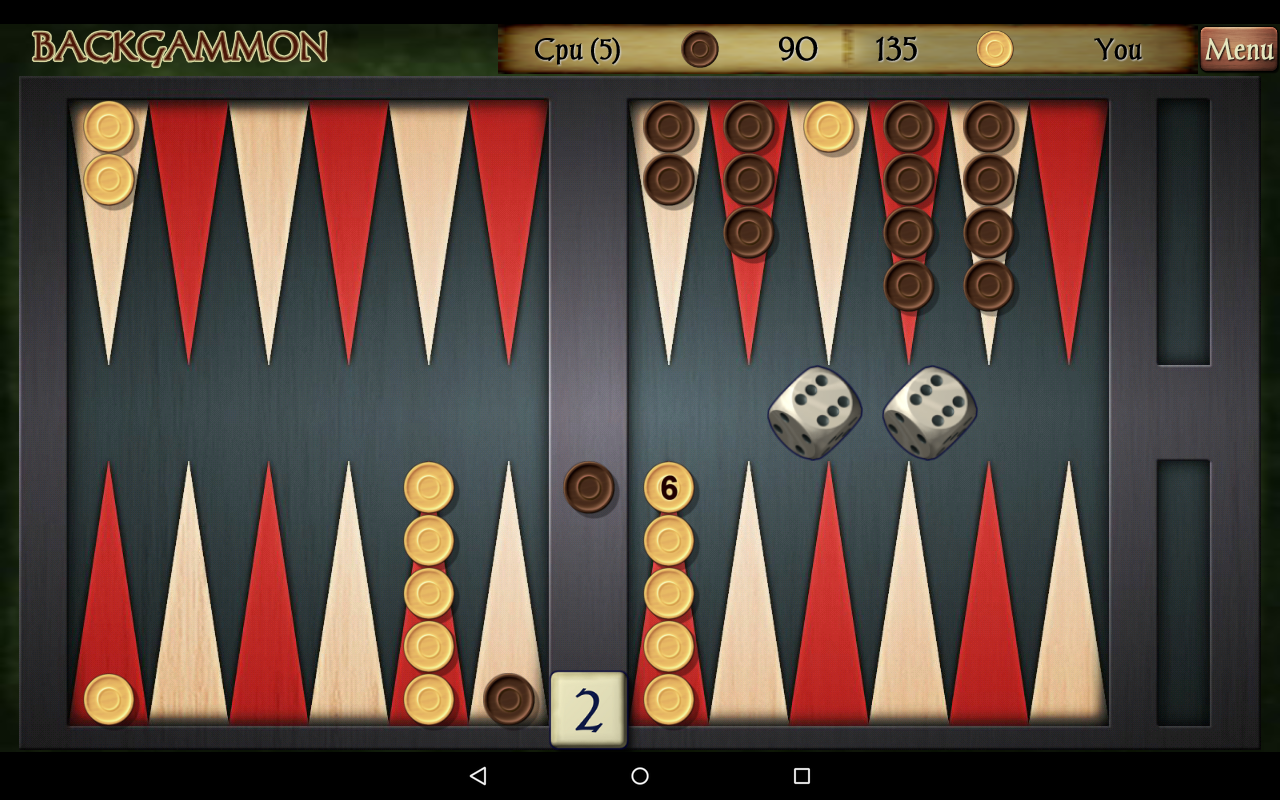
-- Comprehensive match gameplay with options for Doubling Cube & Crawford rule
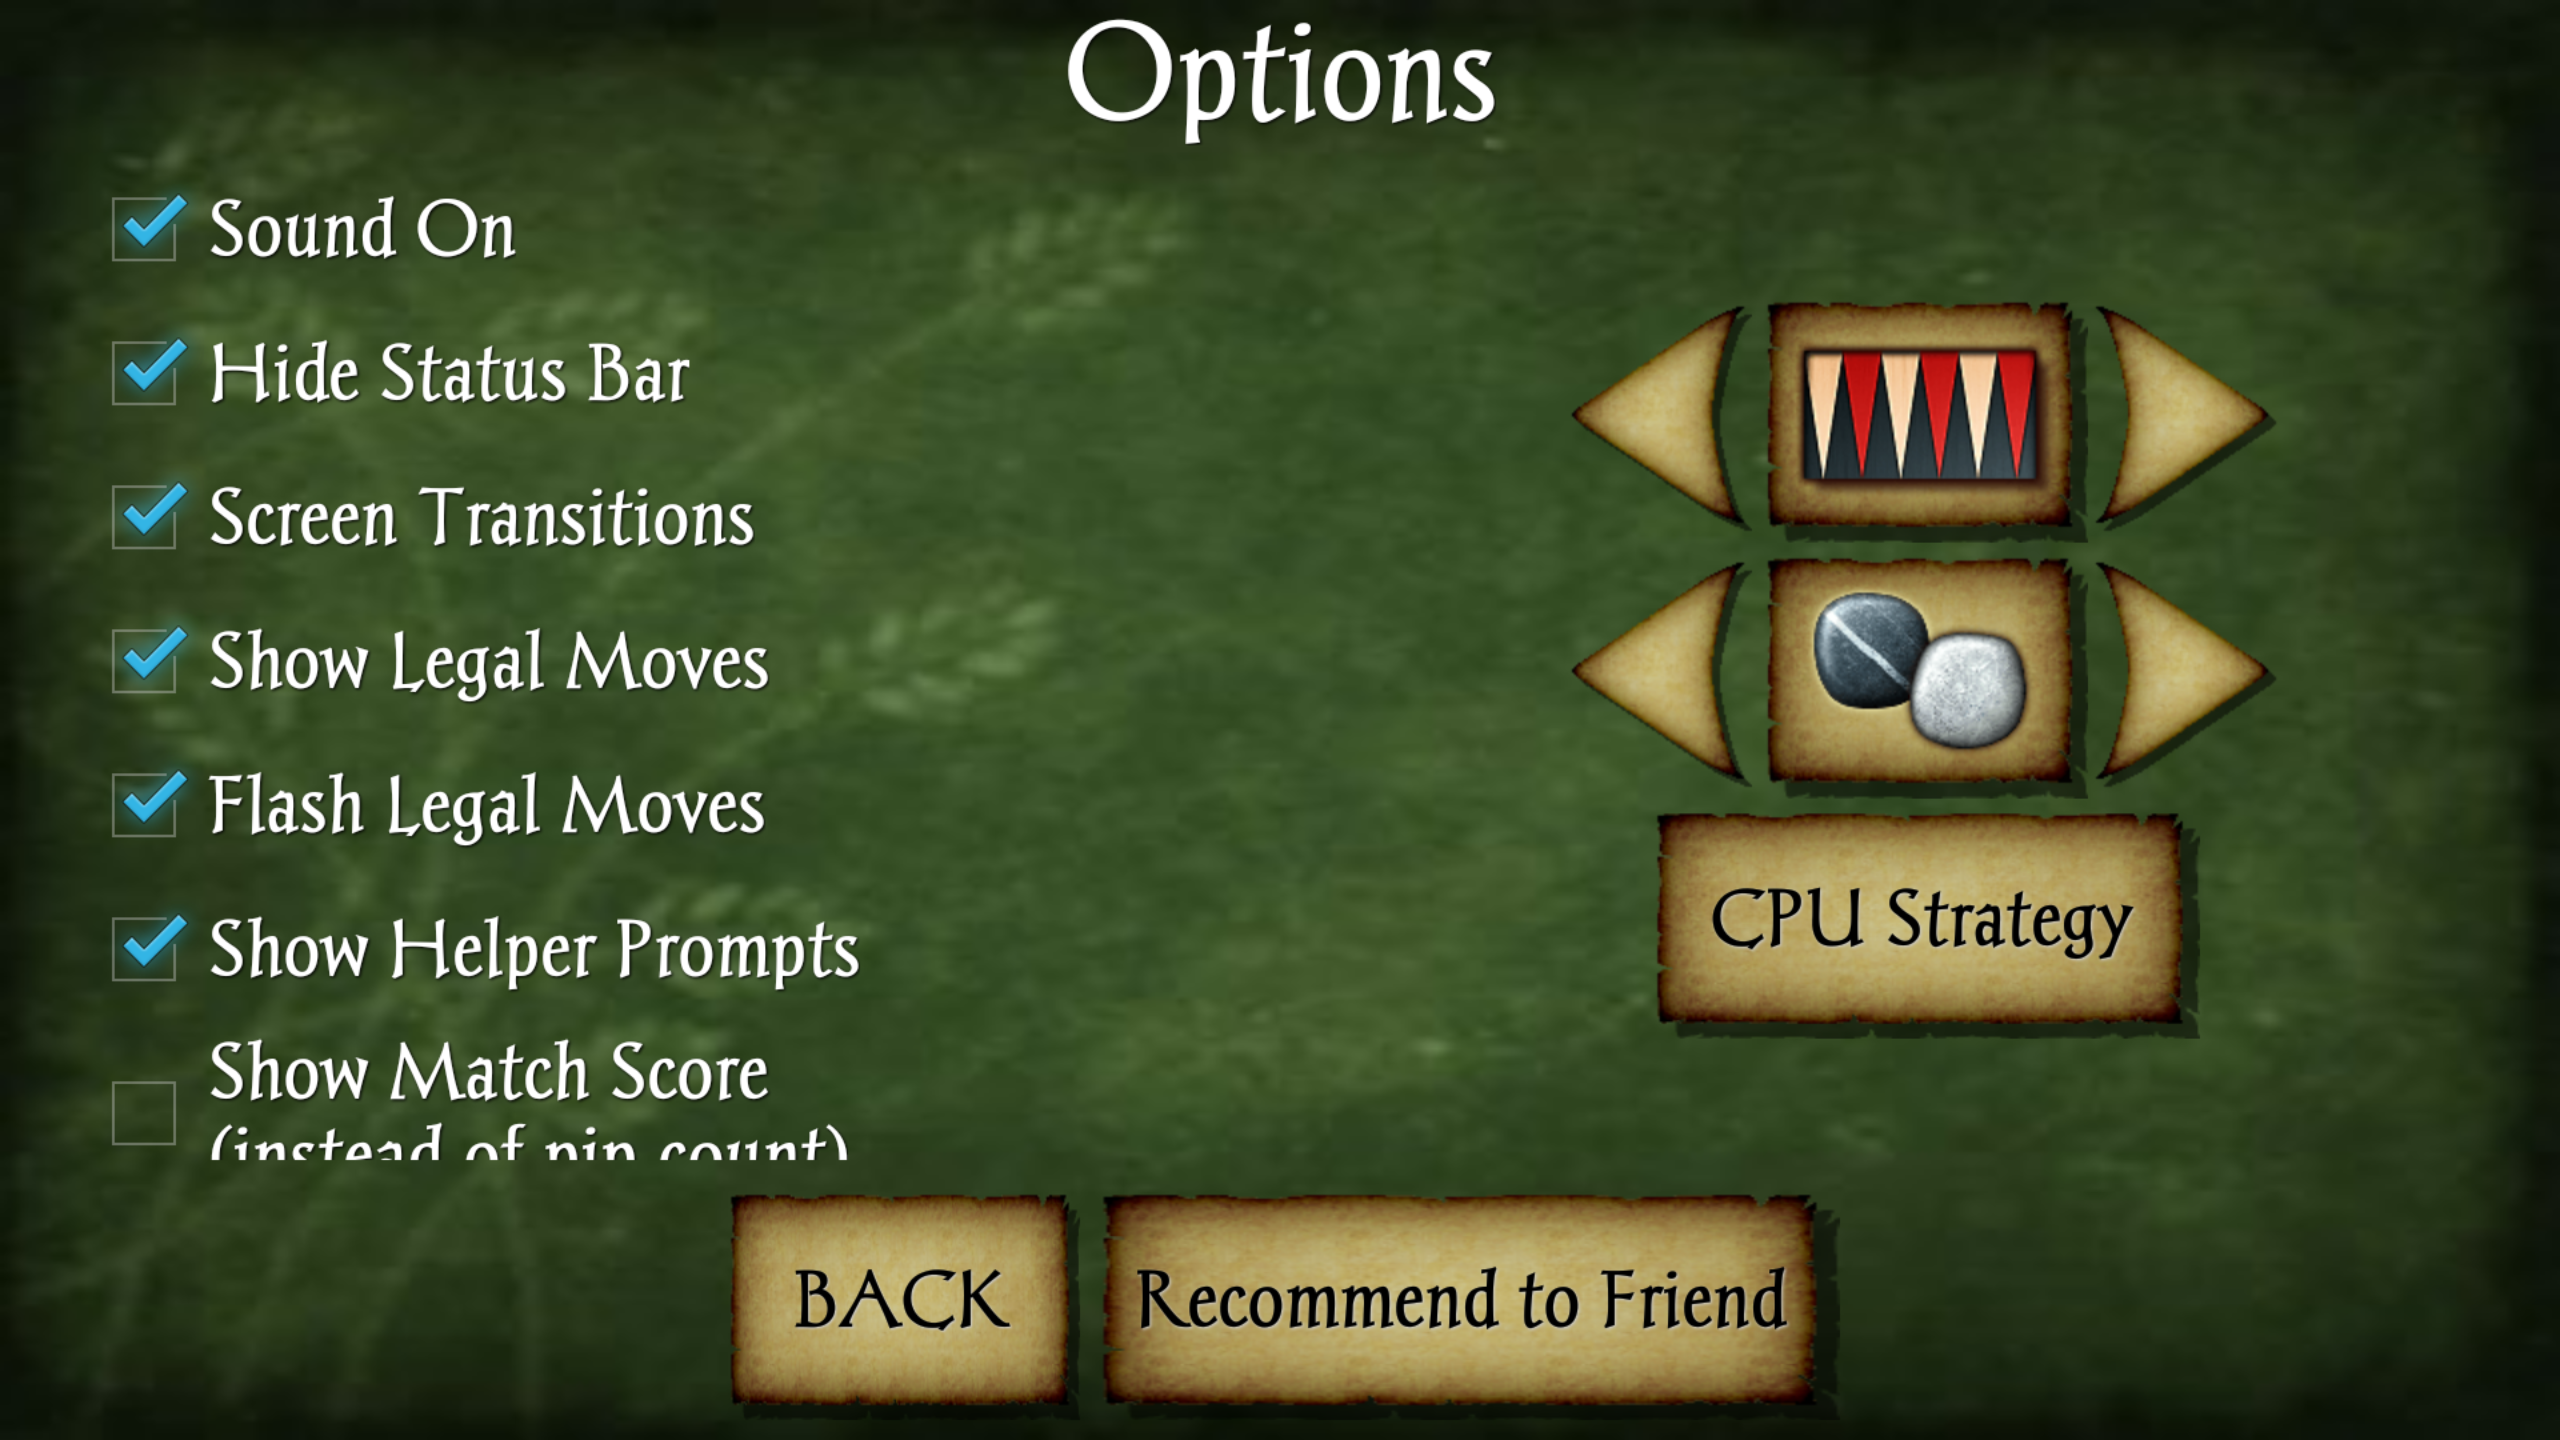
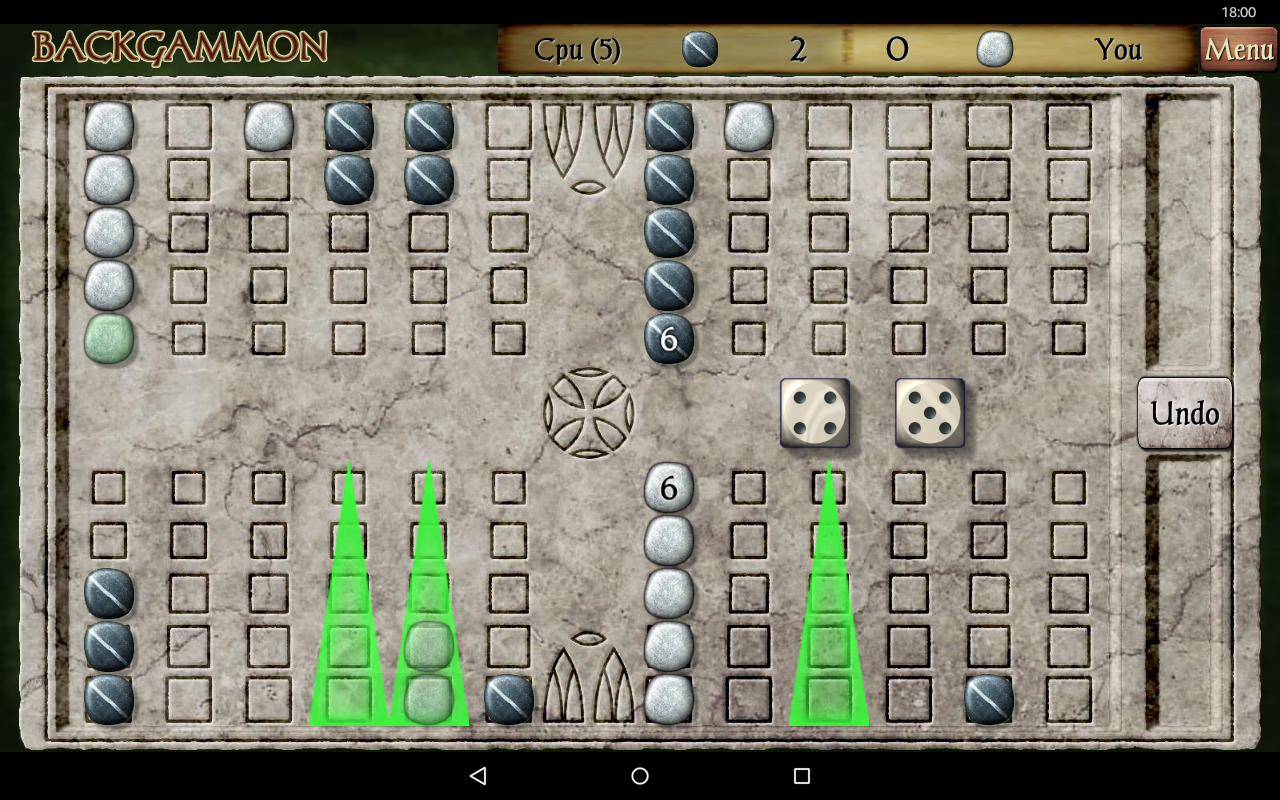
-- 4 Unique Boards and Piece Sets
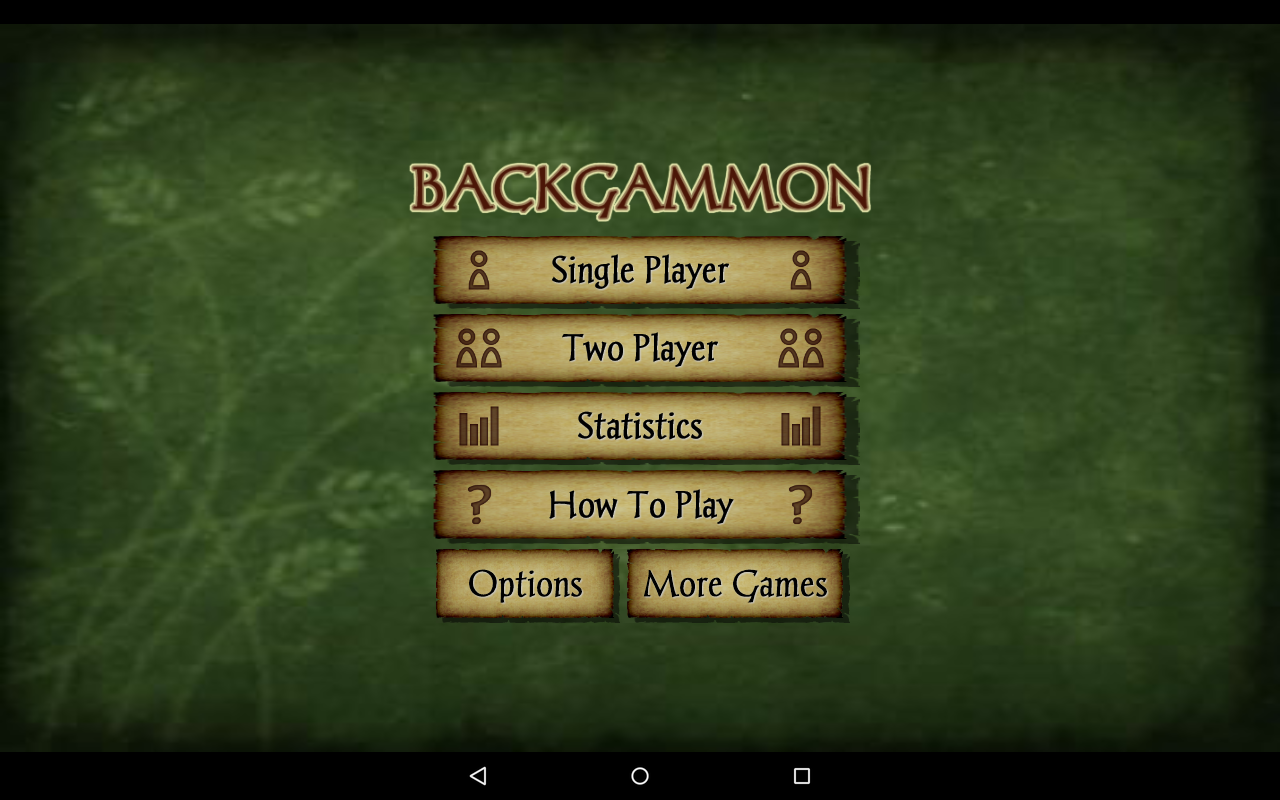
-- Single Player against Computer or local 2 Player mode
-- Helpful Hint & Stats functions
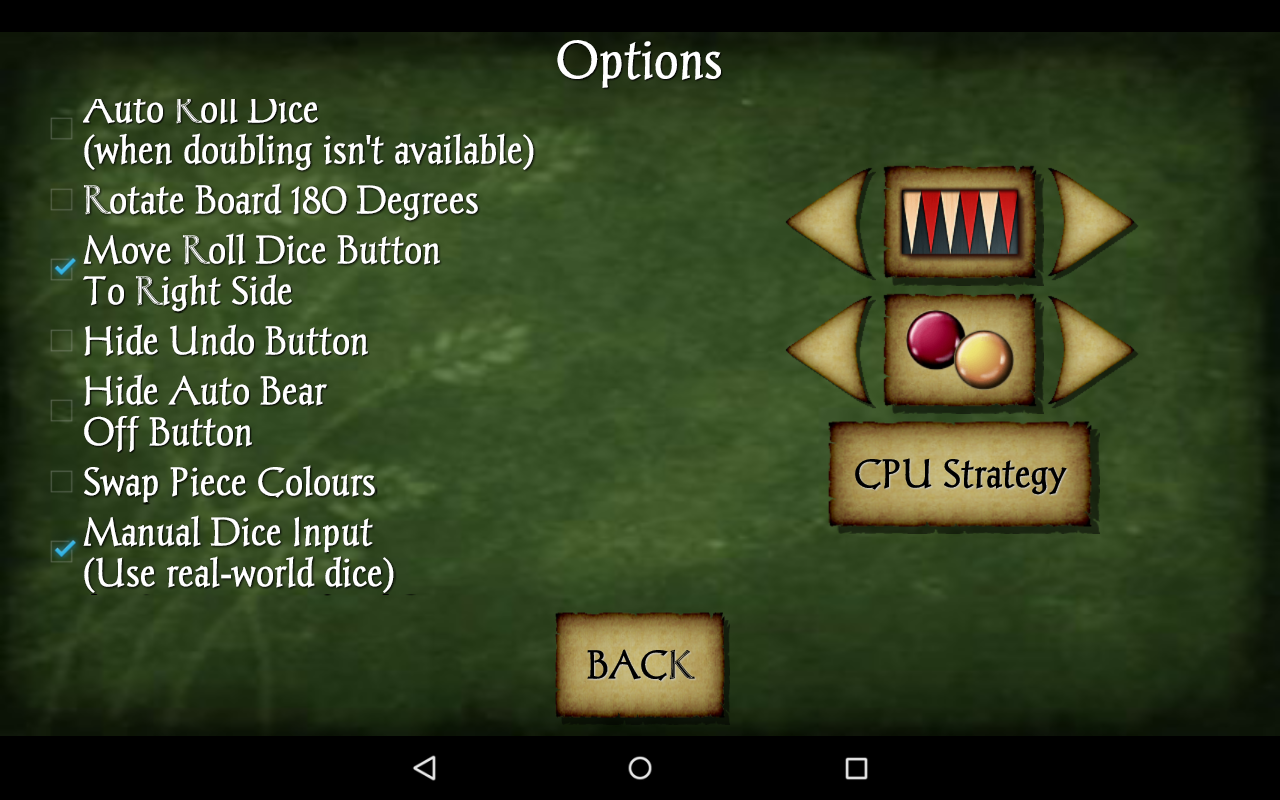
-- Auto Dice generator, Seeded Dice generator, or Manual Dice input
-- Compatible with both Tablet and Phone devices
This free version is ad-supported by third parties. Note that ads might require internet access, potentially incurring additional data charges. The app requests photos/media/files permission to enable saving game data to external storage and at times for ad caching purposes.
*Concerned about fair play? Refer to the "CPU Strategy" section + Utilize Manual Dice feature (real-world dice) and Manual Seed option (to verify dice integrity) to dispel any doubts.*
How to Play Backgammon
The fact that people have been playing Backgammon for over 5,000 years is proof enough that it’s really fun. It's actually one of the oldest board games! The game looks complicated at first, but it’s surprisingly easy once you get the hang of it. Read on to learn everything you need to know about playing Backgammon, like how to set up the game, the rules of play, and how to win.
Part 1 Preparing to Play
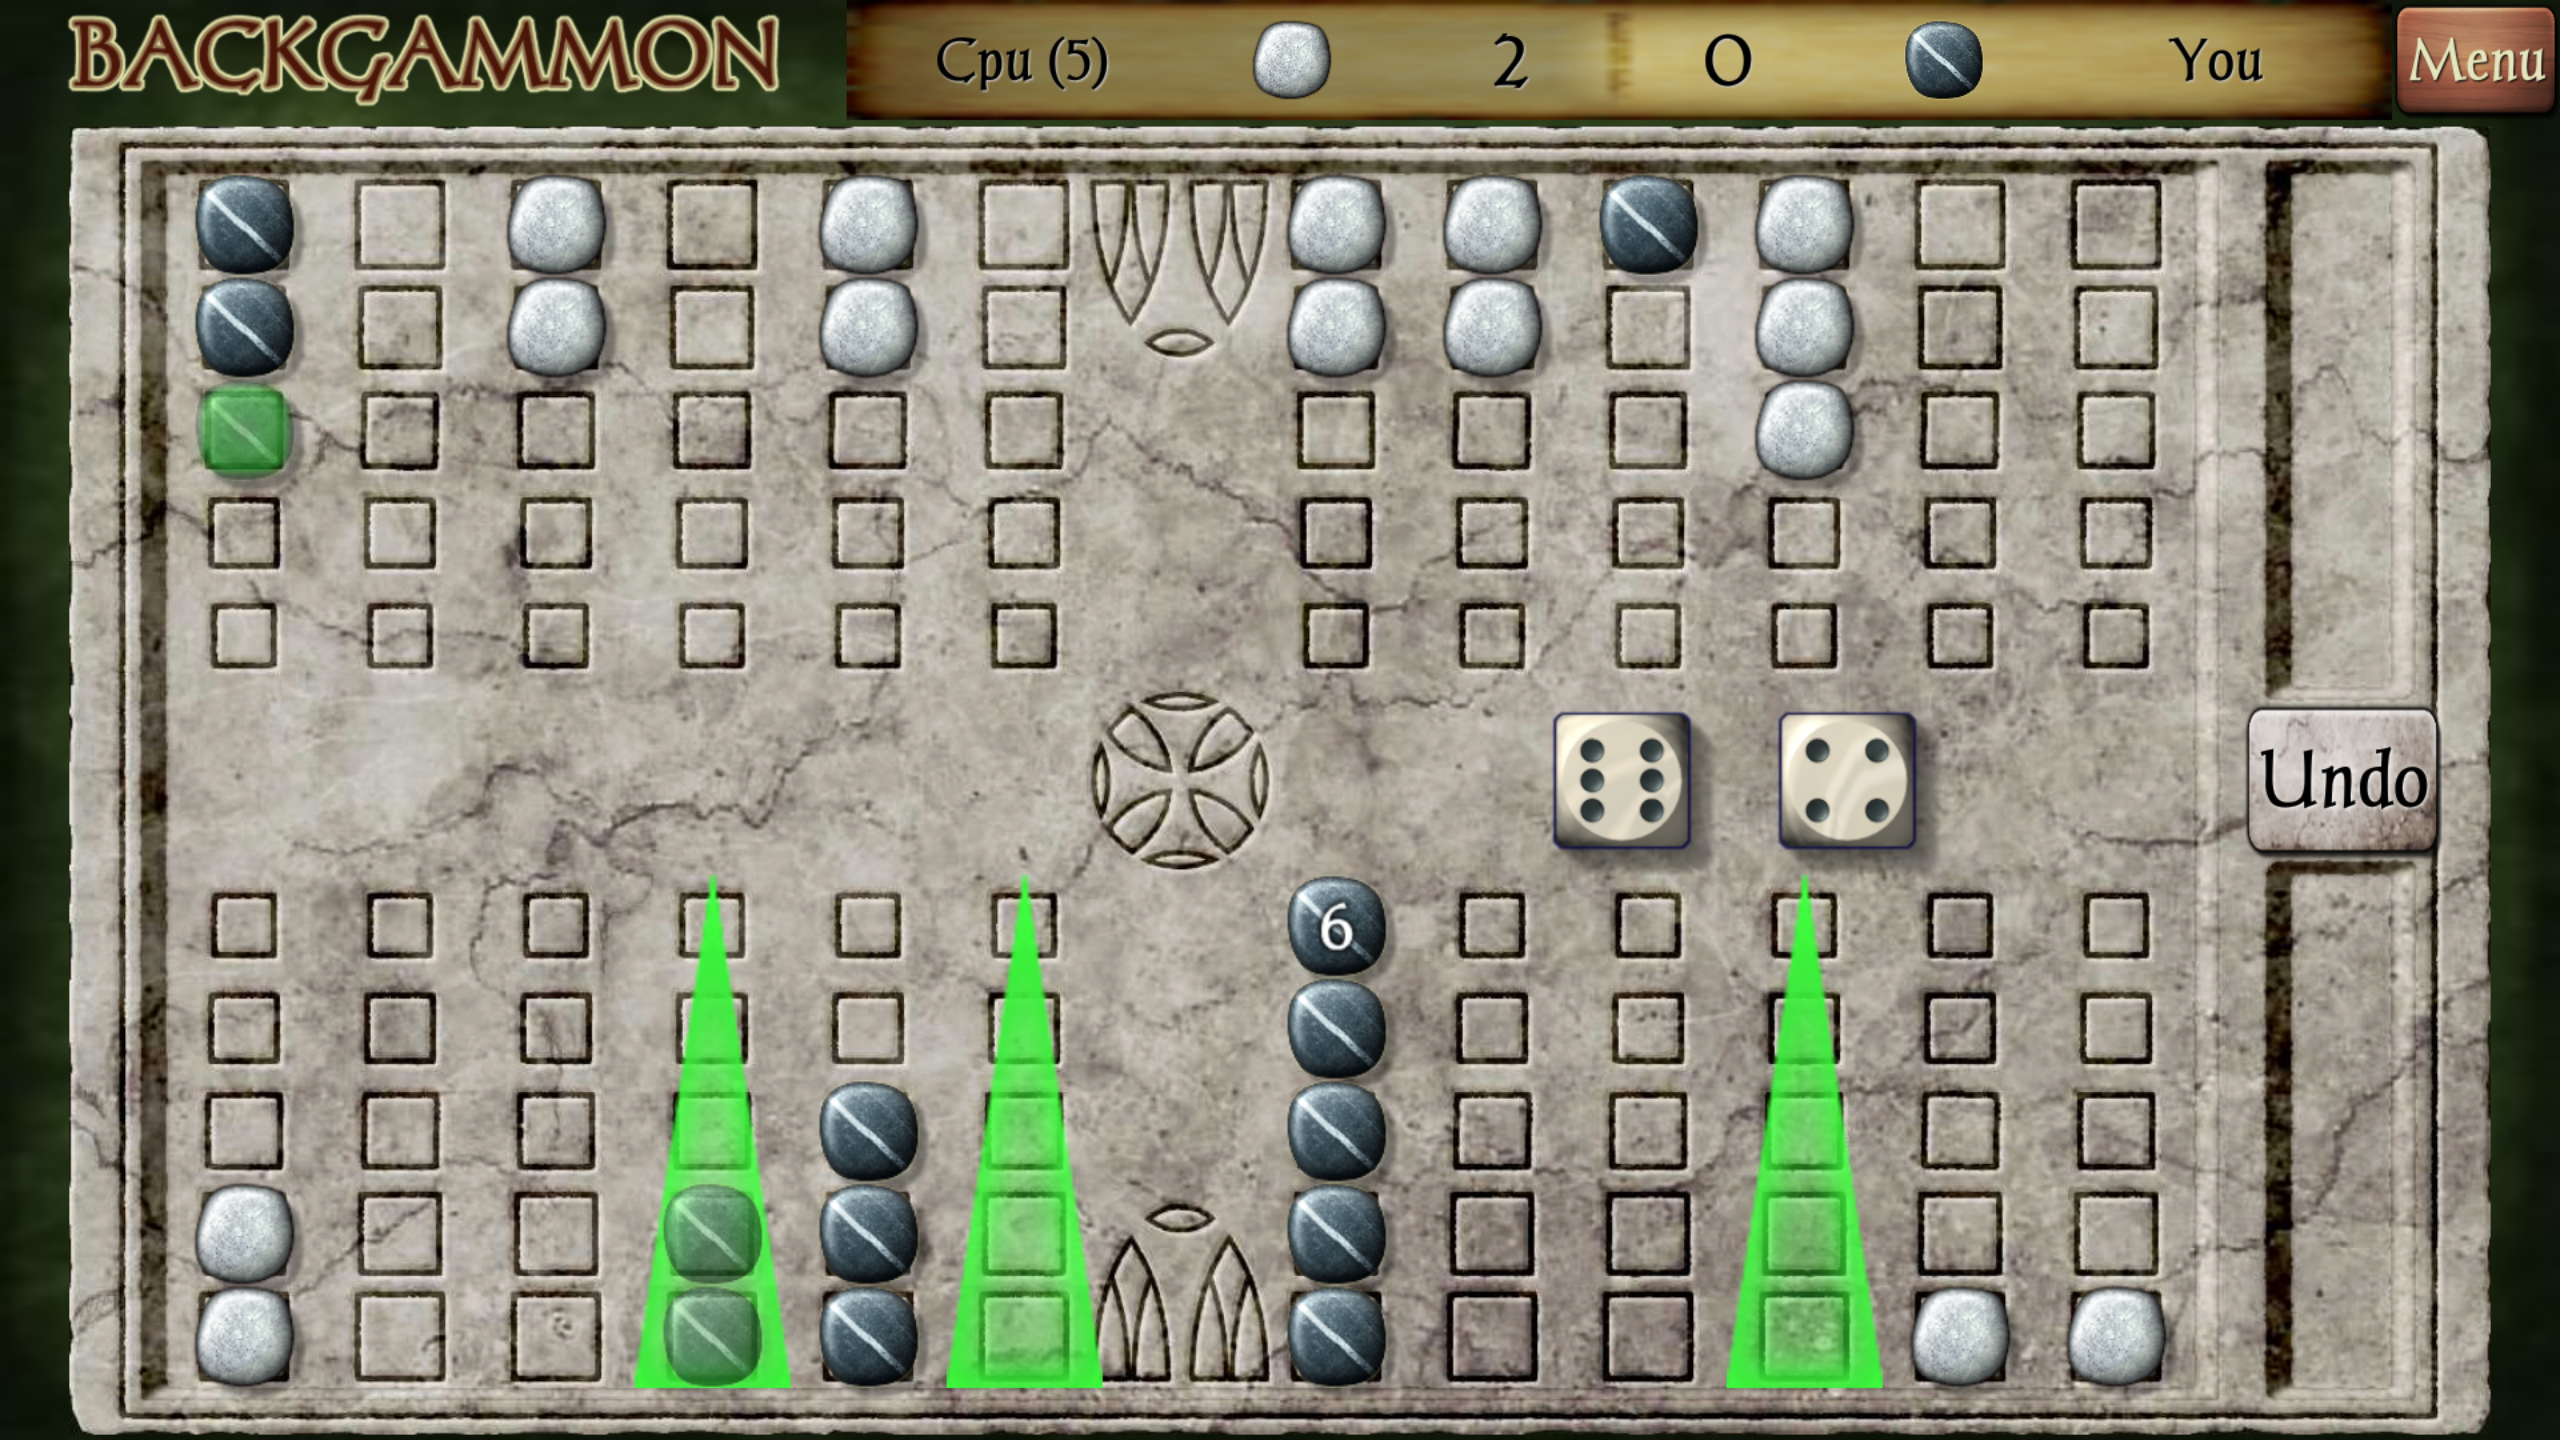
Step 1 Understand the backgammon board. Backgammon is played on a board that consists of 24 narrow triangles that are called points. The triangles alternate in color and are grouped into four quadrants of six triangles each. There are four types of quadrants: the player's home board and outer board, and the opponent's home board and outer board. The intersection of these four quadrants, the middle of the board, is separated by a ridge called the bar.
The players sit facing each other at opposite sides of the board when they play. Each player's home board is positioned on the right quadrant closest to the player. The home boards are opposite each other, and so are the outer boards, which are located in the left quadrant.
Each player moves his checkers from the direction of the other player's home board in a horse-shoe like fashion, in opposite directions (one player will move their pieces clockwise, and the other counter-clockwise), aiming to bring all of their pieces to their home board and bear them off (more on this later).
The triangles are numbered from 1-24 in most of the Backgammon boards, with the 24th point being the furthest point from the player, and with 1 being the right most triangle on the player's home court. The players must move their pieces from opposite sides of the board, so one player's 1st point is the other player's 24th point, one player's 2nd point is the other player's 23rd point, and so on.
Step 2 Set up the board. Each player must set up his 15 checkers for the game to begin. The players' checkers will be comprised of two distinct colors, traditionally white and red, or white and black but it can also be other colors. To set up the board, each player must place two checkers on their 24 point, three checkers on his 8 point, five checkers on his 13 point, and five more checkers on his 6 point.
Remember that each player has his own numbering system, so the checkers will not overlap.
Step 3 Roll a die to determine who goes first. The player who rolls the highest number will go first. If both players roll the same number, roll again. The numbers rolled will count as the first moves for the player with the highest number. For example, if one player rolled a 5 and the other rolled a 2, then the player who rolled the 5 would go first and use the 5 and 2 in lieu of a new dice roll.
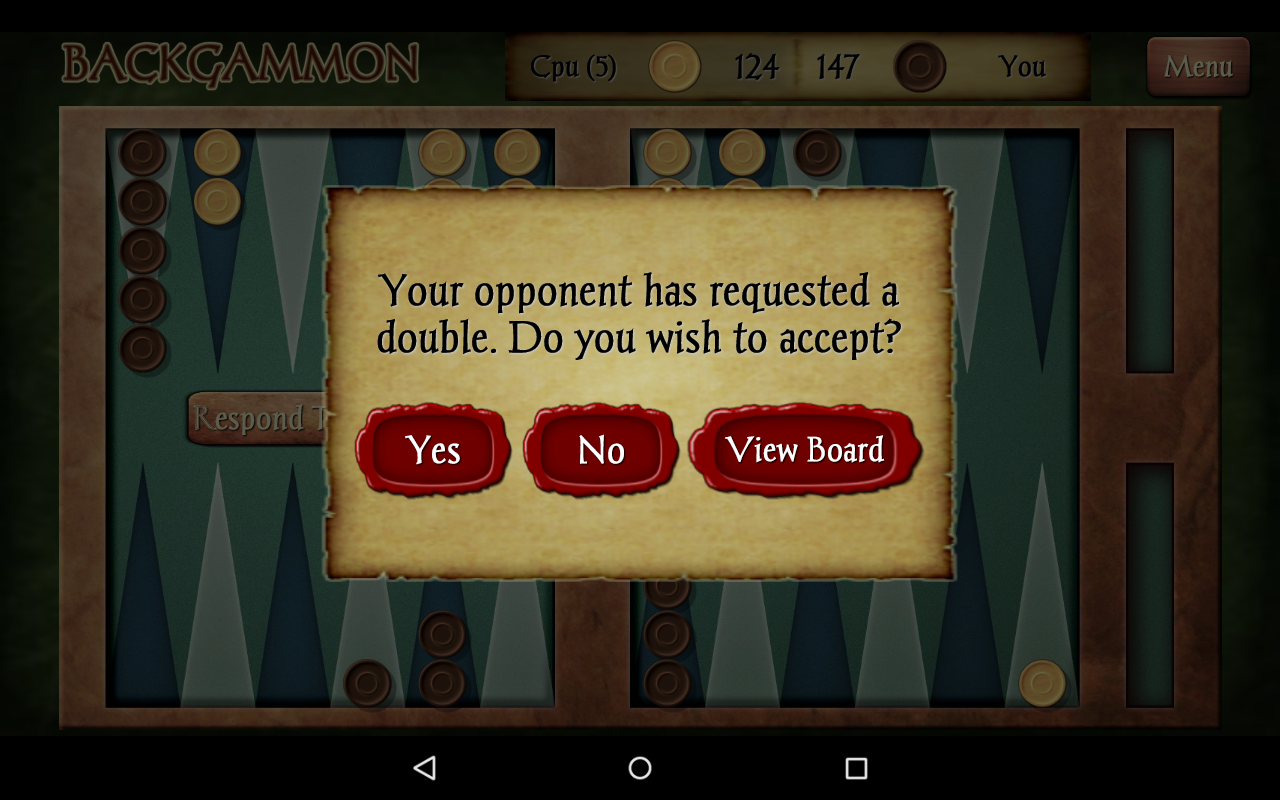
Step 4 Remember that you can double the stakes at any time. In backgammon, the winner doesn't gain points, but the loser loses points. So if you win, the opponent will either lose based on the face value, double value, or triple value of the stakes on the doubling cube. The doubling cube isn't a die but a marker. It starts at 1, but you can raise the stakes at any time at the beginning of your turn before you have rolled the dice.
If you want to double the stakes and your partner accepts, then the cube is turned to the new number and placed in your opponent's court. He will have ownership of the cube and will be able to propose a doubling during any of his future turns.
If your opponent does not accept your offer, he must forfeit the game and lose by the original stakes.
You can keep doubling the stakes back and forth, or redoubling, but it's not traditionally done more than three or four times in a game.
Part 2 Moving Your Checkers
Step 1 Roll the dice. Use a dice tumbler to roll two six-sided dice once during each of your turns. The numbers rolled represent two separate moves. For example, if you roll a 3 and a 5, you can move one checker three spaces and another checker 5 spaces. Or, you can move one checker 3 spaces and then 5 more spaces.
Make sure that you roll the dice to the right of your side of the board, from a reasonable height so that they bounce and roll a bit.
If either of the dice lands on a checker, outside of the board, or leaning against the edge of the board, then it is not considered valid and you will have to reroll.
Step 2 Move your checkers to an open point. An open point is any point on the board that is not occupied by two or more opposing checkers. You can move your checkers to a point with no checkers on it, a point with one or more of your checkers on it, or a point with one of your opponent's checkers on it. Remember that you must always move your checkers in the direction that goes towards your own home court.
You can start with any checker you chose, but it is a good idea to get your checkers out of your opponent's home board as soon as possible.
You only need 2 checkers to block a point, but you can have as many of your checkers as you want on a single point.
Remember that you can either move one checker twice or move two checkers once. For example, if you roll a 3-2, you can move one checker 3 points over and then 2 points over, as long as it lands on an open point both times. Alternately, you can move one checker 2 points over to an open point, and move another checker 3 points over to an open point.
Step 3 Play the numbers on the dice twice if you roll doubles. If you roll the same number on both dice, then you've earned yourself two extra moves. If you roll double 3s, for example, then you can make four moves of 3 points each.
Again, you can move four checkers 3 times, move one checker 12 times if it lands on an open point after every move, or mix it up and move two checkers 6 times, or one checker 3 times and another checker 9 times. As long as the total moves add up to 12 and each move lands in an open point, you're in good shape.
Step 4 Lose your turn if you can't play either number. For example, if you roll a 5-6, but you can't find an open point when moving any checker either 5 or 6 times, then you lose your turn. If you can only play one of the numbers, then you can play that number and lose your turn on the other number. If you can only play one number or the other, then you have to play the higher number.
This rule applies even if you roll doubles. If you can't play the doubled number you've rolled, you lose your turn.
Step 5 Keep your checkers safe. Try to avoid having just one of your checkers on a point because the point, which is called a blot, is vulnerable to being “hit” by your player's checkers. If one of your checker's gets hit, then it will go to the bar and you will have to use your next turn to roll and try to reenter the board in your opponent's home board. Do your best to keep at least two of your checkers on a point, at least early in the game.
Step 6 Try to dominate the board. Before you start moving your pieces into your home court, you should try to have many points occupied by 2 or 3 checkers instead of just a few points occupied by 5 or 6 checkers. This will not only give you more options to move to open points, but will also make it harder for your opponent to move to an open point.
Part 3 Hitting and Entering
Step 1 Hit a blot to move your opponent's checkers to the bar. If you hit a blot, a point occupied by just one of your opponent's checkers, then the opponent's checkers will be placed on the bar. You should try to hit the blots whenever possible, as long as it helps you move your pieces as close to your home court as possible. This is a great way to slow down your opponent.
Any time a player's checker is on the bar, he can't move his other checkers until he gets the bar checker back on the home board.
Step 2 Enter your pieces when they are taken out. If a player hits a blot with one of your pieces on it, then you have to place your own checker on your bar. Your task is now to move that checker back onto the opposing home board. You can do this by rolling the dice and then moving the checker onto an open point on your opponent's home board, if you roll an open number. If you do not roll an open number, then you lose your turn and you will have to try again on your next turn.
For example, if you roll a 2, you can enter your piece on the 23 mark on your opponent's home court, provided that it's open. This is because you're moving your checker two points over from the bar.
You may not use the sum of the two numbers to choose a space. For example, if you roll a 6 and a 2, you cannot add them and move your piece onto the 8th point. You can only move your checker onto the 6th or the 2nd point to reenter.
Step 3 Move your other checkers after you have gotten all of your checker(s) off the bar. Once you get your checker(s) off the bar and back onto the board, you can move your other checkers again. If you only had one checker to enter, then you can use the other number that you rolled to move one of your other checkers.
If you have two checkers on the bar, you have to enter them both before you can move any other checkers. If you can only enter one checker during a dice roll, then you will have to try again on your next turn.
If you have more than two checkers on the bar, you can only move your other checkers once all the checkers on the bar are entered.
Part 4 Bearing Off Your Checkers
Step 1 Understand how to win the game. To win the game, you need to be the first one to bear off, or remove, all of your checkers from the board and into your tray. To bear off your checkers, you need to roll both dice and use the numbers to move pieces into the tray. The numbers you roll must be exact or higher than the number of spaces needed to remove each piece from the board.
For example, if you roll a 6-2, you can bear off two pieces that are on these points. But if you do not have a checker on the 6 point, you can bear it off from the next highest point on your board, such as the 5th or 4th point.
Step 2 Move all of your checkers into your home court. You can only start bearing off your checkers once they are all in your home court. To begin bearing off, get all of your checkers into the 1-6 points on your board. They can be placed on any of these points. Don't forget that your checkers are still vulnerable when they're in your own home court.
If the opposing player has a checker on the bar, then he can still enter it into a blot on your court if you have any, forcing you to take out one of your pieces and move it to the bar. After that, you can't continue bearing off until it's back in the home court.
Step 3 Start bearing off your checkers. When bearing off, you can only bear off checkers that occupy the corresponding point. For example, if you rolled a 4-1, and you have a checker in the 4th and 1st point, you can bear them off. If your roll double sixes and have four checkers on the 6th point, you can bear off all six.
If you still have a die to play and no checker to bear off, you must move a checker according to the number on the die. For example, if you only have two checkers remaining in the 6th and 5th points and you roll a 2-1, then you can move the checker on the 6th point over to the 4th point, and the checker on the 5th point over to the 4th point.
You can use a higher roll to bear off a die on a lower point. If you roll a 5-4 and you only have a few checkers remaining in the 3rd and 2nd points, you can bear off two of these checkers.
You must move a lower die roll before a higher one even if it means you can't fully use the full value of a die. For example, if you have a checker in the 5 point and roll a 5-1, you must first move the checker over 1 to the 4 point and then bear it off using the 5 value.
Step 4 Bear off all fifteen of your checkers. If you bear off all fifteen of your checkers before your opponent does, then you have won the game of backgammon. But not all wins are created equal. Your opponent can lose in one of three ways:
A regular loss. This happens if you bore off all of your checkers first while your opponent was trying to bear off his checkers. Your opponent will lose only the value on the doubling cube.
The gammon. If you bear off all of your checkers before your opponent bears off any of his, he is gammoned and loses twice the value on the doubling cube.
The backgammon. If you bore off all of your checkers while your opponent still has checkers on the bar or your home court, then your opponent is backgammon and loses three times the value on the doubling cube.
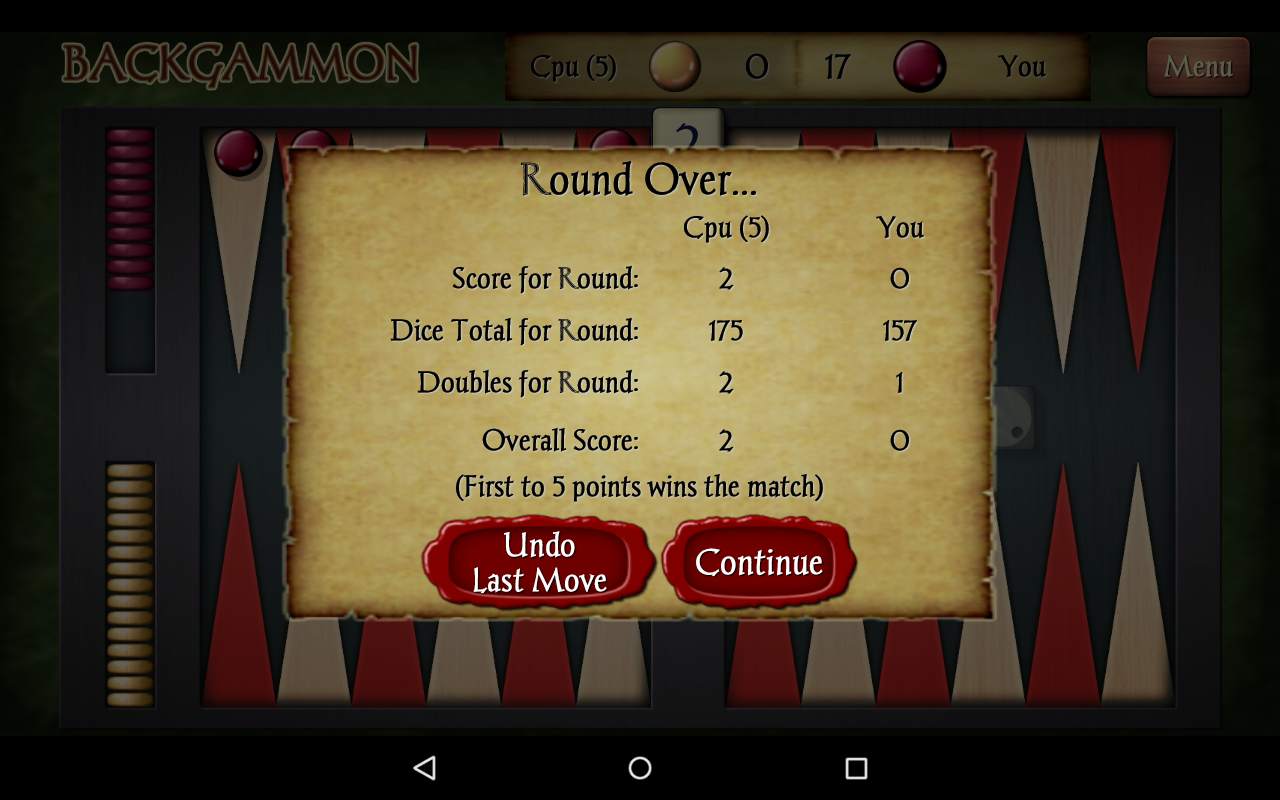
Step 5 Play again. Backgammon is meant to be played more than once, since each game is worth a certain amount of points. You can even set a goal to play until the losing player loses a certain amount of points.
If you want to keep playing more games but can't do it in one sitting, you can keep a tally of the points lost by each player and return to the game at another time.
CONTACT
mailto: Enquiries@AIFactory.co.uk - All business enquiries via this e-mail
mailto: Support@AIFactory.co.uk - All product support issues
Location: AI Factory Limited, 23 The Avenue, Hatch End, Middlesex, HA5 4EN, UK (Registered Office). Registered no. 4721316
- Version4.38
- UpdateOct 19, 2024
- DeveloperAI Factory Limited
- CategoryBoard & Casino
- Requires AndroidAndroid 5.0+
- Downloads8M+
- Package Nameuk.co.aifactory.backgammonfree
- Signature518429b50de76ab422d0cf1109be3d24
- Available on
- ReportFlag as inappropriate
-
NameSizeDownload
-
23.29 MB
-
23.24 MB
-
23.24 MB


challenging but very beatable
naive, even the highest difficulty
always rejects the double request