ColorColor: Step by Step - Color Picker Tutorial
Create stunning color schemes effortlessly with guided step-by-step tutorials.
- 3.16.0 Version
- 4.7 Score
- 11M+ Downloads
- In-app purchases License
- 3+ Content Rating


Introducing ColorColor: Step by Step
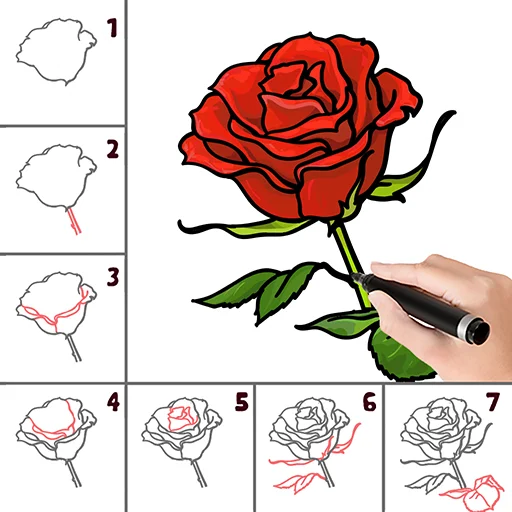
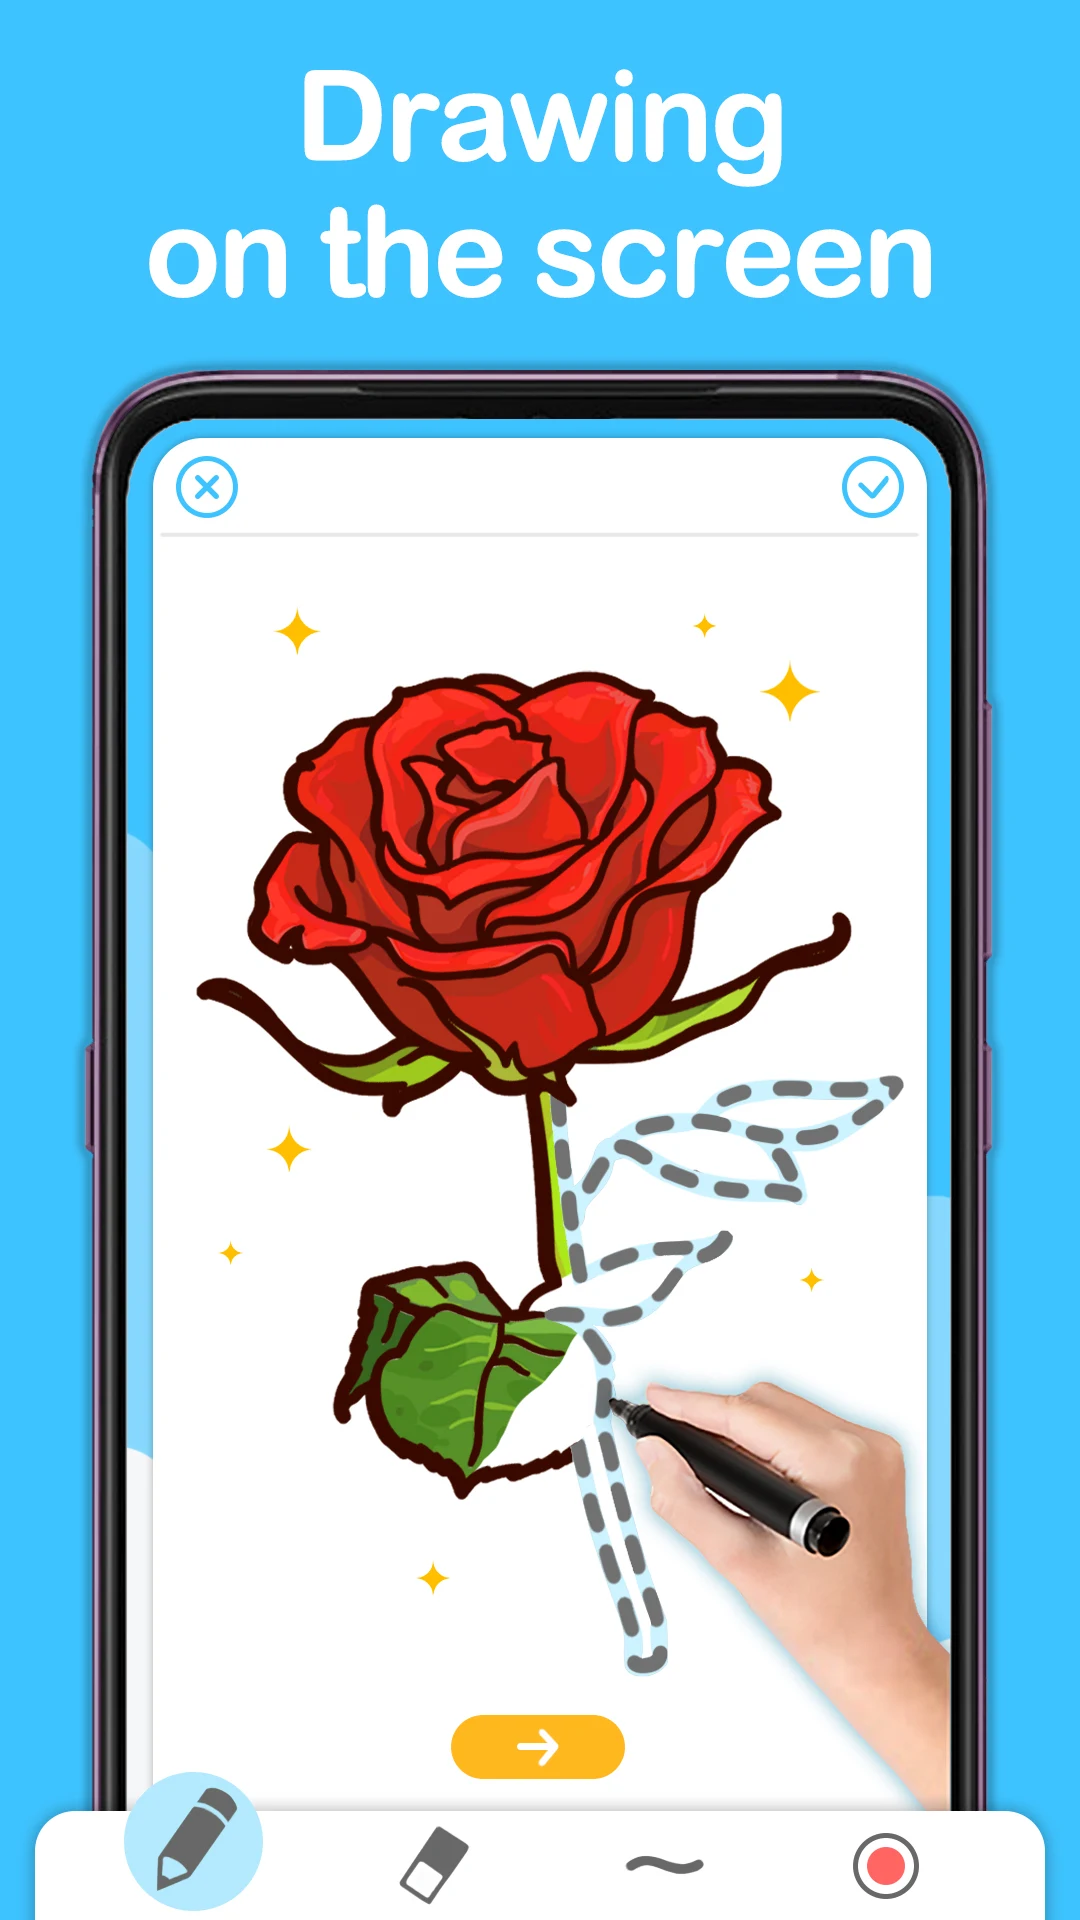
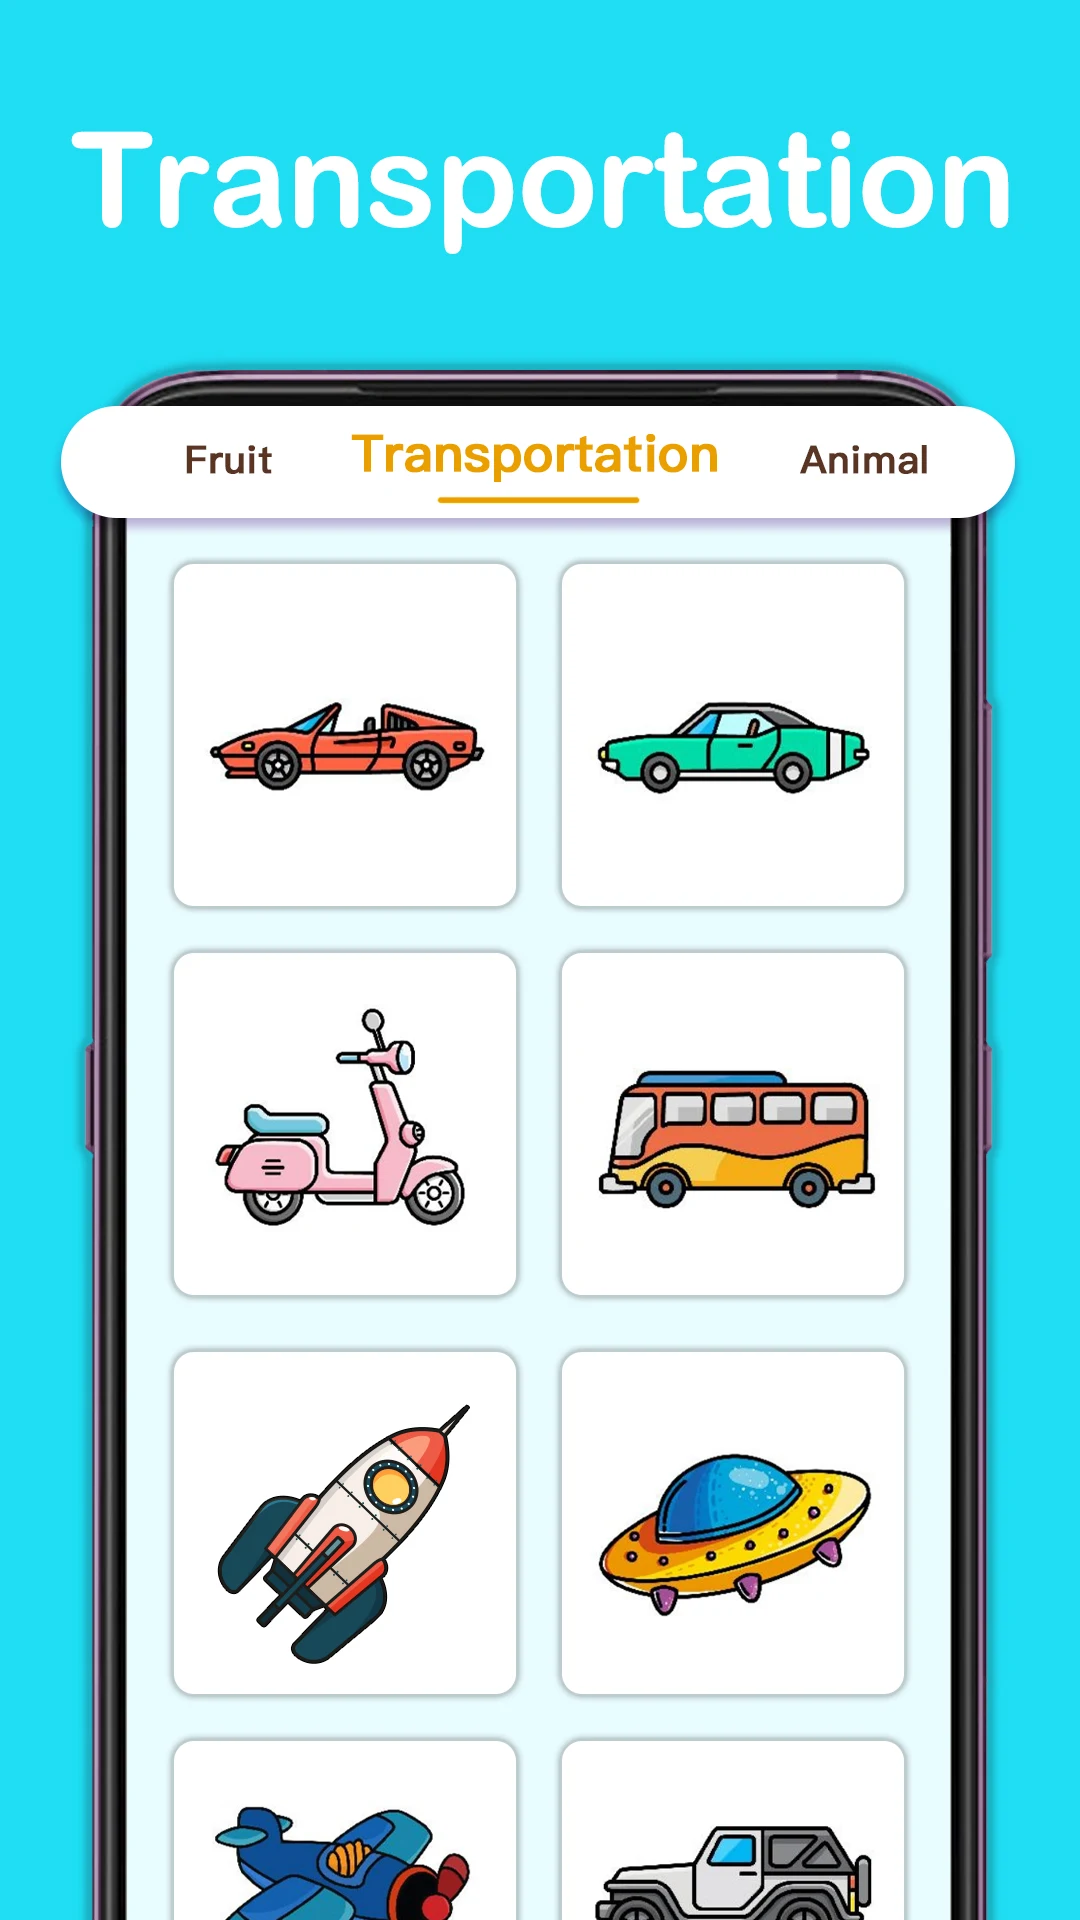
Colored Colors Tutorial is a free coloring book suitable for all ages, offering animated steps that demonstrate detailed processes for thousands of cartoon drawings like unicorns or love-themed designs. This app facilitates learning to draw by providing a step-by-step guide as if you were in an art class with a real artist showing you the way. It creates an immersive experience akin to watching drawing videos, enhancing your painting adventure.
This delightful drawing app is user-friendly, featuring numerous cartoon games accessible to everyone, enabling effortless following of drawing procedures. With guidance through each step, users can easily draw cute pictures. Furthermore, it allows quick sketching of cartoons, comics, and various adorable drawings at no cost, resembling an engaging drawing game experience.
Discover ColorColor: Step by Step
Many novices, particularly those with limited artistic experience, struggle with drawing beautiful illustrations such as comic characters or cartoons while coloring them accurately. They seek guidance from established artists on completing drawings step by step. However, within this app, users can effortlessly unleash their creativity by drawing anything they desire, be it comic characters, exquisite flowers, charming kawaii motifs, and more.
Embark on drawing a magnificent picture by following the provided steps! In this application, not only can you draw but also color sketches. Animated actions will illustrate each drawing stage throughout your learning journey, requiring no prior experience or advanced skills. The process ensures a comfortable and educational drawing encounter.
Grab a pencil and paper, dive into the realm of creating comics and cartoons using this drawing app, relishing the joy of drawing and painting in one of the premier drawing applications. Follow the guidelines, engage daily in drawing exercises, complete regular portraits, and evolve into a genuine master of artistic expression.
Key Features:
★ Cartoon Creator: Simplified animations demonstrating how to draw cartoons.
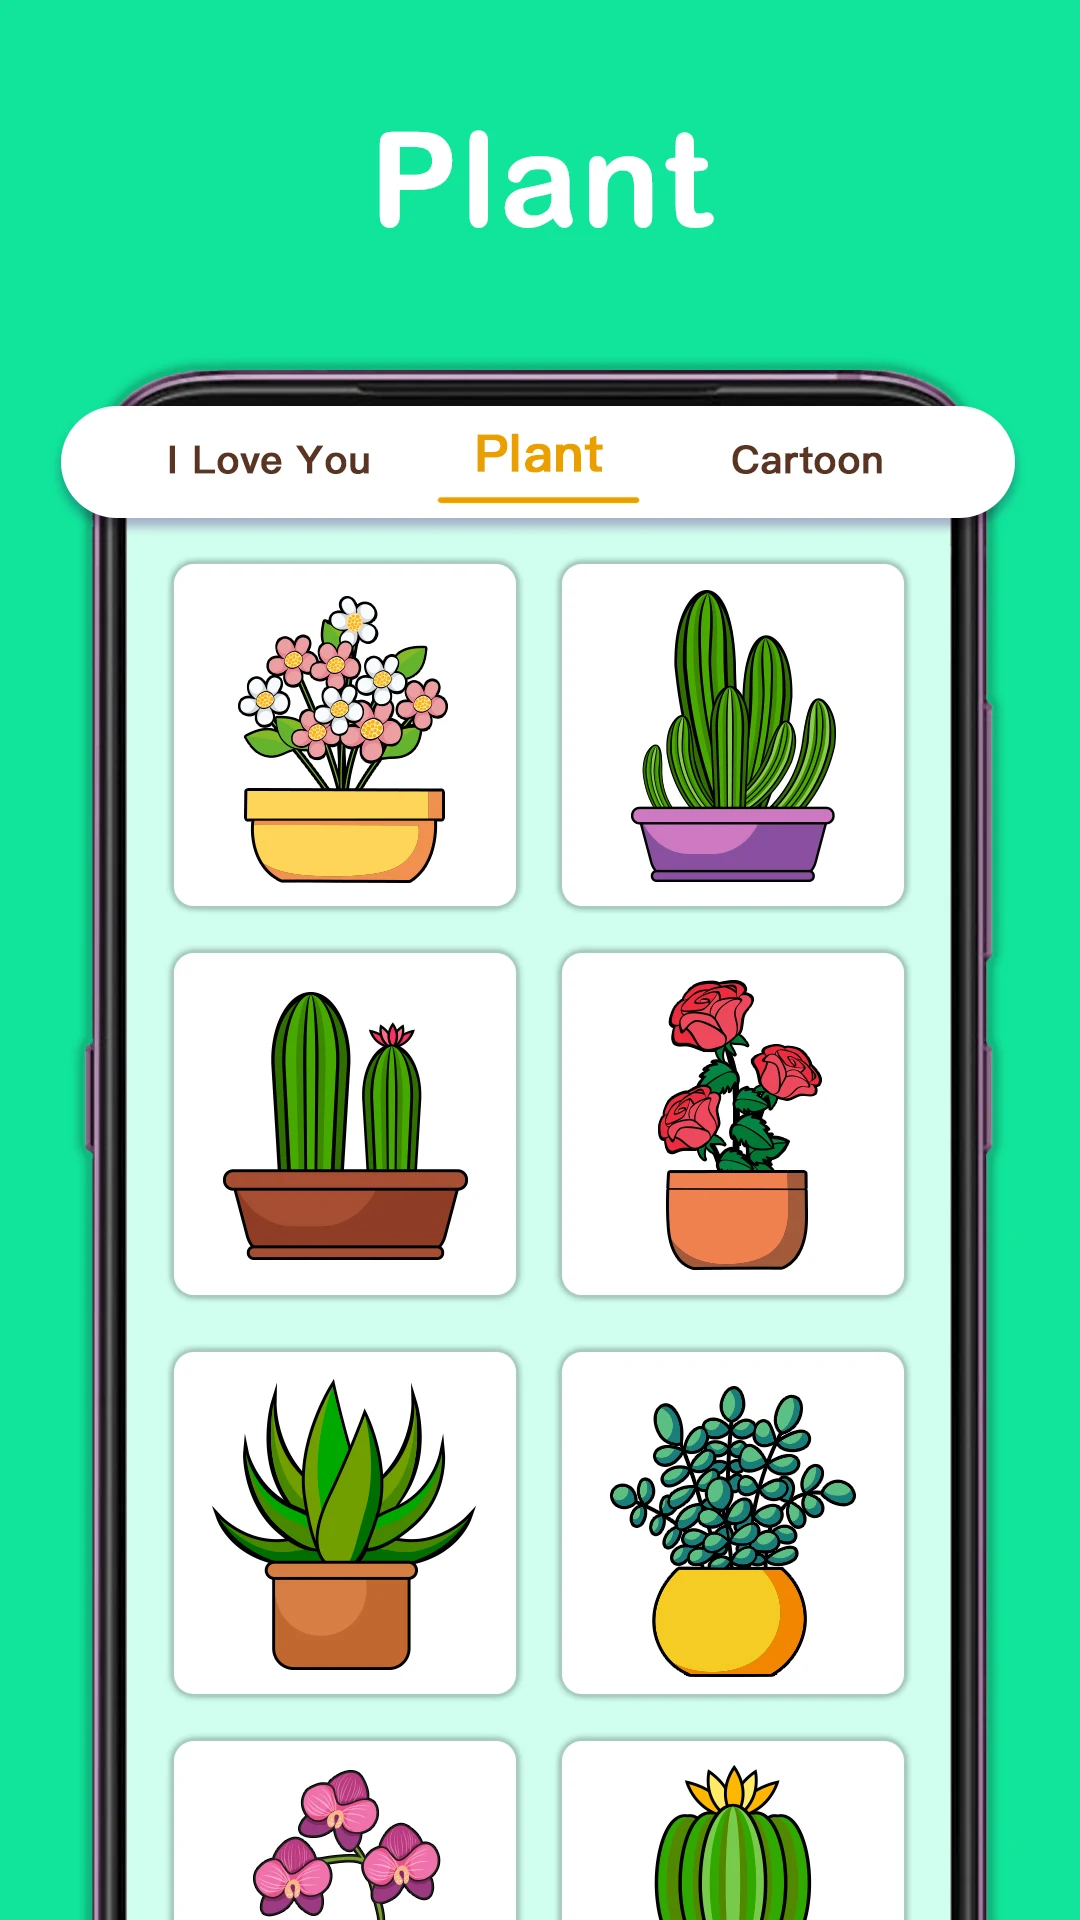
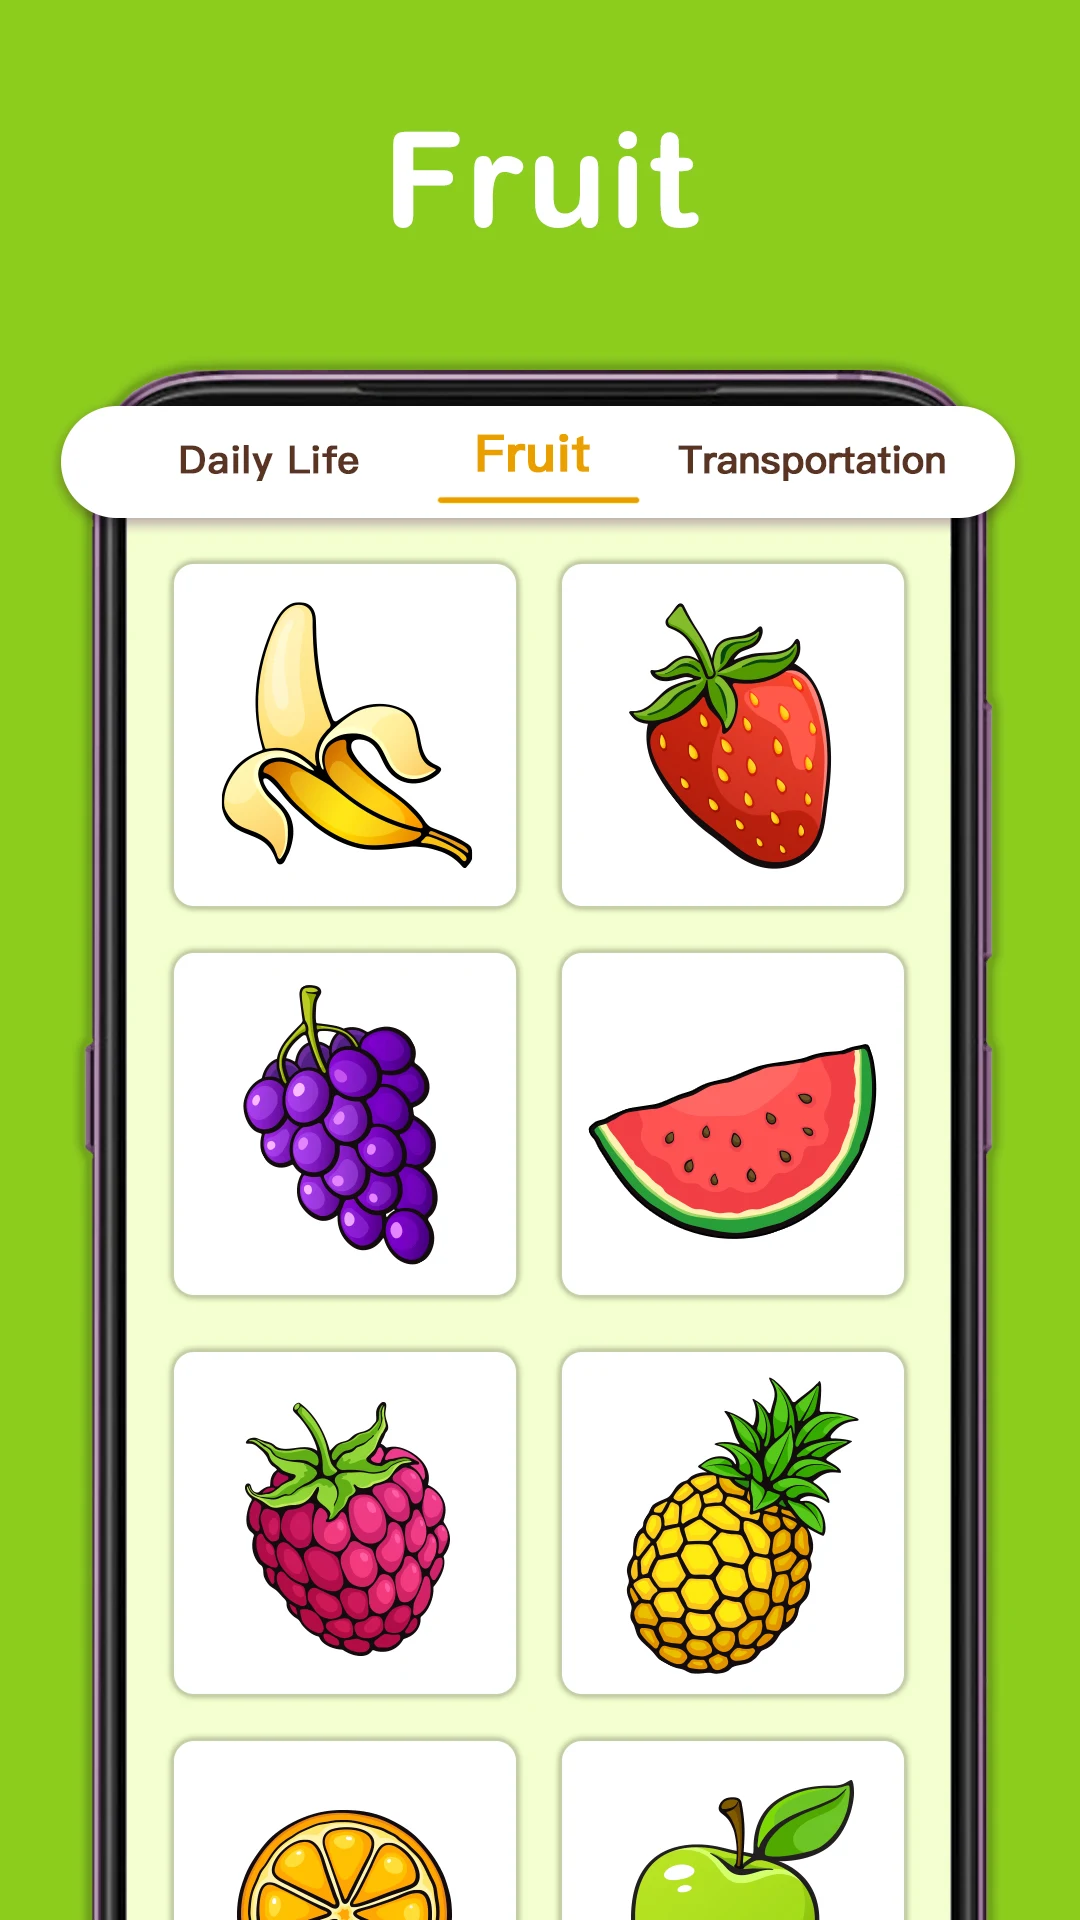
★ Diverse Range of Categories: Animals, plants, princesses, comics, anime, and more.
★ Beginner-Friendly: Suitable for individuals eager to learn drawing.
★ Stunning Drawing Images & Illustrations: Fresh cartoons and comics updated daily.
★ Array of Drawing Tools: Many exquisite drawing tools to personalize your artworks.
★ Beautiful Artistic Fonts: Various stunning art fonts for the most aesthetically pleasing drawings.
★ Artistic Masterpieces: Drawings contributed by multiple artists daily.
★ Elaborate Drawing Steps: Detailed instructions on drawing techniques.
★ Professional Art Sessions: Abundance of lessons for an immersive learning experience.
★ Private Gallery: Securely store and showcase your artwork to friends and family.
★ Offline Functionality: Draw anytime, anywhere without needing an internet connection.
★ Selection of Drawings: Various themes like cars, flowers, dogs, cats, and more.
Colored Colors Tutorial provides an accessible and enjoyable platform for drawing and creating pencil and painted sketches, transforming sketches into colorful illustrations. As one of the most popular beginner-friendly drawing apps, expect easy-to-follow drawing guides in 2022. Keep up with the updates, draw effortlessly, enroll in real art classes, and cultivate your inner artist swiftly.
We are committed to continuous enhancement, valuing your feedback and opinions immensely. Feel free to reach out to us with any questions or suggestions via email at joyapp@dailyinnovation.biz.
How to Draw for Beginners: A Step-By-Step Guide
1
General Drawing Techniques
Step 1 Practice drawing basic lines and curves.
Practice drawing basic lines and curves. If you're just learning to draw, start by dragging the pencil over the page in a straight line. It’s harder than it looks! Practice holding your hand at different angles to see what feels best. Normally, it is easier to draw a straight line when you use your whole arm, not just the wrist. Once you feel comfortable drawing a straight line, practice rotating your wrist as you draw to create a curve.[1]
Try making a series of big loops on the paper, then draw tiny swirls below that. This will help you build up your coordination on the page.
Practice drawing lines of different lengths, thicknesses, and textures. Try wavy lines, zig-zag lines, and tangled, scribbly lines.
After you get comfortable with lines and curves, try drawing shapes. For instance, you might try filling a page with two-dimensional shapes such as circles, squares, or triangles.
If you’d like, get a set of graphite pencils with different hardnesses so you can experiment.
Step 2 Create a sense of depth by shading in a shape.
Create a sense of depth by shading in a shape. Draw a simple shape, like a circle, and add an imaginary light source to your page. Use a pencil to lightly shade in the areas farthest from your light source, while leaving the area closest to the light source unshaded. Keep building up the shading until you have a gentle fade running from the darkest parts of the object to the lightest area which is closest to the light source.[2]
You might imagine that there's a lamp shining down from the top left corner of the page. In that case, the top-left area of any shape you draw wouldn't have any shading.
Try blending your shadows with your finger, an eraser, or a cloth to soften them.
When you’re ready for more advanced shading techniques, try to learn cross-hatching and stippling.
Step 3 Make an object seem grounded in reality by adding cast shadows.
Make an object seem grounded in reality by adding cast shadows. Picture your light source, then draw a shadow on the opposite side of the object from the light. Keep the shadow the same shape as the object, although it may be longer or shorter than the object itself depending on how far away the light source is.[3]
For instance, if you have a bowl of fruit on a table, the table will cast a shadow on the floor, the bowl will cast a shadow on the table, and the fruit will cast a shadow inside the bowl.
Use your finger or an eraser to blur the edges of the shadow so it looks more realistic.
Step 4 Create a grid on the paper if you need help with proportions.
Create a grid on the paper if you need help with proportions. If you're drawing something from a source image, draw several evenly-spaced vertical and horizontal lines on your paper to make a grid. Then, draw the same lines on your source image. Look at each square on the image and copy it into the same square on your paper. Your finished picture will be proportionate to the original![4]
For instance, you might draw 3 vertical lines and 2 horizontal lines to make a 4 by 3 grid.
It's okay if the squares aren't the same size on your source image as they are on your paper. You'll naturally adjust the size as you copy the picture you see in each grid.
Step 5 Show an object's dimension by learning perspective.
Show an object's dimension by learning perspective. To start practicing perspective, draw a horizontal line across your paper to represent the horizon. Make a small dot on the line. This will be your vanishing point. Next, draw two lines that meet at the vanishing point and stretch down toward the bottom of your paper. This can represent a road or a stream. The widest part of the path, near the bottom of the page, will seem closest to you, while the vanishing point will seem to be very far away.[5]
Perspective means that objects that are up close seem to be larger than objects that are far away.
Simple drawings only have one vanishing point, although more complex drawings might have two or even three.
Understanding perspective will also help your shading and cast shadows look more realistic.
Practice drawing 3D boxes from different locations to get a sense for how this works with other objects.
Step 6 Build up more complex objects using multiple shapes.
Build up more complex objects using multiple shapes. When you’ve mastered the art of drawing and shading basic shapes, you can draw much more complex objects by breaking them up into simpler shapes. Look at something you’d like to draw—such as a person, a car, or your hand—and sketch out the basic shapes that make it up.[6]
You can practice by taking an any image and outlining the different shapes directly on the image.
For example, take a picture of a car and outline the rectangular shape of the windshield, the circular shapes of the tires, and so on.[7]
Once you’ve sketched out the shapes that make up your image, shade them in to create depth.
To create a more finished drawing, connect the different shapes with lines to build a coherent whole. Erase the outlines when you’re done.
EXPERT TIP
Kelly MedfordKelly Medford:
*Professional Artist
Use a mirror to practice drawing objects. Hold a mirror in front of whatever you're drawing and look at its reflection. The reversed image will make it look fresh and give you a new perspective, which can help you figure out how to draw more imaginatively overall.
Step 7 Try contour drawing to practice internalizing shapes.
Try contour drawing to practice internalizing shapes. Contour drawing is an exercise that helps you learn to create complex, realistic outlines. Pick an object to draw and follow the outlines of the image with your eye while drawing them at the same time. Try to keep your eye on the object you’re drawing as much as possible, instead of concentrating on the hand that’s drawing.[8]
Don't worry if the drawing isn't perfect! Just try to get the basic shape of whatever you're looking at onto the paper.
Make a game of it by trying a continuous contour drawing—try to connect all the outlines of what you see without lifting your hand from the page or going back over what you’ve already drawn.
Step 8 Outline every sketch first, then add details at the end.
Outline every sketch first, then add details at the end. Don’t worry about the small details right away. Start by filling in basic shapes and values, then clean up your drawing and add details as you go. If you focus on intricate details too soon, you might make one part of your drawing too big or too small, and the work will feel out of balance when you're finished.[9]
For instance, if you're drawing a flower, you might start by sketching out the lines of the petals and stem.
Once you've done that, you might start adding details like the center of the flower and the curves of the leaves and petals. Finally, you would add shading and any intricate details that are left.
2
People and Faces
Step 1 Sketch a large oval shape and a cross to draw a person's face up close.
Draw an upside-down egg shape that's slightly narrower on the bottom and wider on the top. Then, lightly sketch a vertical and a horizontal line going through the oval.[10]
These lines will help you balance the proportions of the person's face. Draw them lightly, since you don't want them to show in the finished drawing.
Step 2 Use the lines to sketch the person's facial features.
Use the lines to sketch the person's facial features. Draw the person's eyes along the horizontal line and place the nose about halfway between the eyes and the bottom of the chin. Sketch eyebrows above the eyes, then add the ears so that the bottom of each ear lines up with the bottom of the nose, and the top of each ear lines up with the eyebrows.[11]
Imagine a line halfway between the bottom of the nose and the chin, then place the mouth on top of this line.
From here, you can fill in details like the person's eyelashes, pupils, and hair, along with shading and other details.
Erase the vertical and horizontal lines when you're finished.
Step 3 Draw a circle on top of a trapezoid to make the silhouette of a head.
Draw a circle on top of a trapezoid to make the silhouette of a head. If you're drawing a person from a little further away, the picture will look more realistic if you create the shape of a skull. To do this, draw a circle, then draw a narrow horizontal line a little below the circle. Create the jawline by sketching angled lines coming from the sides of the circle down to where they meet the horizontal line.[12]
Women tend to have a narrower chin, while men often have a wider jawline.
You can still use the crossed directional lines from a close-up drawing to help you keep the proportion as you fill in the features of the person's face.
Draw these lines lightly so they don't show in your finished drawing later.
Step 4 Draw a rounded rectangle and an oval to create the person's core.
Draw a rounded rectangle and an oval to create the person's core. Just below the head, draw a long rectangle, which will be the person's torso. Make the rectangle very narrow for a slender person, or wider if the person is large. Then, sketch a horizontal oval overlapping the bottom of the rectangle. This will be the person's hips.[13]
If the person's neck will show in the picture, draw a narrow rectangle reaching from the person's head to the core.
If the person is standing still, make the rectangle perfectly straight. If they're leaning slightly, tilt the rectangle a little.
Step 5 Use straight lines and circles to sketch out the person's limbs.
Use straight lines and circles to sketch out the person's limbs. Use a straight line to represent each segment of the person's limbs, like their upper and lower arms and legs. Then, draw small circles anywhere that the person bends, such as their shoulders, knees, elbows, and wrists.[14]
Draw the lines and circles lightly since they're just meant to help you visualize the person's form. You'll erase them after you add detail to the drawing.
Step 6 Fill in clothing, limbs, and other details once the body is sketched out.
Fill in clothing, limbs, and other details once the body is sketched out. After you've drawn the person's figure get ready to add some detail. If you haven't already, fill out the face. Develop the limbs and erase the guidelines and circles inside the joints. Add other features, like hair, clothing, and hands. Don’t shy away from getting creative or expressive here![15]
Remember, the further away a person is, the less detail you need to include. Focus on the outlines if you're drawing a large group of people.
Step 7 Try gesture drawings to capture the essence of poses and actions.
Try gesture drawings to capture the essence of poses and actions. A gesture drawing is a basic sketch that captures both form and a sense of movement. Start by doing some quick sketches (like 30-60 seconds) with a few simple lines to capture the shapes and movements that you see. Keep your lines loose, sketchy, and curved. The idea is to create something that looks dynamic and natural, not tidy and polished.[16]
If you’re drawing a human figure, try drawing a line through the center of the figure, going from the top of the head to the weight-bearing foot.
Build the rest of the figure around it, sketching in other lines to indicate the angles of the hips and shoulders.[17]
Keep your hand moving, and don’t worry about details or accuracy.
3
Landscapes
Step 1 Use a reference photo or your view if you’re outside.
Use a reference photo or your view if you’re outside. Find a photograph of a natural scene that you like, or look out the window and draw what you see. When you're drawing a landscape, it's often helpful to have some sort of reference to help you get your proportions right, especially when you're first starting.[18]
If you can't find a picture you like and you don't have a good view from your home, try taking a sketchbook to a natural spot like a national park or a wildlife refuge in your area.
Step 2 Draw a flat line across your page for the horizon.
Draw a flat line across your page for the horizon. The line that splits the ground and sky in a landscape picture is called the horizon line. Lightly sketch this line wherever you want your horizon to fall. Keep in mind that if your horizon features mountains, treetops, buildings, or other raised elements, it may not be a perfectly straight line.[19]
According to the rule of thirds, your picture will be more visually interesting if you place the horizon line a third of the way up from the bottom of the page.[20]
If you draw your horizon further up the page, the viewer will see more of the ground, and if you draw it further down, they'll see more of the sky.
Step 3 Add a focal point, like a tree, to your picture.
Add a focal point, like a tree, to your picture. To make your landscape drawing seem interesting, add some eye-catching objects for the viewer to look at. This might be a tree, a building, some interesting rocks alongside a stream, a barn, a waterfall, a bench, a person, or anything else you can think of.[21]
Typically, the focal point is the largest element in a painting, although it may also be an object that stands out because of its color or contrast.
For instance, a small patch of bright yellow flowers at the base of a stream would likely catch the viewer’s eye if the rest of the colors are dull.
It's helpful to try to find a reference photo or a natural angle with a focal point already included. For instance, your reference photo might include a big old tree.
Step 4 Use perspective to maintain your proportions.
Use perspective to maintain your proportions. When you’re drawing, imagine a vanishing point along your horizon line. Orient all of the lines in your picture back to this spot. Draw elements in the foreground so they appear larger, and make elements in the distance smaller.[22]
For instance, if you're drawing trees, the tops and bottoms of the trees in the foreground can stretch up to the edges of the paper, if you like.
However, as trees go into the background, line the tops and bottoms up with an imaginary diagonal that angles toward the vanishing point.
Step 5 Simplify the details in your drawing and add texture.
Simplify the details in your drawing and add texture. When you're drawing a landscape, don't try to draw every leaf on a tree, blade of grass, or brick on a paved road. Instead, draw out the overall shape of an object, then add details to small sections to give the viewer a sense of texture and movement.[23]
For example, you might draw a few wispy lines to indicate that a fir tree is covered with needles.
Some detail is okay, and this will vary depending on your style of drawing. Feel free to experiment with how much you want to add based on your personal vibe.
If you are practicing a realistic drawing style, you may choose to include as many details as you can, and that's fine too!
4
Fun Drawing Activities
Step 1 Give still lifes a try by drawing a simple object or two.
Give still lifes a try by drawing a simple object or two. Pick something relatively simple to start with, like a bowl of fruit, a flower, or a vase. Use a lamp to create a strong light source. Sketch in the outlines of what you see, then fill in the shadows and interior details.[24]
Try to draw what you see rather than what you think the objects should look like. This is harder than it sounds!
These are called still-life drawings, and they are commonly used in art classes to practice techniques.
Step 2 Try your hand at drawing cartoons if you have a playful style.
Cartoon drawings tend to be more simple than realistic drawings, but they also open the door for you to be more creative. You might draw yourself as a superhero, for instance, or you could draw a cartoon animal who goes on adventures. You could even practice drawing a character that already exists, like your favorite anime or comic-book hero.[25]
Focus on your main character first, then create different backgrounds, supporting characters, and props for your cartoon to interact with.
Also, play with your character's facial expressions and pose to convey different emotions and actions.
You can also create realistic-looking fantasy drawings from your imagination. For instance, if you have a clear idea in your head of what a dragon would look like, you could try drawing that!
Step 3 Draw a picture of your favorite animal to practice detail.
Draw a picture of your favorite animal to practice detail. Find a reference photo of an animal you like and study its features before you start to draw it. Then, start by sketching the outline of the animal. Once you've done that, fill in any major features, like its face, wings, or fins. Then, gradually add detail and shading until you're happy with the picture.[26]
Drawing animals can be hard! Pay attention to light and shadows if you want to make your picture look realistic, or emphasize the animal's most notable features if you want a more cartoonish drawing.
- Version3.16.0
- UpdateSep 12, 2024
- DeveloperOakever Games
- CategoryLifestyle
- Requires AndroidAndroid 4.4+
- Downloads11M+
- Package Namedrawing.lessons.sketch.how.to.draw.portrait
- Signature279448a33ab9b70ef179ed7e31df0457
- Available on
- ReportFlag as inappropriate
-
NameSizeDownload
-
41.55 MB
-
42.26 MB
-
29.61 MB


very good easy doodles
option on screen or on paper
long time no update
ads free version suggested