F-Secure FREEDOME VPN - Privacy & security protection
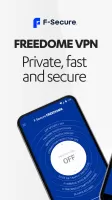
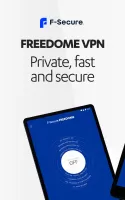
Browse securely and privately with a trusted VPN service.

- 2.9.2.9712 Version
- 4.3 Score
- 4M+ Downloads
- In-app purchases License
- 3+ Content Rating
F-Secure FREEDOME VPN: Your Comprehensive Protection Hub
F-Secure FREEDOME VPN is your central portal for managing and protecting all devices under your subscription. Whether you're using the VPN for the first time or are an existing user, everything you need is right at your fingertips.
Getting Started with F-Secure FREEDOME VPN
When you use the F-Secure app for the first time, follow these steps:
Create Your Account: Begin by creating your personal F-Secure account to manage all your devices and subscriptions.
Privacy First: We prioritize your privacy. We only process the data needed to deliver our services and communicate with you, never sharing your account information with third parties.
Secure Payments: Payment details are handled by trusted third-party resellers (online store or app store providers), and F-Secure never accesses your payment information.
Sharing Licenses with Family and Friends
F-Secure FREEDOME VPN allows you to share your protection with others:
Invite Others: Easily invite family members and friends to join your F-Secure FREEDOME VPN group.
Account Creation: They will need to create their own F-Secure account after accepting your invitation.
License Sharing: Everyone in your group can use the licenses available under your subscription.
Managing Your Subscription
Keep track of your subscription details and manage everything in one place:
View Subscription Status: Check when your subscription expires and see how many free licenses are available.
Extend or Purchase Licenses: If your subscription is close to expiring or you need more licenses, you can extend or buy more directly through the portal.
Access Account Settings: Easily access and update your account information, including your email address and notification settings.
Key Features of F-Secure VPN
F-Secure VPN is trusted by professionals and journalists worldwide for its robust protection features:
Private Network: Shield your online privacy, conceal your activities, and enjoy ad-free browsing.
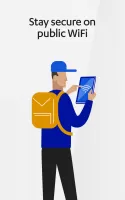
WiFi Security: Connect securely to any WiFi network and keep your data encrypted.
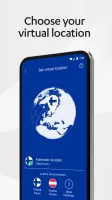
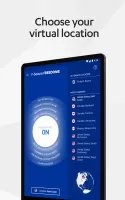
Mask IP Address: Protect your IP address and change your virtual location for enhanced privacy.
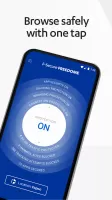
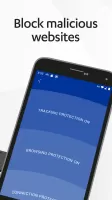
Browsing Protection: Safely surf the web and avoid harmful websites to boost your security.
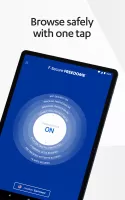
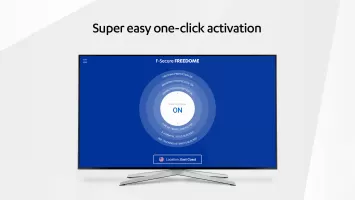
User-Friendly Interface: Simple to use—activate your protection with just one button.
Kill Switch: Prevent data leaks during temporary internet disruptions.
Supported Devices
F-Secure VPN works across a variety of devices:
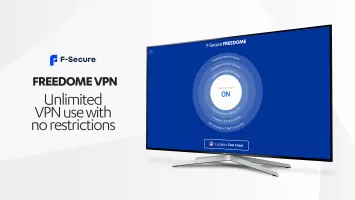
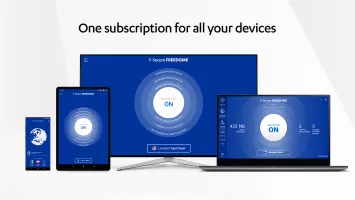
Compatibility: Available for PCs, Macs, iOS, Android devices, Android TVs, and more.
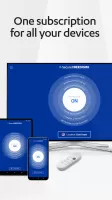
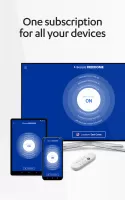
Cross-Platform Protection: Safeguard all your devices under a single subscription.
Support
Here you can find information that can help you solve your issues.
If you have a question about the product or an issue with it, before contacting our customer support, go to F-Secure Community and see if you can find an answer to your question there.
How to create an F-Secure account
This topic explains how to create an F-Secure account.
On the My F-Secure login page, select Create new account.
Alternatively, if you are creating an F-Secure account directly after purchasing the product, select Create an account for My F-Secure.
Fill in your name and email address in the relevant fields, if not prefilled.
Make sure that you enter your email address correctly, as this address is used as part of your login credentials.
Create a strong password or passphrase.
Tip: To see the password that you create, check the Show password box.
Select Accept and create account.
Note: By pressing the Accept and create account button, you agree to F-Secure End User License Terms.
To complete your account creation, open your email inbox and in the Activate your F-Secure account now email, select the link to confirm your email address for your account.
You will also receive a "Get started with F-Secure" email with instructions for installing the F-Secure app.
Resetting a forgotten My F-Secure password
This topic describes how you can reset your My F-Secure password if you have forgotten it.
To reset your forgotten account password:
On the My F-Secure login page, select the Forgot your password? link.
Note: If your browser remembers your password and takes you to My F-Secure automatically, log out of My F-Secure and repeat step 1.
Enter your email address, and select Send. We will send you an email with a link to reset your password. If you can't find this email in your inbox, check your spam or junk mail folder.
Click on the link in the email or copy it to your web browser's address field.
Note: The password reset link in the email expires in two hours.
Enter your new password and select Reset.
The new password is immediately taken into use.
Go back to the My F-Secure login page, enter your email address and new password and select Log in.
Changing the email address for your account
This topic describes how to change your account username (email address).
Your account username is the email address that you used when you created your account.
To change your account email address:
Log in to My F-Secure with your account username and password.
In the top-right corner, select <your name> > Account settings.
In the Your F-Secure email address field, enter your new email address and select Save changes.
Your account username has now been changed. From now on, use the new email address when logging in to your account.
Changing your account password
This topic describes how to change your account password.
To change your account password:
Log in to My F-Secure with your account username and password.
In the top-right corner, select <your name> > Account settings and select F-Secure account settings.
In the Account settings window, select Change password.
In the Change password window, enter first your current password, and then create a new password.
Select Save.
Your account password has now been changed. Use the new password next time you log in to your account.
Deleting your F-Secure account
This topic describes how you can delete your F-Secure account permanently.
Warning: When you delete your F-Secure account, all currently active subscriptions will expire immediately and all devices protected by the account, including child profiles, will no longer be protected. This cannot be undone.
To delete your account permanently:
Log in to My F-Secure with your account username and password.
In the top-right corner, select <your name> > Account settings.
Under Other settings, select the link to delete your account.
The Delete account? dialog opens.
To delete your account permanently, select Delete account.
Your account has been deleted permanently. Your subscription has expired and all the devices protected by this account are no longer protected.
Note: Another option is to contact our customer support and request to delete your account permanently. Note that you must have access to your email address for verification. Once you have responded to the email confirming the deletion request, our support agent will then proceed to delete your account.
Canceling automatic subscription renewal
This topic describes how you can cancel your subscription auto-renewal.
When you buy a subscription, you can decide whether to renew the subscription manually or automatically. If you have previously chosen to use the auto-renewal option but want to continue to renew the subscription manually, do as follows:
Log in to My F-Secure with your account username and password.
In My F-Secure, select Subscription.
The subscription details open.
Under Manage your subscriptions, select Cancel auto-renewal.
The automatic renewal of your subscription has now been canceled. Your subscription remains valid and active until your current subscription expires.
Releasing a license from a device through My F-Secure
This topic describes how to release a license that is no longer needed for a device.
If you have a device that no longer needs a license, we recommend that you release the license. Only then can the license be used on another device.
To release a license through My F-Secure:
Log in to My F-Secure with your account username and password.
In My F-Secure, select the user from whom you want to release the license.
A list of protected devices of the user is shown.
Select the device that you want to release a license from.
Basic details about the device are shown.
Select Release license.
The Release license window opens.
Select Release license.
This frees up the license that you can now use on another device.
Note: Releasing a license from a device does not uninstall the F-Secure app from the device. To uninstall the app, you have to do it manually from the device.
Removing a family member or friend from your My F-Secure group
This topic describes how to remove a sub-user from your My F-Secure group.
If you want to remove a family member or a friend with whom you have shared the protection from your My F-Secure group, do as follows:
Log in to My F-Secure with your account username and password.
In My F-Secure, select the sub-user that you want to remove from your My F-Secure group.
Once you have selected the sub-user, click on it again to open the sub-user settings.
Select the Remove from My F-Secure group link.
The Remove from group window opens.
Select Remove.
The sub-user is removed from your My F-Secure group and is no longer protected by your subscription.
Alternatively, you can stop sharing protection and remove sub-users from your My F-Secure group directly through F-Secure app's People & Devices view.
Best practices to increase the security of your F-Secure account
This topic provides information on how to keep your F-Secure account safe.
We take your privacy and your account security seriously. We want to make sure that only you have access to your F-Secure account. To increase the security of your account, we encourage you to take 2-step verification into use and to use only a strong, unique password for the account.
Enable 2-step verification in My F-Secure
2-step verification is an additional, optional feature that adds an extra layer of security to your F-Secure account. This additional layer makes sure that no one can log in as you, even if that person has discovered your password. For more information about 2-step verification and instructions on how to take it into use in the Related topics.
Create a strong password
Create a strong, unique password or passphrase that only you know and have access to. Never give your password to anyone else. If you need guidance on how to create a good, strong password, see "What makes a good password" in the More on this topic.
With Password Vault, we have made it easy for you to create strong and unique passwords. It also protects your identity by offering a secure storage for all your passwords and by acting as an easy-to-use password manager.
ID Monitoring helps you protect your personal information, such as usernames, passwords and credit card numbers by alerting you of your breached online services and by giving you specific instructions on how to recover from the incident with minimum damage.
My F-Secure login confirmation email
Once we notice that there has been an attempt to log in to your F-Secure account from a new device, we will notify you immediately by sending you a My F-Secure login confirmation email.
If it was you who logged in to the account and you recognize the device, you don't need to do anything. If, however, you don't recognize the device, your account's integrity might be at risk. Follow the instructions in "What is the My F-Secure login confirmation email?" in the Related topics.
Taking 2-step verification into use in My F-Secure
This topic describes what to do to enable 2-step verification for your F-Secure account.
To be able to use 2-step verification, you need to install an authentication app, such as Google Authenticator or Duo Mobile, on your mobile device. If it's not already installed on your device, you can get it from an app store.
2-step verification adds an extra layer of security to your F-Secure account. It ensures that no one can log in as you, even if that person has managed to find out your account password. 2-step verification requires something that only you know (your password) and something that only you have (a unique code). This unique code is generated by you with the mobile authentication app.
To take 2-step verification into use:
Log in to My F-Secure with your username and password.
Go to <your name> > Account settings and select F-Secure account settings.
The Account settings window opens.
Next to the 2-Step Verification status, select Change.
The Turn on 2-Step Verification window opens.
Select Set up.
The Set up 2-Step Verification window opens.
If you have not yet installed an authentication app on your device, do it now.
Open the authentication app and scan the QR code shown in the Set up 2-Step Verification window.
Note: Instead of scanning the QR code, you can alternatively select the Show code link and manually enter the security code shown in the window into the authentication app. As soon as you have scanned or entered the code, your F-Secure account is added to the authentication app and the authentication code is automatically generated.
Enter the authentication code into the empty field in the Set up 2-Step Verification window and select Turn on.
The 2-step verification is now on.
The final thing you need to do is to generate and save the so-called recovery codes. These recovery codes serve as backup access to your account if later, when you are trying to log in to your F-Secure account, you cannot for some reason generate the code with the authentication app. Do one of the following:
Select View current recovery codes to view the codes in your web browser.
Select Download recovery codes as as a text file. The codes are downloaded on your computer as a .txt file. Go to your Downloads folder, and save your codes in a safe place.
Select Generate new recovery codes > Generate to create a new set of recovery codes.
Note: When you generate new recovery codes, the previously generated codes will no longer work. Remember to save the new codes.
Important: Keep these codes safe and make sure that only you can access them. You can only use each code once and in the order that they are listed.
What is the My F-Secure login confirmation email?
This topic provides information about the My F-Secure login confirmation email.
Every time you successfully log in to your F-Secure account with a new device, we send you a login confirmation email to ensure that it was truly you who logged in to the account. This increases the security of your account. We take your privacy seriously, and we want to make sure that only you have access to your F-Secure account.
If it was you who logged in to the account and you recognize the device, you don't need to do anything. We add the device to the list of trusted devices in your account settings. You can always check the list of your trusted devices and remove devices from the list if necessary. To view your trusted devices:
Log in to My F-Secure with your username and password.
Go to <your name> > Account settings and select F-Secure account settings.
In the Account settings window, select Advanced settings > Manage trusted devices.
In the Manage trusted devices window, you can see all the devices that have been marked as trusted.
If you notice anything suspicious in the details of your already trusted devices, simply select Remove next to the devices that you want to remove.
To close the window, select Back.
If, however, you don't recognize the device, your account's integrity might be at risk. In this case, select the This was not me button in the email. Also, we strongly recommend that to prevent account misuse, you change your account password immediately. To change the account password:
Log in to My F-Secure with your username and password.
Go to <your name> > Account settings and select F-Secure account settings.
In the Account settings window, select Change password.
In the Change password window, enter your current password first, and then create a new password.
Select Save.
Finally, we recommend that you take 2-step verification into use with your F-Secure account. It adds an extra layer of security to your account.
Where can I find version information of the product?
If you need to contact us, our customer support may ask information about your product version.
To view the current version information:
Open the F-Secure app.
Select the profile icon  in the top-right corner of the screen.
Select About and help.
The About and help view opens.
Under About, select About the F-Secure app.
The About view opens, showing various information about the product.
Apart from the product version information, the About view contains information, such as the license key, end user license terms, privacy policy, and third-party software.
Sending logs to support
This topic explains how to send log files to support if requested.
At times, to be able to solve an issue, our technical support may need more detailed information about your device.
To create and send log files to support:
Open the F-Secure app.
Select the profile icon  in the top-right corner of the screen.
Select About and help.
The About and help view opens.
Under About, select About the F-Secure app.
The About view opens, showing various information about the product.
Tap the version number seven times until the SEND LOG button is shown.
Select SEND LOG and then select your preferred email app.
The message opens in the email app with the recipient field prepopulated and the log(s) attached.
Describe the issue in more detail and send the message to our support.
Wait until our support contacts you.
Phone scams and what to do if you think you are targeted
Phone scams are unfortunately on the rise with scammers using social engineering to target their victims.
This topic is to help you identify these calls, and in the worst case—if you have been targeted—give you some information on what to do next.
What are phone scams?
Phone calls can start either as a cold call or via an advert or link that triggers a pop-up on your computer. These pop-ups then urge you to call the tech support number advertised; the pop-ups may appear suddenly and are not that easy to get rid of.
How can I recognize a phone scam?
These types of calls normally follow a certain pattern: The scammers usually claim that your computer has a problem, say a virus—when it actually doesn't—and then they trick you into paying for a service that doesn't exist either. They catch you off-guard and play on your emotions. Here's the basic scenario:
Phone scammers claim to be from a well-known company, such as Microsoft, your bank, or even your network operator. As they use a reputable name, this puts you more at ease. They also seem knowledgeable and use technical terms, which make them seem legitimate and believable.
As the risk seems real and you feel worried about possible computer viruses, you give the scammers access to your computer. They convince you to let them install an application that gives them access to your computer using remote access tools.
Once the scammers have access to your computer, they pretend to fix the virus, and may also ask for your personal credentials. When the scammers have "fixed" the issue, they ask you to log into your online bank or ask you to fill in a form with your credit card details. The scammers charge you for the bogus service, which ends up being much more than you thought. In fact, it's difficult to know how much they really charge you.
What to do if you think you have been scammed
If you think you are being scammed and you recognize the scenario that we described above, do the following:
Act without delay.
Immediately contact your credit card company or bank, report the scam and cancel any bank or credit cards. If you act promptly, they even may be able to stop the transaction and reverse the charges.
Report the scam to the appropriate authority.
Change all your passwords on every website or service that you think might have been affected.
Uninstall any unknown, third-party software.
Run a full scan on your computer: Open your security product, then select Device Protection > Full computer scan.
Things to remember about unsolicited phone calls
If you receive this type of a call, think: have I requested this?
Note: Normally, customer support calls you if you have already contacted them and created a support ticket.
Remote sessions are commonly used in tech support as a way to assist you in solving issues.
Remember: Only allow remote sessions with people or companies you know and trust. Only ever allow remote sessions if you have contacted your service provider beforehand and have a valid support case with them. Also, guard your remote access data as you would guard any other password.
Never give access to your device to people you don't know. Granting scammers remote access means that, in effect, you hand over the admin rights to your computer. Even if you have antivirus software installed, this can no longer protect you, as the scammers take control of your computer.
Microsoft has informed its users that they never include phone numbers in their software's error messages or warning messages.
Never freely hand over any personal credentials or credit card details.
End the call immediately.
These types of phone calls are illegal, and when in doubt, turn to the relevant authority that deals with fraud and report it.
How can the security product help?
With the security product installed, your computer is protected from viruses, trojans and ransomware. The Browsing protection, Banking protection, and Remote access tool protection features also add another layer of protection and make sure that you can browse and do your online banking safely.
If you have been targeted and you already have a security product installed, you can immediately run a full computer scan to help detect any applications that may have been installed by the scammers; these are called Potentially Unwanted Applications (PUAs). The product is not able to protect you from these types of phone scams, however.
Be vigilant and stay safe.
What's New
Bug Fixes and Improvements: Enhanced performance and resolved issues for a smoother experience.
Support and Contact Information
If you need assistance, we're here to help:
Phone Support: Call our support team (Mon–Fri, 9–18) at +1 866 476 0216 (United States).
Email Support: Reach out to us at playstore@f-secure.com.
For more details, visit our official page.
- Version2.9.2.9712
- UpdateAug 19, 2024
- DeveloperF-Secure Corporation
- CategoryTools
- Requires AndroidAndroid 8.0+
- Downloads4M+
- Package Namecom.fsecure.freedome.vpn.security.privacy.android
- Signature8fdc1b759324126b758c51ea91d8c5b3
- Available on
- ReportFlag as inappropriate
-
NameSizeDownload
-
13.64 MB
-
13.69 MB
-
13.69 MB







outstanding reliability
impressive features
banned by apps