Microsoft Lens - PDF Scanner
Digitize and organize documents on the go with this powerful PDF scanner

- 16.0.18526.20136 Version
- 4.8 Score
- 27M+ Downloads
- Free License
- 3+ Content Rating
Microsoft Lens, formerly known as Microsoft Office Lens, is a multifunctional tool that trims, enhances, and renders images of whiteboards and documents easily readable. Users can convert images into various file formats such as PDF, Word, PowerPoint, and Excel files using Microsoft Lens. They can also digitize printed or handwritten text and save the files to OneNote, OneDrive, or their local device. Furthermore, users have the option to import images already stored on their device through the Gallery feature.
Enhanced Productivity in Work Environment:
- Effortlessly scan and upload all notes, receipts, and important documents.
- Capture whiteboard content at the end of meetings to stay on top of action items.
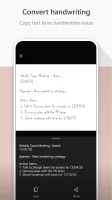
- Digitize printed text or handwritten meeting notes for future editing and sharing.
- Maintain business networking contacts by scanning business cards and saving them directly to your contact list.
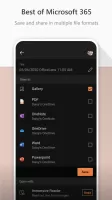
- Flexible saving options include PDF, Image, Word, or PowerPoint formats to OneNote, OneDrive, or the local device.
Guide for Microsoft Lens - PDF Scanner
Step 1: Choose what to capture
Once you open Microsoft Lens, you can choose a capture mode.
Swipe left or right near the bottom of the screen to select Whiteboard, Document, Business Card, or Photo.
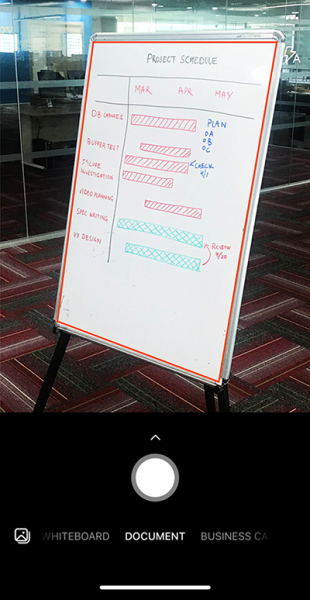
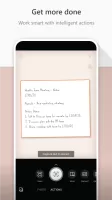
- Whiteboard This mode is best for capturing handwritten notes and sketches on a dry erase board or similar surface. Microsoft Lens adjusts the image so the background isn't too bright and the ink strokes are easier to see.
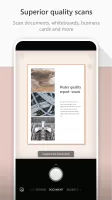
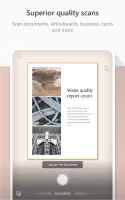
- Document This mode is optimized for small words written or typed on a page or note. It's also great for things like forms, receipts, posters, flyers, or restaurant menus.
- Business Card This mode captures contact information from a business card and saves it to the Contacts app on your iPhone or iPad, as well as Microsoft OneNote. This feature currently works best with business cards in English, German, Spanish, or Simplified Chinese.
- Photo This mode is best for capturing photos and images that include landscapes or people.
Step 2: Take a photo
After selecting a capture mode in step 1, you can use your camera to take a new photo or import an existing image from your device.
Do any of the following:
- To take a photo with your iPhone or iPad, point the camera at the item you want to capture and make sure the orange frame in the camera outlines the item. The camera's flash is set to automatically turn off (if needed), but you can change this setting by tapping the Flash icon in the upper-right corner of the capture window. When you're ready to take the photo, tap the circular Camera button in the bottom center of the screen.
Tip: People who are blind or have low vision can use the VoiceOver feature in iOS to get real-time voice guidance in Microsoft Lens, such as "Move right," "Move up," and more. For more information, see Accessibility in Microsoft Lens for iOS.
- If needed, you can import existing images from any of the photo albums on your device. In the Microsoft Lens capture screen, tap the Pictures button near the lower-left corner of the capture window. Navigate to the photo album that contains the picture you want to use, and tap it to import it into Microsoft Lens.
Step 3: View and edit
Microsoft Lens allows you to edit captured images before saving them so they appear exactly the way you want. You can choose to adjust the borders of an image after it's captured, or capture multiple images one at a time and edit them later.
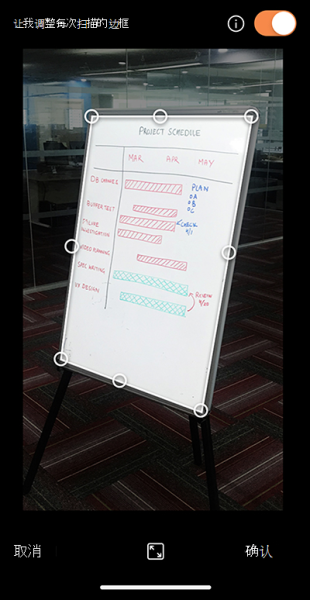
Tap any of the icons shown in the lower bar to start editing or adjusting the captured image.
You can add new images to the scan, apply filters to the image, crop, rotate, or delete the image, or annotate it with a pen or text.
Filters are used to quickly apply visual enhancements to the selected image (for example, remove all colors in a document).
By using the optional Crop feature, you can crop any unwanted parts of the image by excluding them from the selection. Once you have finished cropping the image, tap Confirm in the lower-right corner. If desired, you can continue editing the current image using any other editing tools.
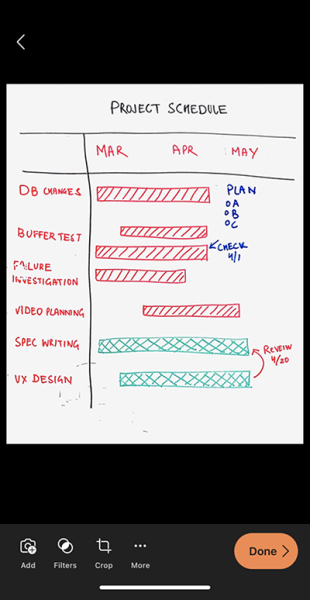
When you have finished editing the image, tap Done in the lower-right corner.
Step 4: Save and share
If the image was captured in Whiteboard, Document, or Photo mode, you can save it to the photo library on your iPhone or iPad.
You can also save the image as a PDF (Portable Document Format) file, or save it to Microsoft OneNote, OneDrive, Word, or PowerPoint. You can also send the image through Microsoft Outlook or the Mail app in iOS and iPadOS.
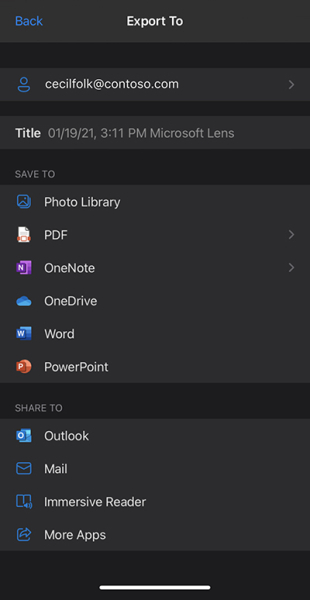
Note: If you choose to save the image to OneNote, OneDrive, Word, or PowerPoint, you may be prompted to sign in with a Microsoft account or a work or school account.
If you want Microsoft Lens to read aloud any text found in the captured image, tap Immersive Reader. For more information, see Accessibility in Microsoft Lens for iOS.
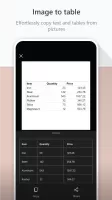
If you want to apply optical character recognition (OCR) to the captured image, select the Word option. Microsoft Lens will create a Word file in your OneDrive account that will automatically extract any legible text found in the captured image.
If the image was captured in Business Card mode, tap OneNote to save it as a vCard (.vcf file). Or, if you want to save the image to the photo library on your iPhone or iPad, tap Photo Library , and then tap Close.
Simple text teaching
1. Download the app
2. Open the app and allow all permissions
3. Switch to "File Mode" before taking pictures. After making sure that you can clearly capture the edges of the lesson, please select "Photography"
4. The application will automatically identify the edges of the document. If necessary, you can manually adjust the edges, and then select "Confirm"
5. Please select "Add" to take photos and crop the remaining coursework pages in order (repeat steps 3-4)
6. Once you have finished adding all coursework pages, select "Finish"
7. Change the file name and choose to export as "PDF" file format
8. Export to "Mobile Storage"
9. After completing the export, open the file and select "Share" the file to "Classroom"
10. First switch to the school Google account at the bottom of the screen, then select the course (for example: 2021 1A Online Classroom) at the top, and then select "Attach to Assignment"
11. Select the job you wish to attach to and wait for the upload to complete
12. After completing the upload, open the Google Classroom assignment and select "Submit"
Other information
Captured images saved as Word, PowerPoint, or PDF files will be located in the Documents folder on OneDrive, so you can access them from any device. PDF files can also be saved locally on your iPhone or iPad, and you can edit the location where the PDF is saved by clicking the "Save" button.
Microsoft Lens doesn't just import images into Word or PowerPoint files. The final Word and PowerPoint documents are real Microsoft Office documents.
Microsoft Word can recognize handwritten or typed text and printed text, as well as capture the general layout of the content. Therefore, the text, formatting, and layout in Word documents created by Microsoft Lens are fully editable, just like you authored the document yourself.
Microsoft PowerPoint recognizes handwritten lines and strokes that are converted into drawing objects that can be recolored, resized, moved, and edited. You can also remove the background of your drawings to make it easier to reuse them in other presentations.
PDF (Portable Document Format) files extract text information from captured images. You can search the text content of PDF files and highlight or copy any part of the page using your preferred PDF reader app.
Accessibility
To use Microsoft Lens more easily, you can connect your keyboard to your device using Bluetooth or USB.
Additionally, accessibility settings in iOS and iPadOS help you use Microsoft Lens in the way that works best for you. On your iPhone or iPad, go to Settings > Accessibility to turn on features like VoiceOver.
Increased Productivity in Educational Settings:
- Scan classroom handouts and annotate them within Word and OneNote.
- Digitize and edit handwritten notes (supports English language only).
- Snap pictures of whiteboards or blackboards for future reference, even in offline mode.
- Keep track of class notes and personal research with seamless integration with OneNote.
- Version16.0.18526.20136
- UpdateMar 04, 2025
- DeveloperMicrosoft Corporation
- CategoryProductivity
- Requires AndroidAndroid 7.0+
- Downloads27M+
- Package Namecom.microsoft.office.officelens
- Signature44b2afee171d32a21e1ffef6528b7b68
- Available on
- ReportFlag as inappropriate
-
NameSizeDownload
-
64.82 MB
-
61.21 MB
-
61.20 MB


















MS Office integration
Works with both existing and freshly shot images
Provides clear scanning results
Automatic text recognition (OCR) function
Interface has fewer menu items
Re-cropping could be an annoyance