Photo Lab - Photo Editor App
Unlock endless creative possibilities with a wide range of editing tools.
- Photo Editor - 1.0.51.7 Version
- 1.6 Score
- 1M+ Downloads
- In-app purchases License
- 3+ Content Rating
In today's ever-growing world of photo editing applications, Photo Lab - Photo Editor App stands out as a user-friendly platform that allows beginners to easily navigate through its features. Among its offerings is the option to create photo collages using either a freeform or grid style layout. The app provides a variety of filters for refining each image, along with tools for editing, cropping, adding stickers, overlays, text, blurring, painting, resizing, color splashing, mosaic effects, and enhancing beauty features all within an online photo editor environment.
Discover Photo Lab - Photo Editor App
Despite the abundance of photo editing apps available, this particular image editor boasts over 20 unique features. As a cutting-edge photo editor version from 2024, it offers Photopea photo editor effects and background editing capabilities to help users effortlessly enhance their photos without requiring extensive editing knowledge. With just a few clicks, users can achieve impressive results using the Photopea tools provided by the Photo Editor - Photo Lab.
Characteristics of the app include:
1.Photo editor app equipped with filters and the Photopea feature, offering over 100 fantastic photo effects such as blur effects, Glitch, Light Leak, Double Exposure, black and white filters, analog film effects, retro themes, fresh styles, and classic effects.
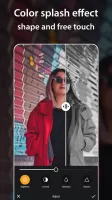
2.Color splash photo editor feature allowing users to apply color splashes in various shapes (heart, leaf, square, circle, star, etc.) or through freehand drawing, providing an array of facelab effects for additional creativity.
3.Various painting options including freehand pencil tools and neon paint effects, enhancing the creative possibilities for images edited through the Lab picture editor.
4.Beauty effects integrated into the photo editing background to refine body shape and facial features easily, catering to both men and women seeking a beautiful face effect.
5.Advanced blur tools for creating larger blur effects and flexible brush sizes, enabling users to blur specific parts of images swiftly for a professional finish.
6.A selection of stylish stickers and texts, offering over 1000 stickers in 50 categories and a range of text styles, bringing a distinctive touch to edited images.
7.Multi-style cropping function allowing rotation, flipping, and resizing of photos, with access to 200+ background patterns for further customization.
8.Comprehensive adjustment tools for brightness, sharpness, contrast, warmth, shadows, exposure, and more, ensuring precise control over image enhancements.
9.Face photopea effects to deliver exceptional effects for facial features, enhancing overall photo quality.
The innovative features of the Photo Editor New Version 2024 and its background changing capabilities provide unparalleled creative opportunities for users seeking professional-grade results. The Photo Editor Lab is a valuable tool for those looking to explore breathtaking effects and unique editing experiences. Users are encouraged to share feedback and queries with the dedicated photo lab and photo editor team via rqrappshelp@gmail.com. Thank you.
8 Photo Editing Tips: How to Edit Photos Like a Pro
Ready to take your photography to the next level? Check out these top tips for editing your photos like a pro.
By Andy Day | Updated July 16, 2024
So, you’ve taken some snaps and imported the images from your camera. Now, you need to pick out your best photos, make them look amazing with professional-quality photo editing, and share them online!
Over the past decade, photography and photo editing has gone through a big evolution. With the emergence of new technology, trends and styles, the photography industry has become heavily influenced by smartphones and social media. Now anyone can shoot and edit stunning, high-quality photos all from the comfort of their phone, or opt for the trusty old camera and desktop setup like Photoshop. No matter what your preferred shooting or editing style, there are some rules of thumb that always apply when it comes to photo editing and making your photos pop.
Ready to take your images to the next level? Here are 8 tips for better, faster photo editing.
1. Get Organized


It can be hard to know how to organize yourself when starting out, but there are a few basic steps you can take to stand you in good stead for an efficient workflow. Firstly, create a folder structure to keep your original files in some sort of logical order. Organizing by date tends to work best, and keep in mind that Year-Month-Date will ensure that your images appear in the right sequence when sifting through your hard drives.
It might seem pointless when you only have a few images but it’s worth creating a system for renaming your files early on. Date followed by a shoot description followed by a sequence number is a good option, and you can always go back and change things later on. At this stage, any system is better than no system!
2. Be Selective


Before you edit anything, you’ll need to pick out your best shots. It’s worth filtering the wheat from the chaff, as there’s no point spending time creating the perfect edit of an image only to realise that the next photo in the sequence is the better shot.
Software such as Adobe Lightroom has various methods for choosing your favorites, such as picking and rejecting. You might prefer to use a star rating system, perhaps giving three stars to everything that looks good in your first pass, and then five stars to trim them even further before you start editing.
3. Don’t Overdo It


Strong edits have their place, but if your edit stands out more than the photo, you’ve probably pushed it too far. A good edit can make an average photo more interesting, but heavy editing won’t rescue a poor photo.
Be sure not to add too much contrast and don’t oversaturate your colors. If an image looks too far from reality, it might be a distraction. Other things to avoid are strong vignettes, excessive color grades and weird white balances.
4. Check Your Histogram


Most editing software will show you a histogram – a graphical representation of the brightness of your image. This can help you to ensure that your image is not too bright or too dark.
The histogram shows the amount of dark values on the left and bright values on the right, with midtones sitting in the middle. If the graph is stacked up against the left, you might be losing details in the shadows. If it’s stacked up against the right, details might be lost in the highlights.
That said, there are plenty of occasions where a creative decision will lead you to ignore the histogram, preferring to craft an image that is deliberately dark and moody, or bright and ethereal.
5. Tweak Shadows and Highlights


Amazing as they are, cameras only grab a slice of the range of brightness that our eyes can see, often leading to images that are perfectly exposed in some areas but far too bright or dark in others. You might then increase the exposure to see more detail in the shadows, but that will then blow out the highlights.
An easy way to bring balance to these extremes of brightness and darkness is through the Shadows and Highlights sliders. For example, if parts of an image are too dark but you don’t want to blow out the sky, you can drag the Shadows slider to the right and effectively increase the brightness of just the darker areas of the image.
The reverse is also true to a degree, but the Highlights slider isn’t quite so effective. This is why photographers often decide to slightly underexpose in order to get perfect highlights, safe in the knowledge that they can find detail in the shadows through the Shadows slider when they come to edit their photos.
6. Understand White Balance


Every light source, whether it’s the bulb in your desk lamp or the midday sun, has a color temperature. Even the sun can change its color temperature over the course of the day, depending on its position in the sky.
Our eyes are very good at adjusting and making any light source look normal, but cameras are different. Most of the time, they’re set to “Auto White Balance” whereby the camera has made a judgement of the color temperature in a scene and balanced the image accordingly.
Sometimes the camera might not make the best decision, or you might want to change the white balance as part of a look and feel that you’re going for, or to make a group of images look more consistent.
You have a degree of flexibility if you are editing a jpeg, as you can make an image slightly warmer or colder, but raw files give you full control over the white balance.
When you’re deep in the edit, it’s easy to lose sight of what looks normal and you might want to stare out of a window for a few minutes to reset your vision and avoid creating an edit that is too strong or unnatural.
7. Don’t Be Afraid to Crop


Some photographers proudly claim that they never crop their images, but most will happily use the cropping tool to improve the composition, sometimes even shooting wider than they need to give themselves flexibility later on.
Cropping will reduce the potential resolution of your exported file but if the image is only ever intended to appear only on social media or a website, this is rarely a problem. Furthermore, thanks to machine learning, editing software is getting very good at upscaling images should you need to put your photo on a billboard or the side of a bus.
If you’re exporting for your own archive, you might not want to crop too harshly and give yourself options when you come to use the images as part of a presentation or design. If you’re about to use your images for a specific purpose, crop your images to what you need and export them accordingly. For example, images work best on Instagram in the portrait format which has a 4:5 ratio. Alternatively, you might want to use it for the header of an article, in which case something like 16:9 might be a better option.
When photographing, if you don’t nail the right composition in camera, you might be able to achieve it by cropping when you come to edit. Through experimentation you can actually improve your photographic eye, increasing your odds of getting it right on camera the next time you’re out shooting.
8. Stay Consistent


The more you edit, the more you will become aware of what you like in an image, and this will help you develop your own style. In addition, it’s useful to create a consistent look and feel in your editing so that websites and social media posts look uniform, organized, and have an overall cohesiveness that gives a sense of refinement.
Most software will have a means of taking all of the individual changes you’ve made to an individual image file — contrast, shadows, highlights, tone curves, etc — and saving it as a template or preset so that you can then quickly apply it to other images. You’ll notice that well-known photographers often sell their own packs of presets so that you can apply their style to your own images.
These presets are a useful way to make a large batch of images have a similar feel, but keep in mind that presets are not necessarily a one-click solution for every image that you edit. For example, some presets will lend themselves best to images that are naturally dark or full of contrast, and could create odd results when used on something light and airy.
To Wrap Up…
At first, photo editing can seem daunting due to the countless sliders and the level of detail and organization required. But hopefully this article has given you a good starting point to help you stay organised, and has provided you with some useful insights into how to edit your photos to achieve excellent results.
- VersionPhoto Editor - 1.0.51.7
- UpdateSep 03, 2024
- DeveloperRQRapps
- CategoryPhotography
- Requires AndroidAndroid 5.0+
- Downloads1M+
- Package Namecom.rqrapps.photocreator
- Signature4270e0302071041196f383385c37b939
- Available on
- ReportFlag as inappropriate
-
NameSizeDownload
-
38.43 MB
-
38.43 MB
-
38.43 MB








very useful options
satisfying output
more navigation needed