Polycam - 3D scanning & modeling
Revolutionize your photos with 3D scanning and measurements

- 1.3.15 Version
- 4.8 Score
- 1M+ Downloads
- In-app purchases License
- 3+ Content Rating


Introducing Polycam
Explore a whole new realm in photography with Polycam, the highly-rated 3D capturing application designed for Android users. Ideal for professionals like architects, artists, designers, contractors, photographers, and anyone looking to perceive the world in a unique manner, Polycam provides cutting-edge technology and advanced editing features to bring your artistic vision into reality.
Key Features:
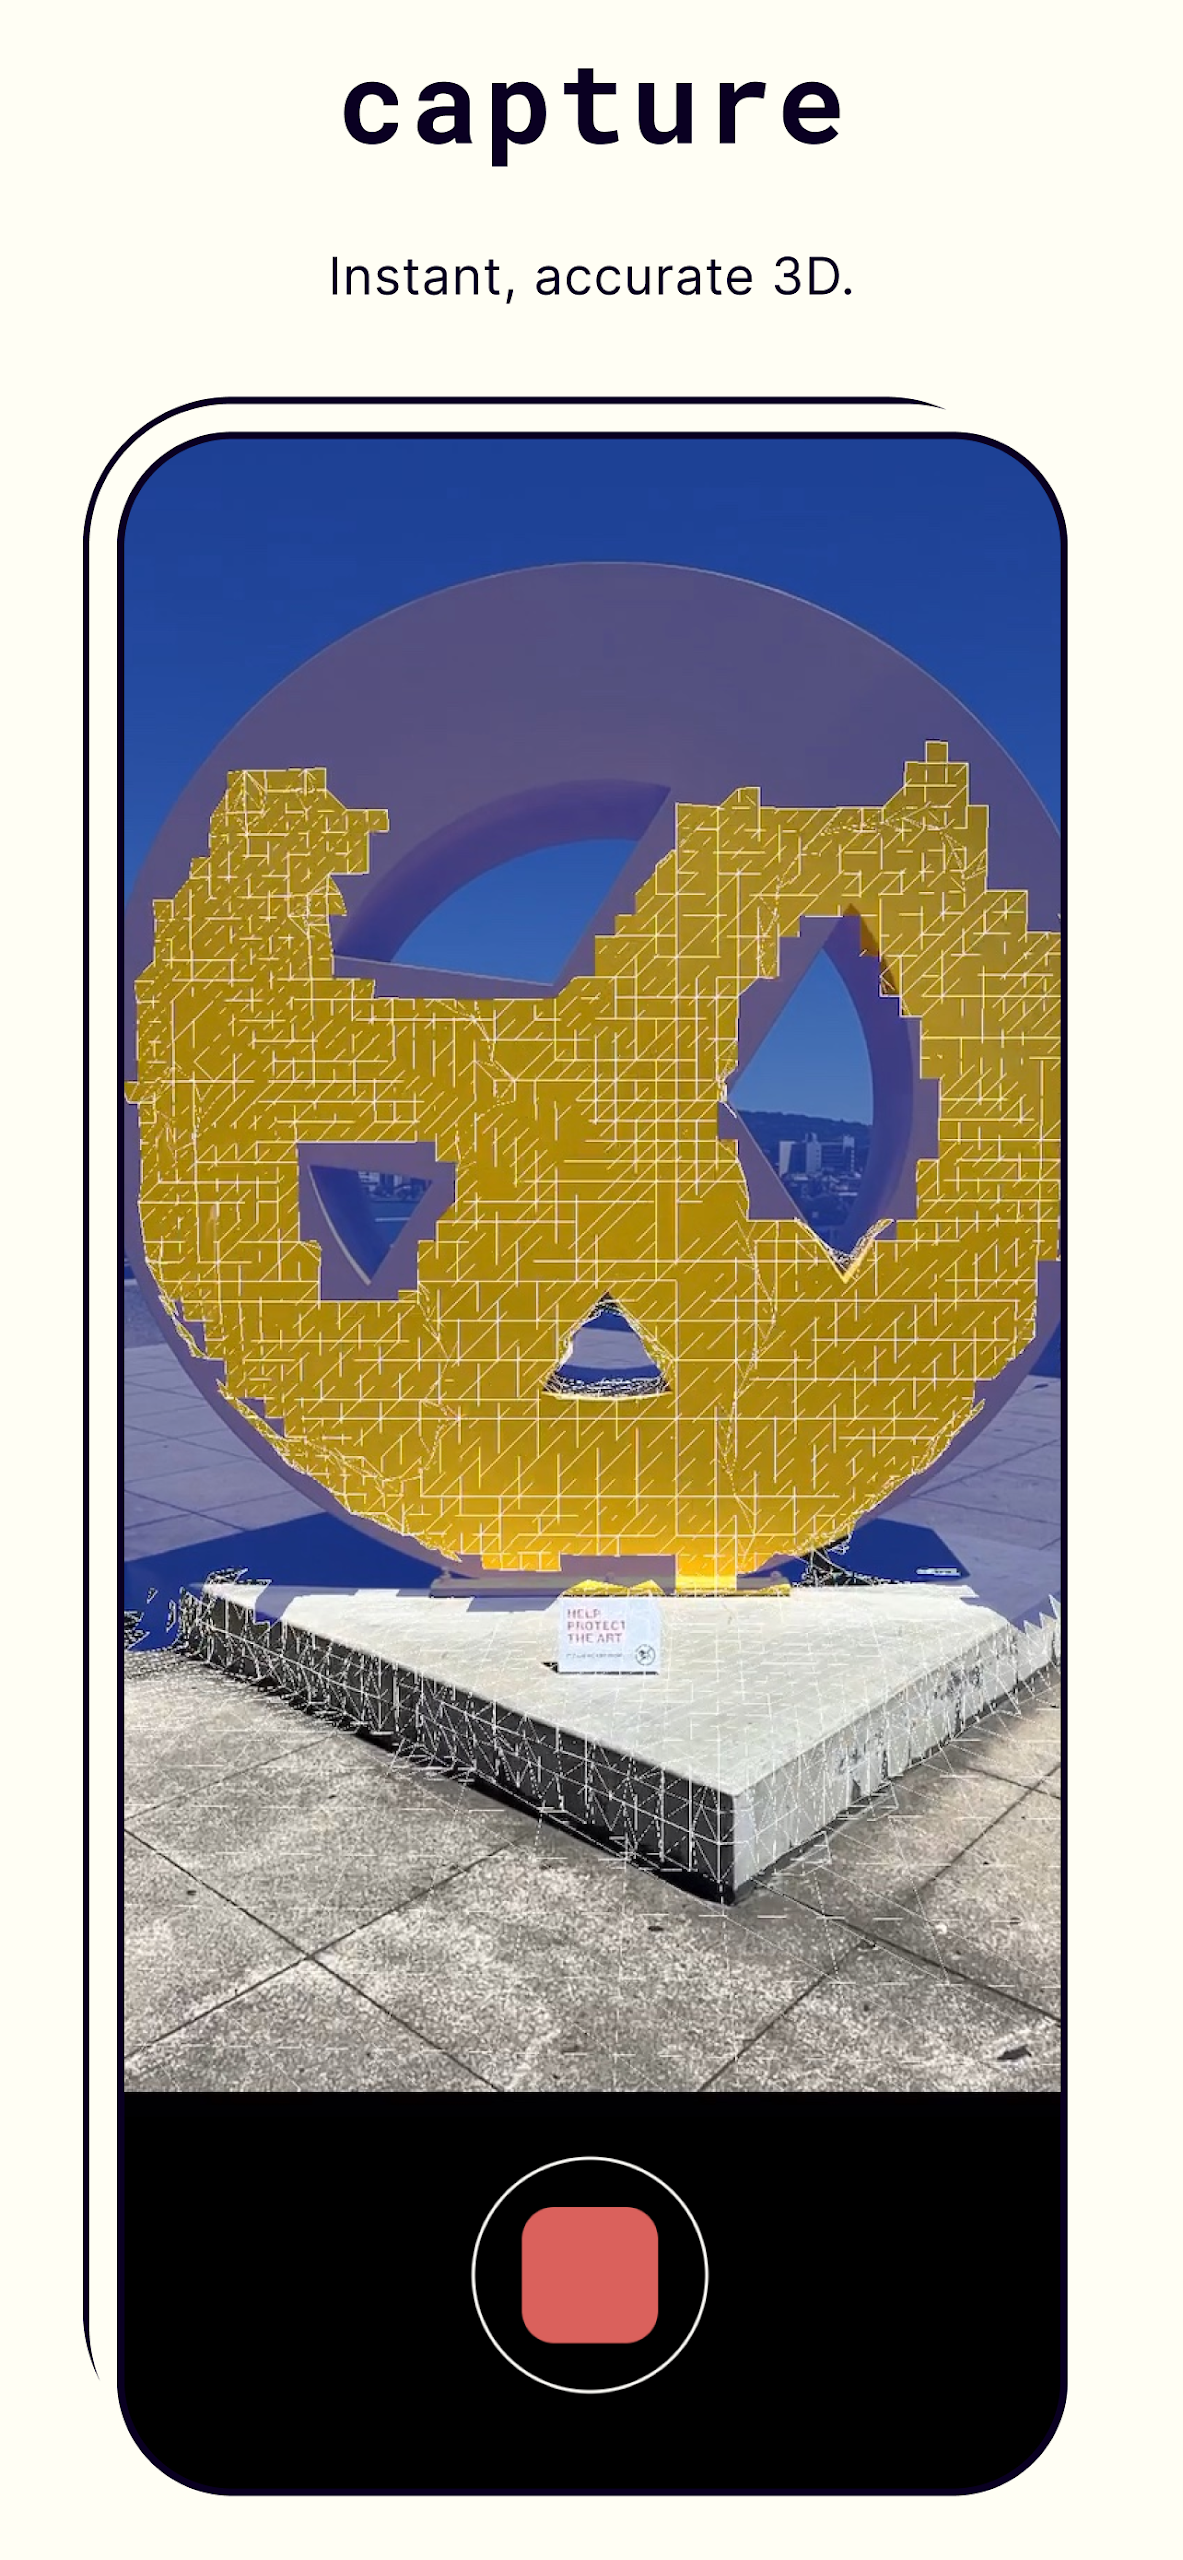
Revolutionary 3D Capturing:
● Convert images into 3D models using sophisticated photogrammetry techniques
● Capture intricate details of complex objects and scenes
● Create readily usable 3D assets for various computer graphics purposes
● Compatible with any Android device with 2GB+ RAM
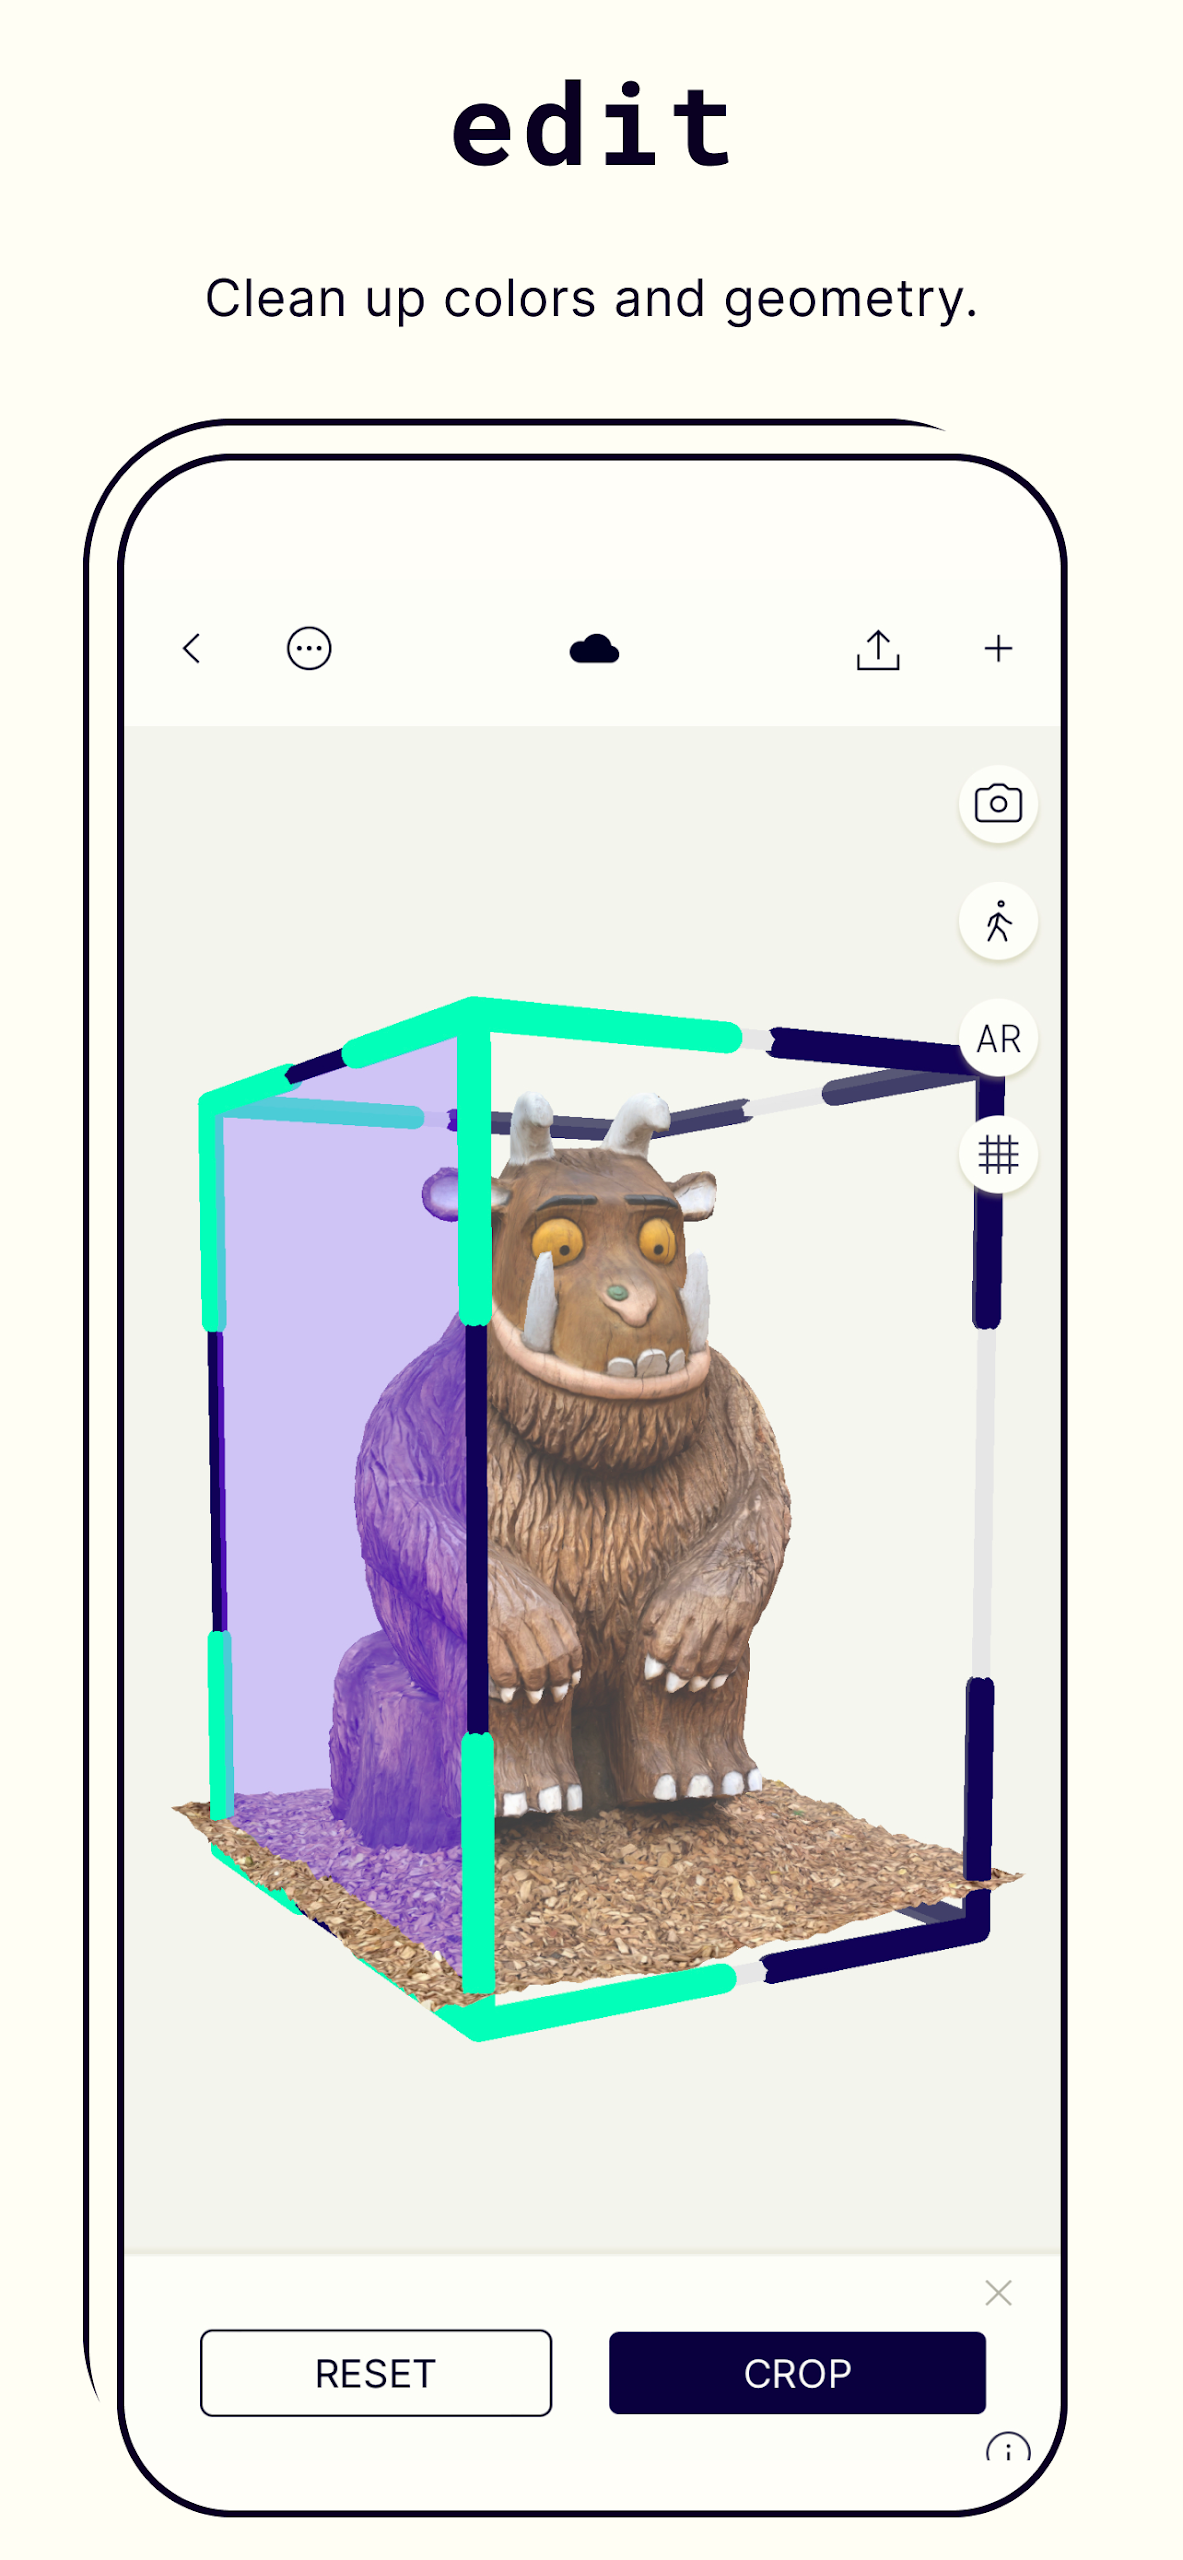
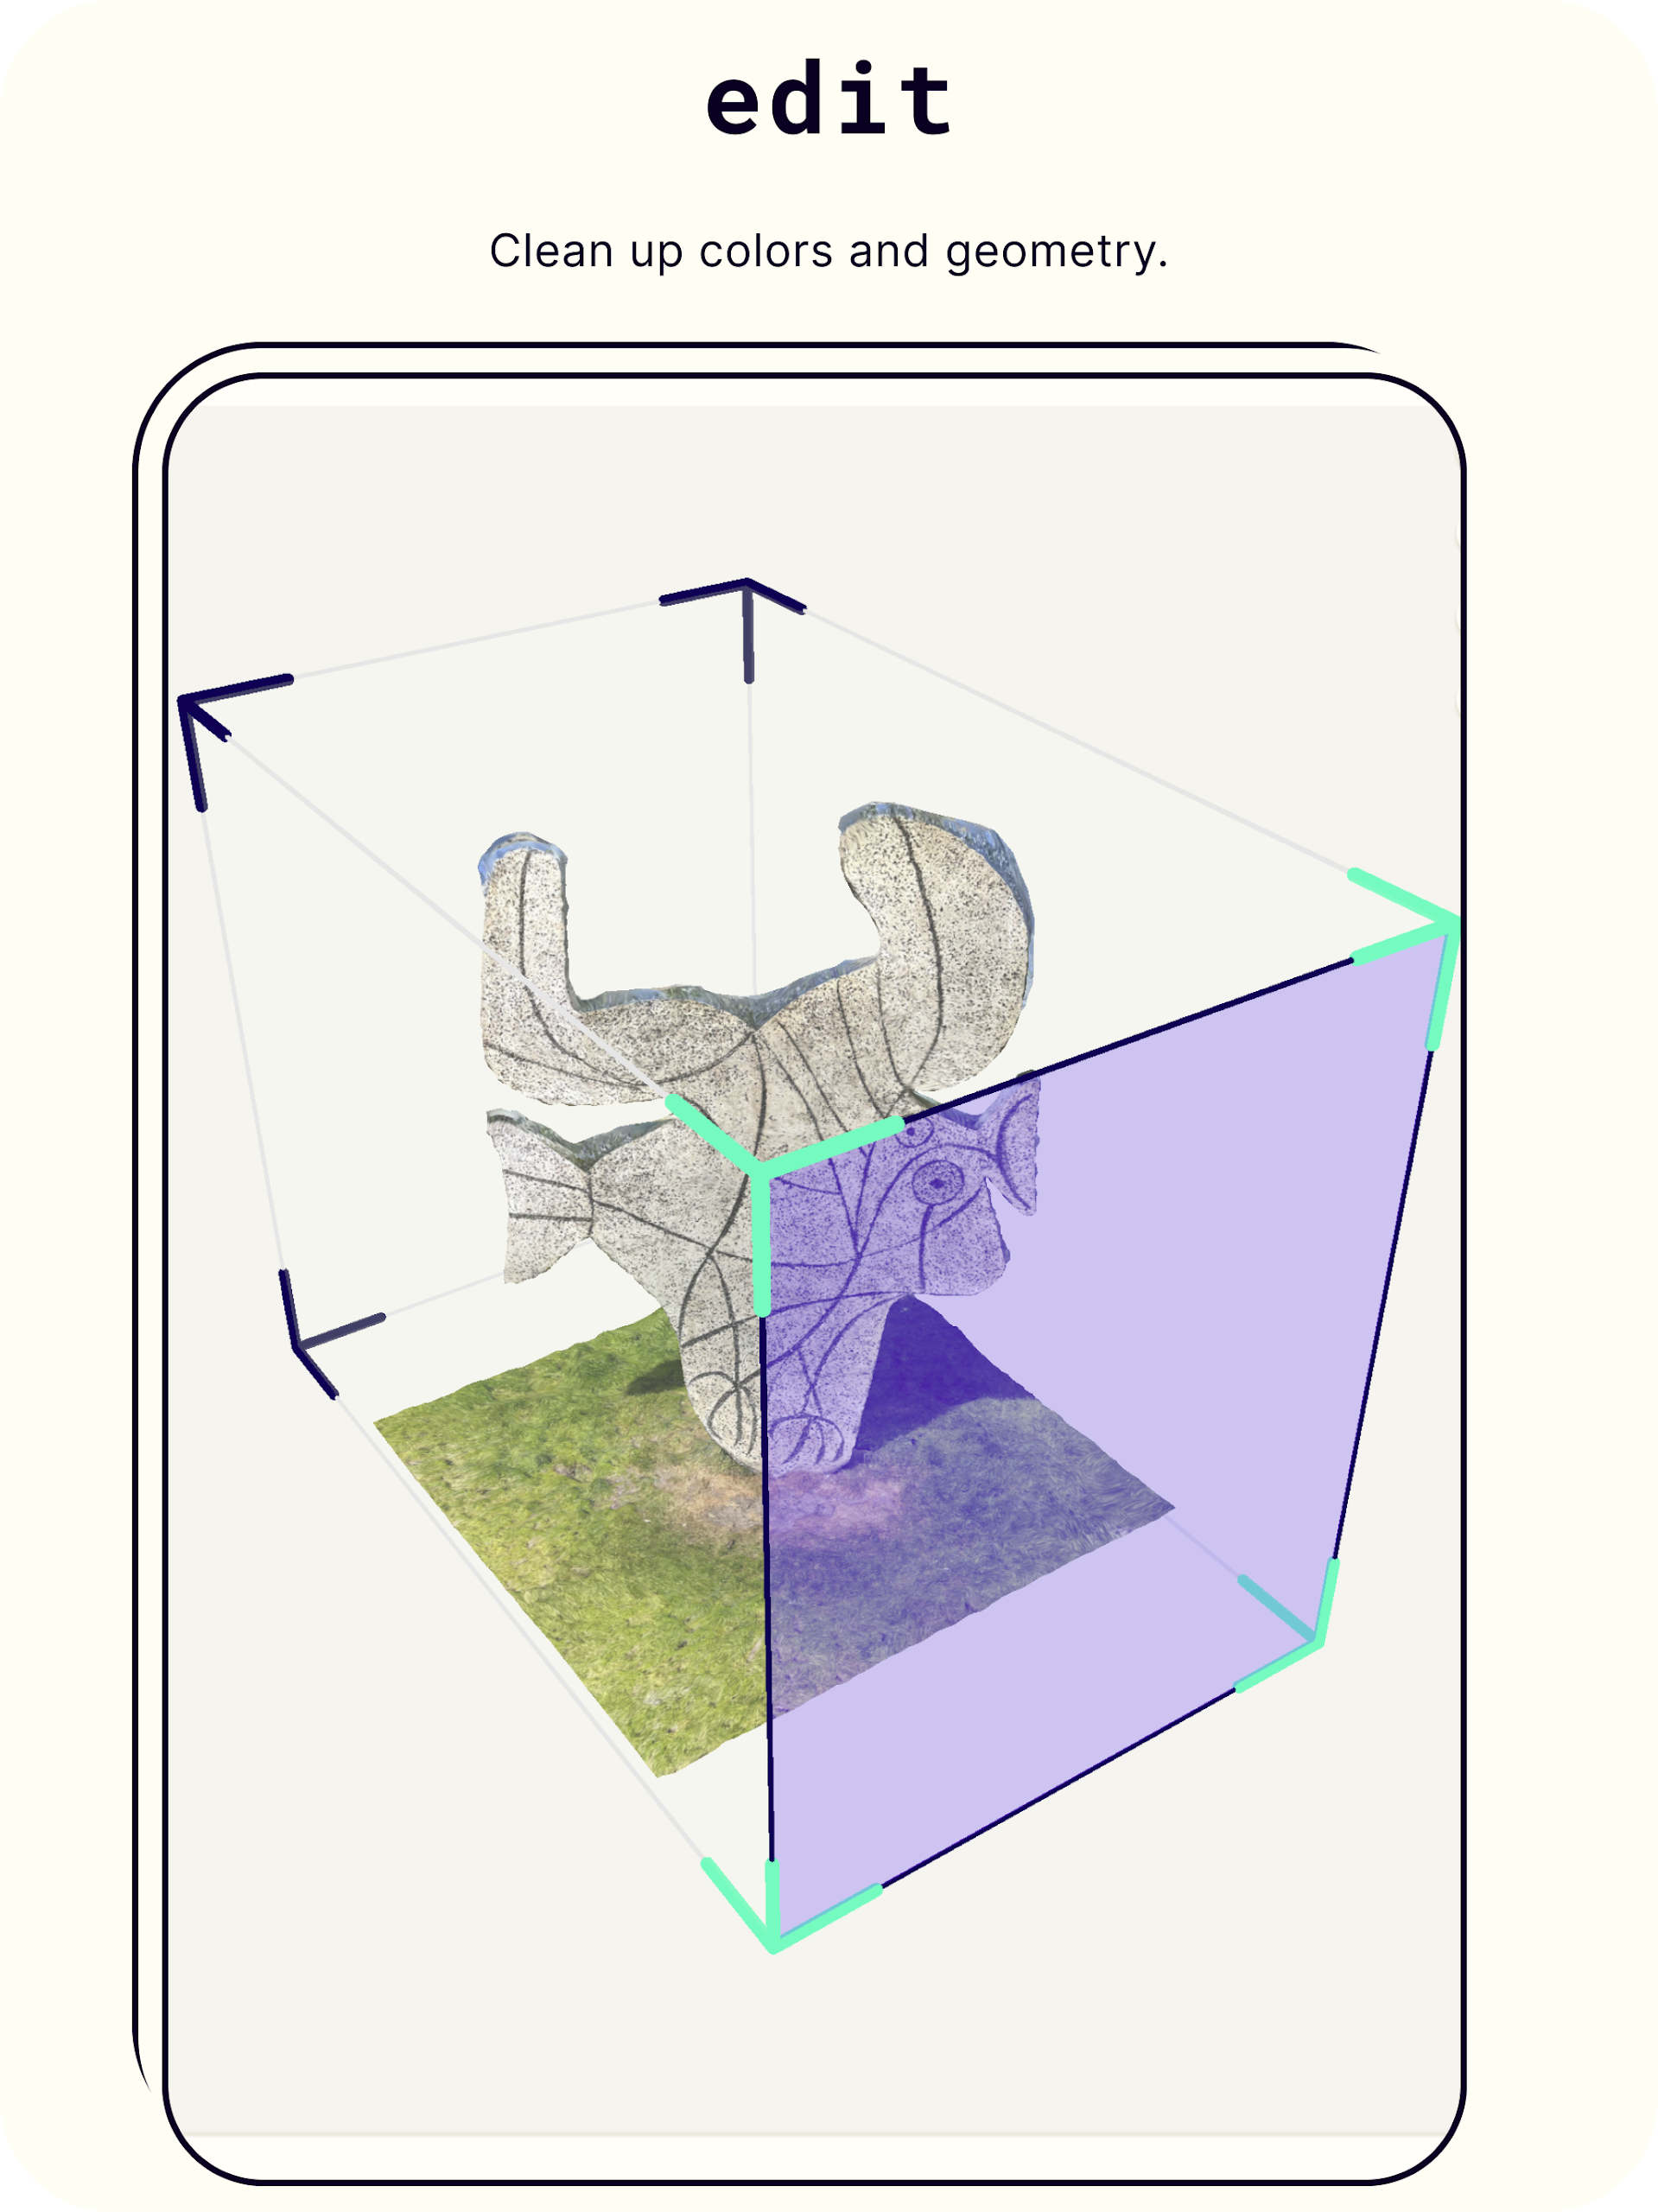
Advanced Editing Tools:
● Adjust the composition of your 3D captures by cropping
● View your models from all perspectives by rotating
● Modify the size of your 3D models by rescaling
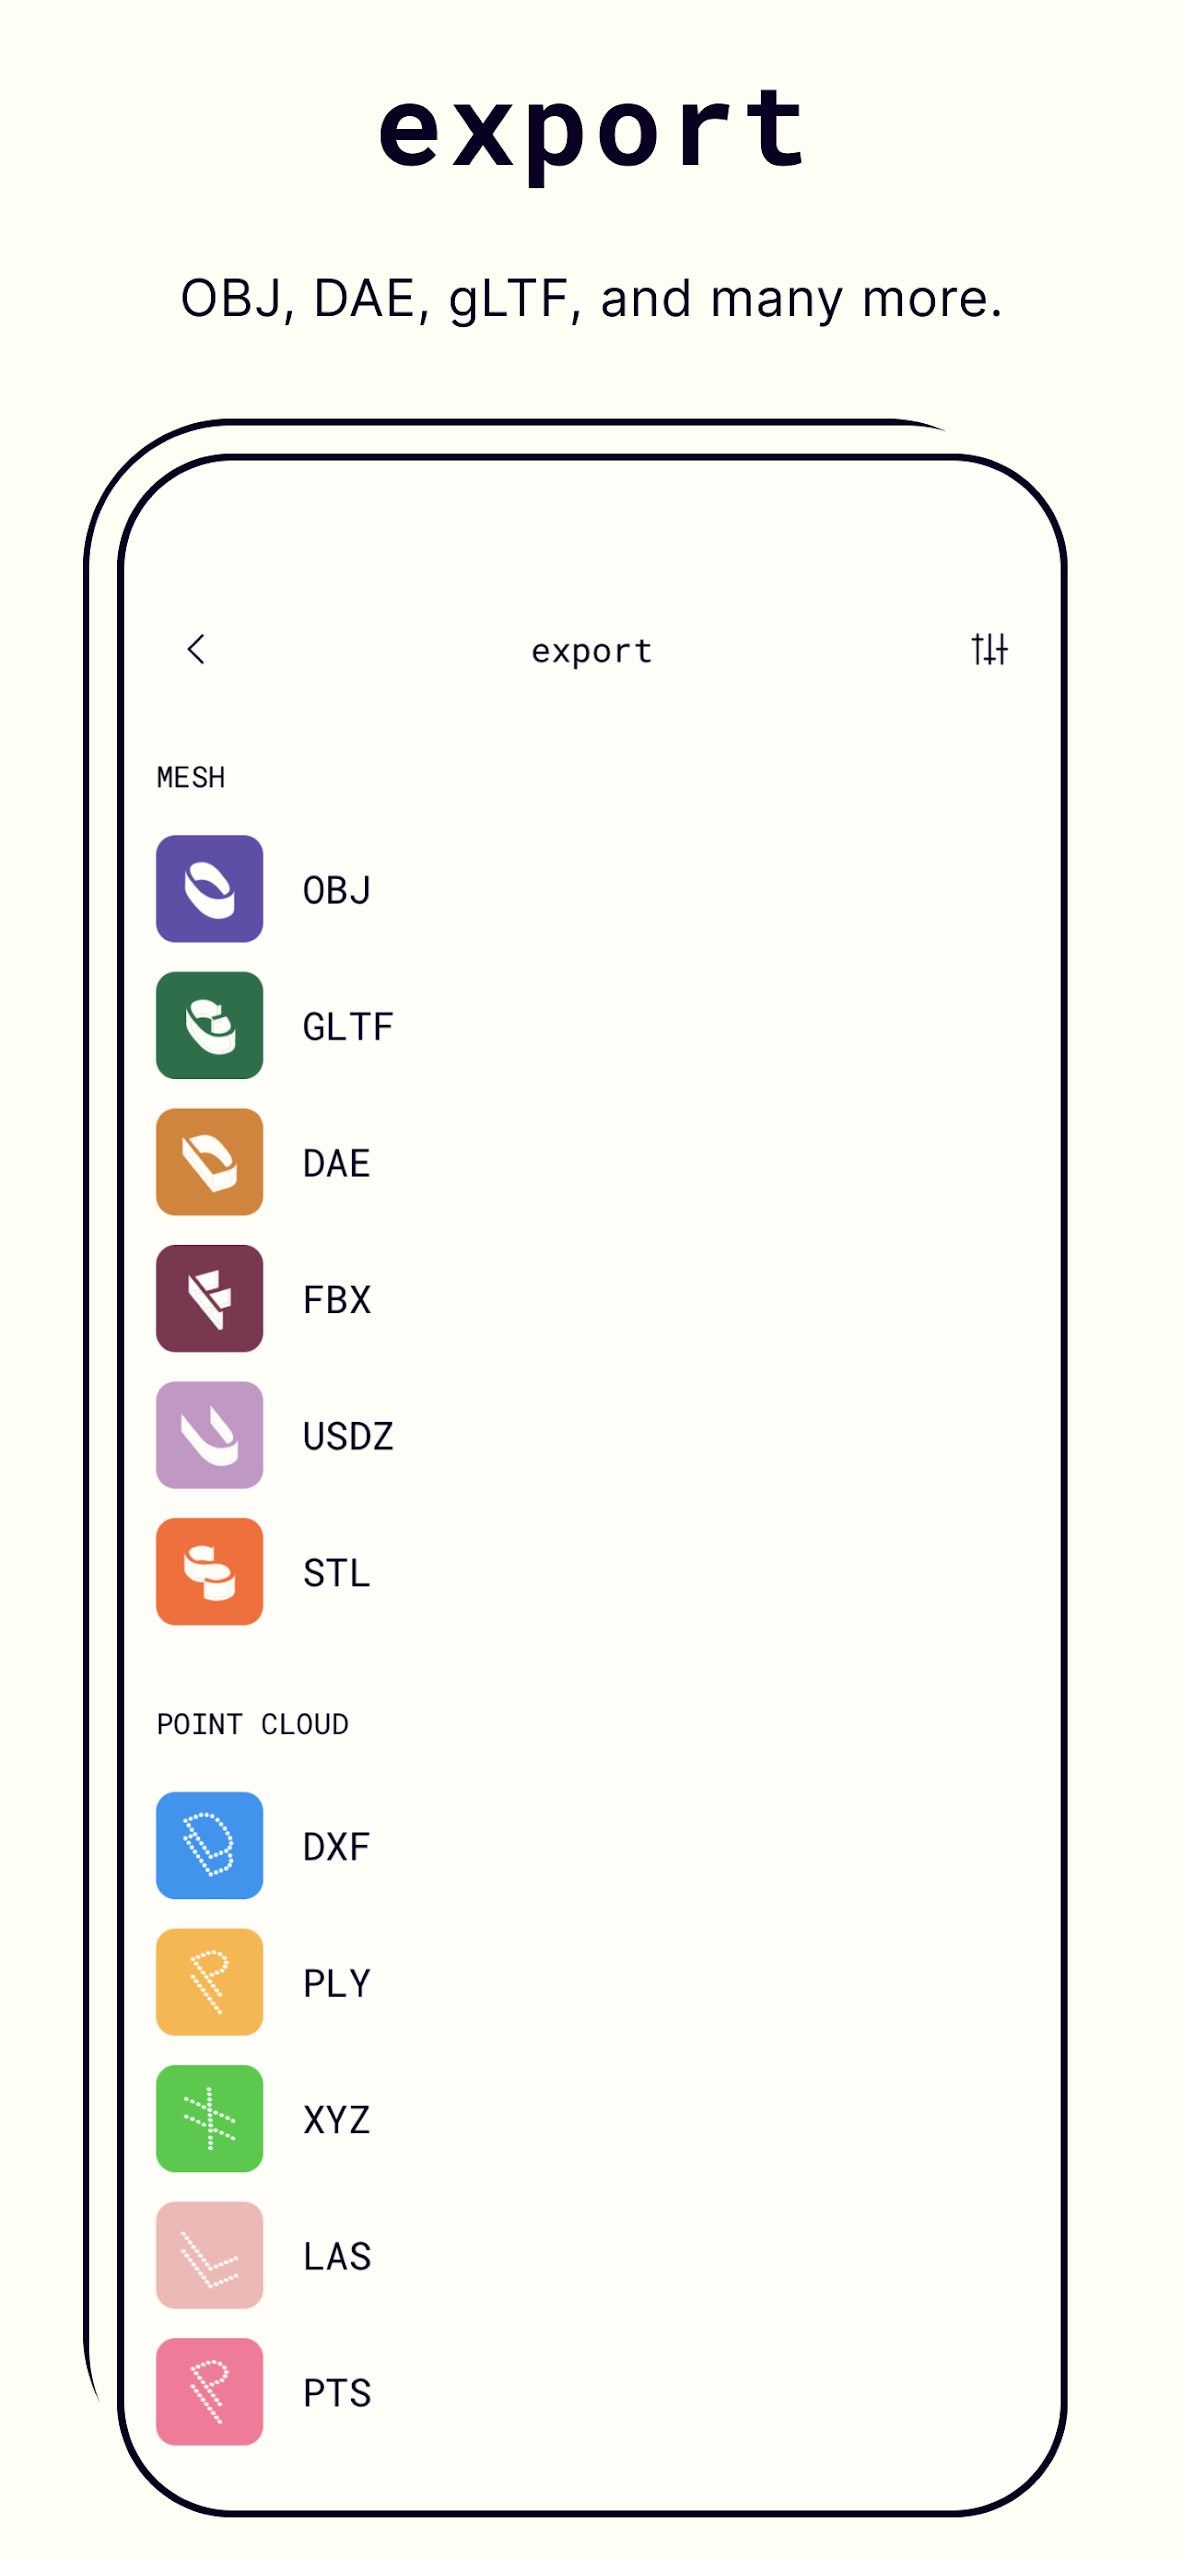
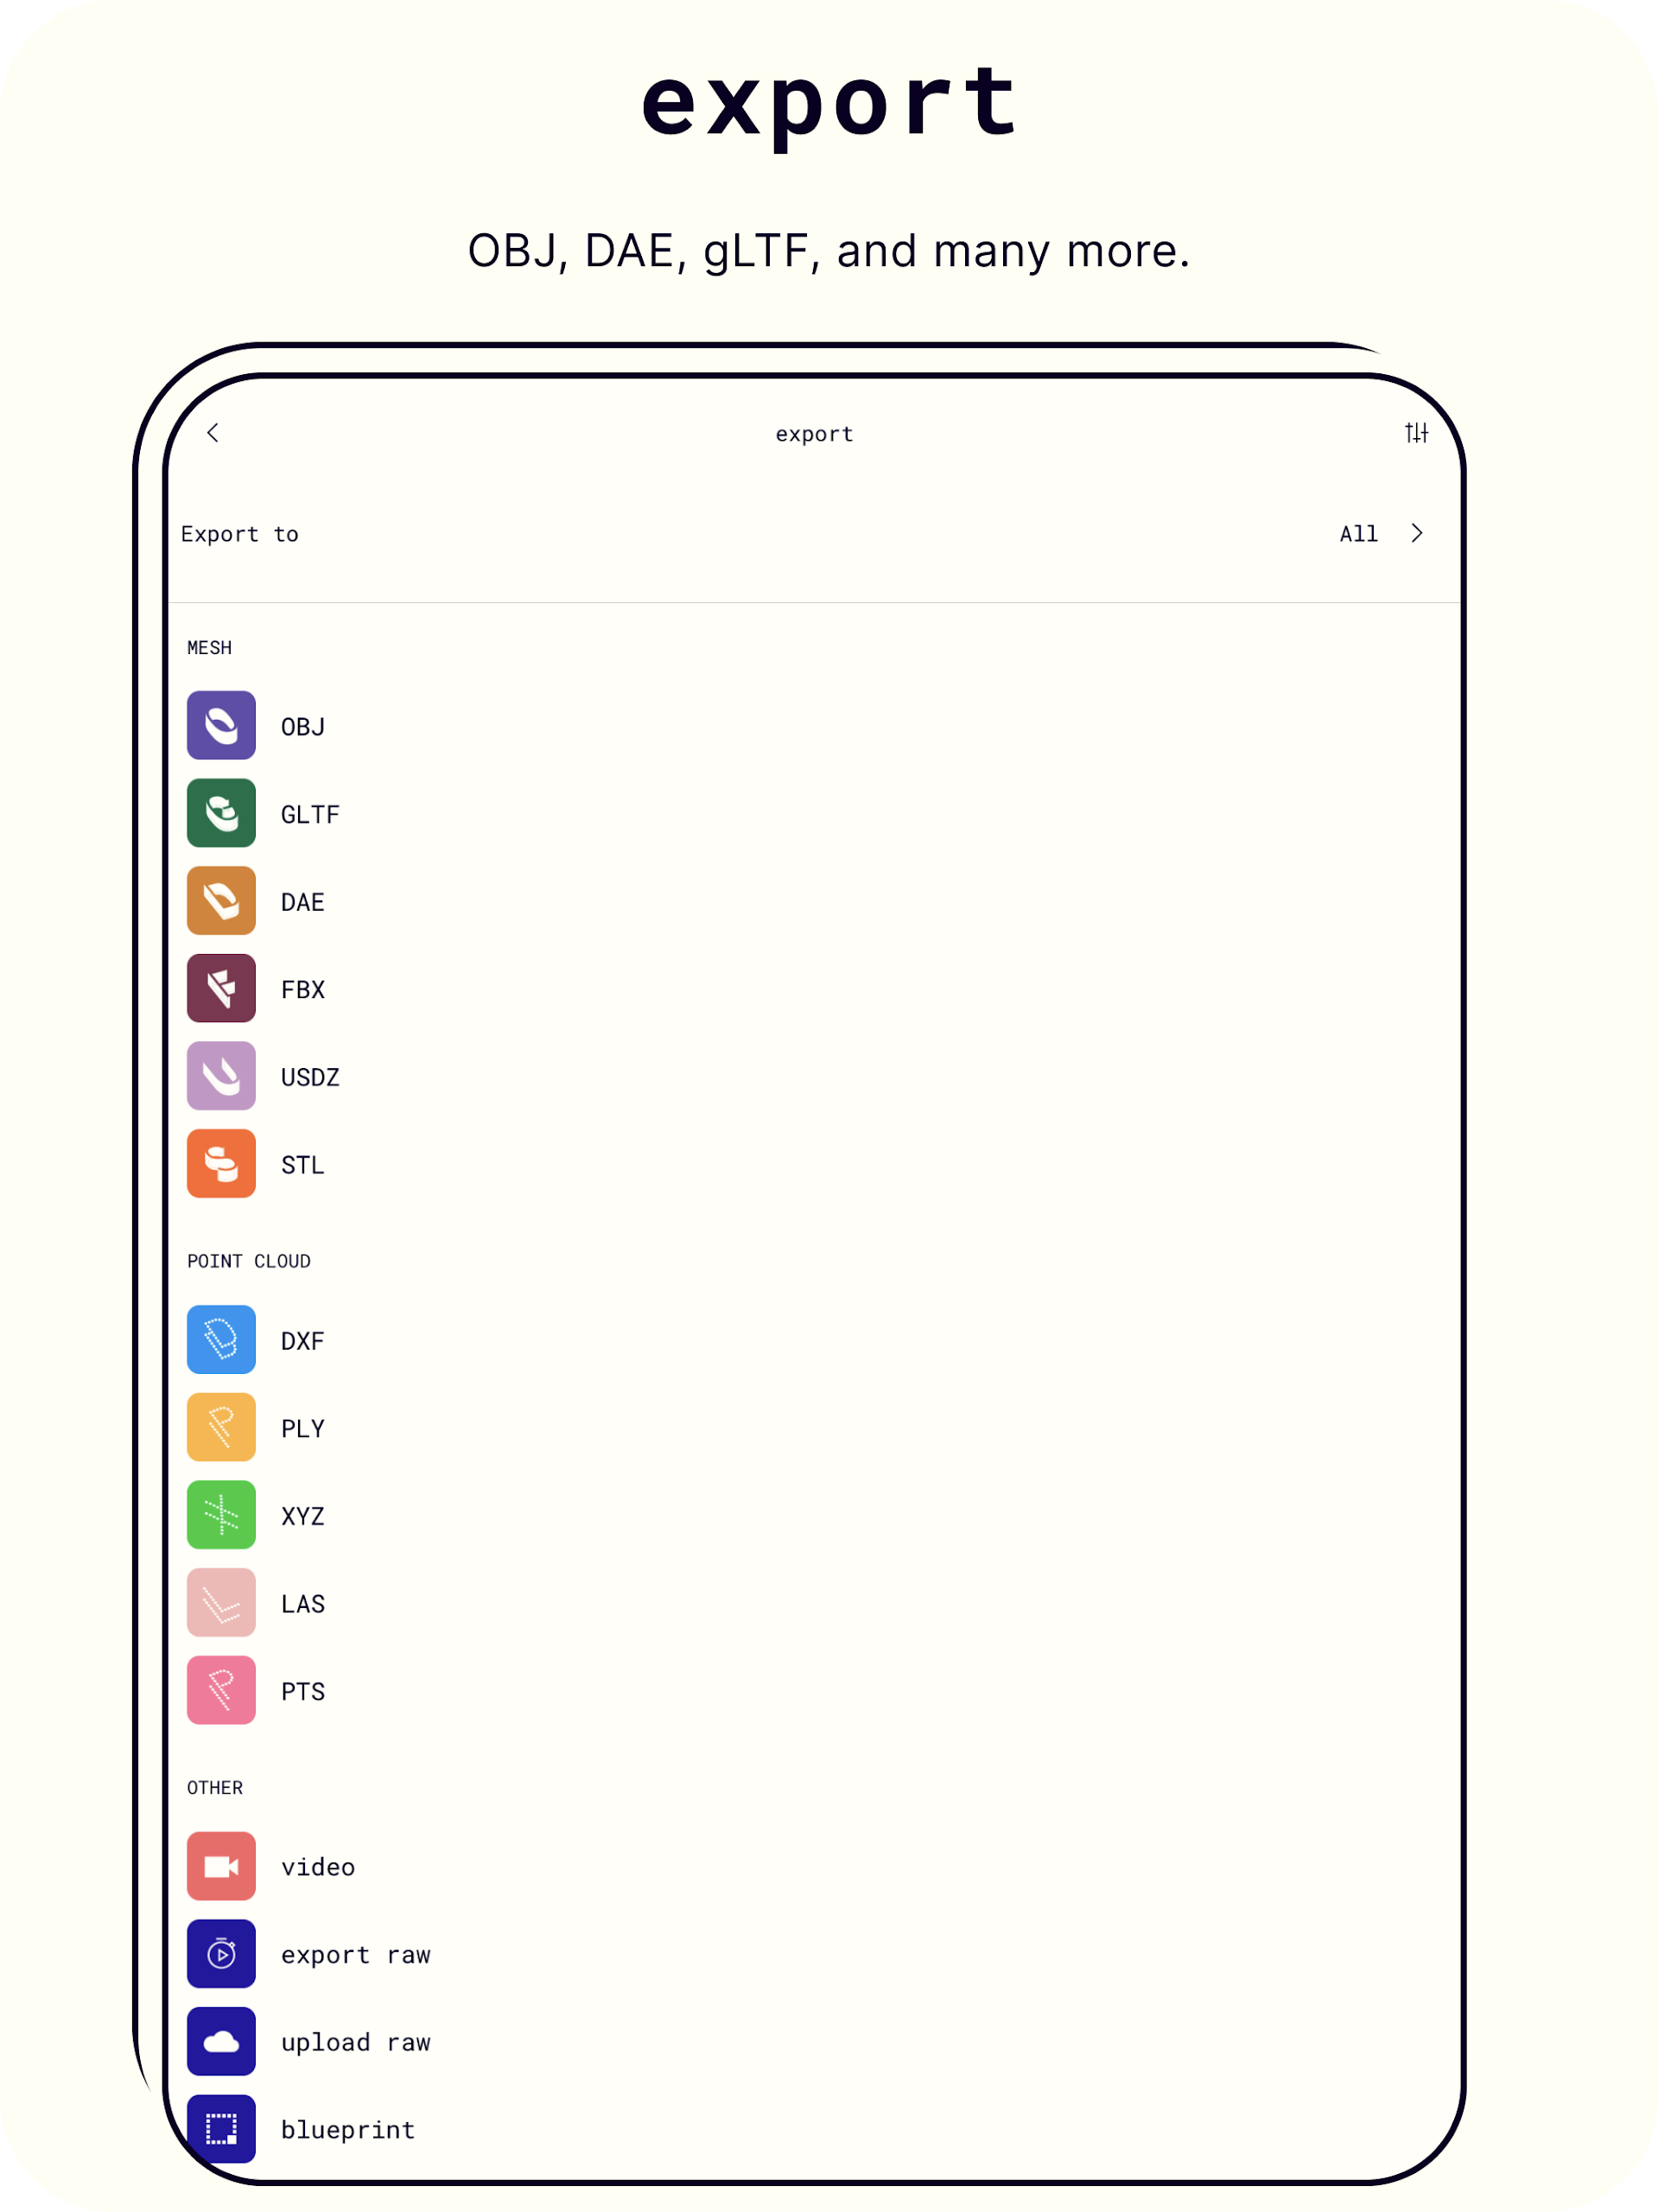
Export 3D Models via Polycam Pro:
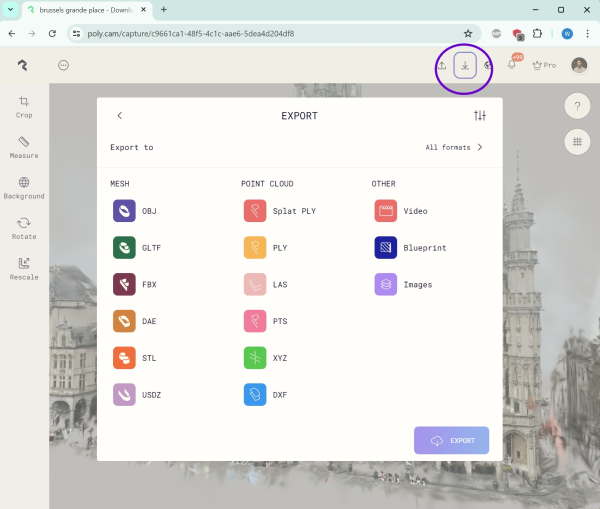
● Export mesh data in formats such as .obj, .dae, .fbx, .stl, and .gltf
● Share color point cloud data through formats like .dxf, .ply, .las, .xyz, and .pts
● Save blueprints as .png images or .dae files
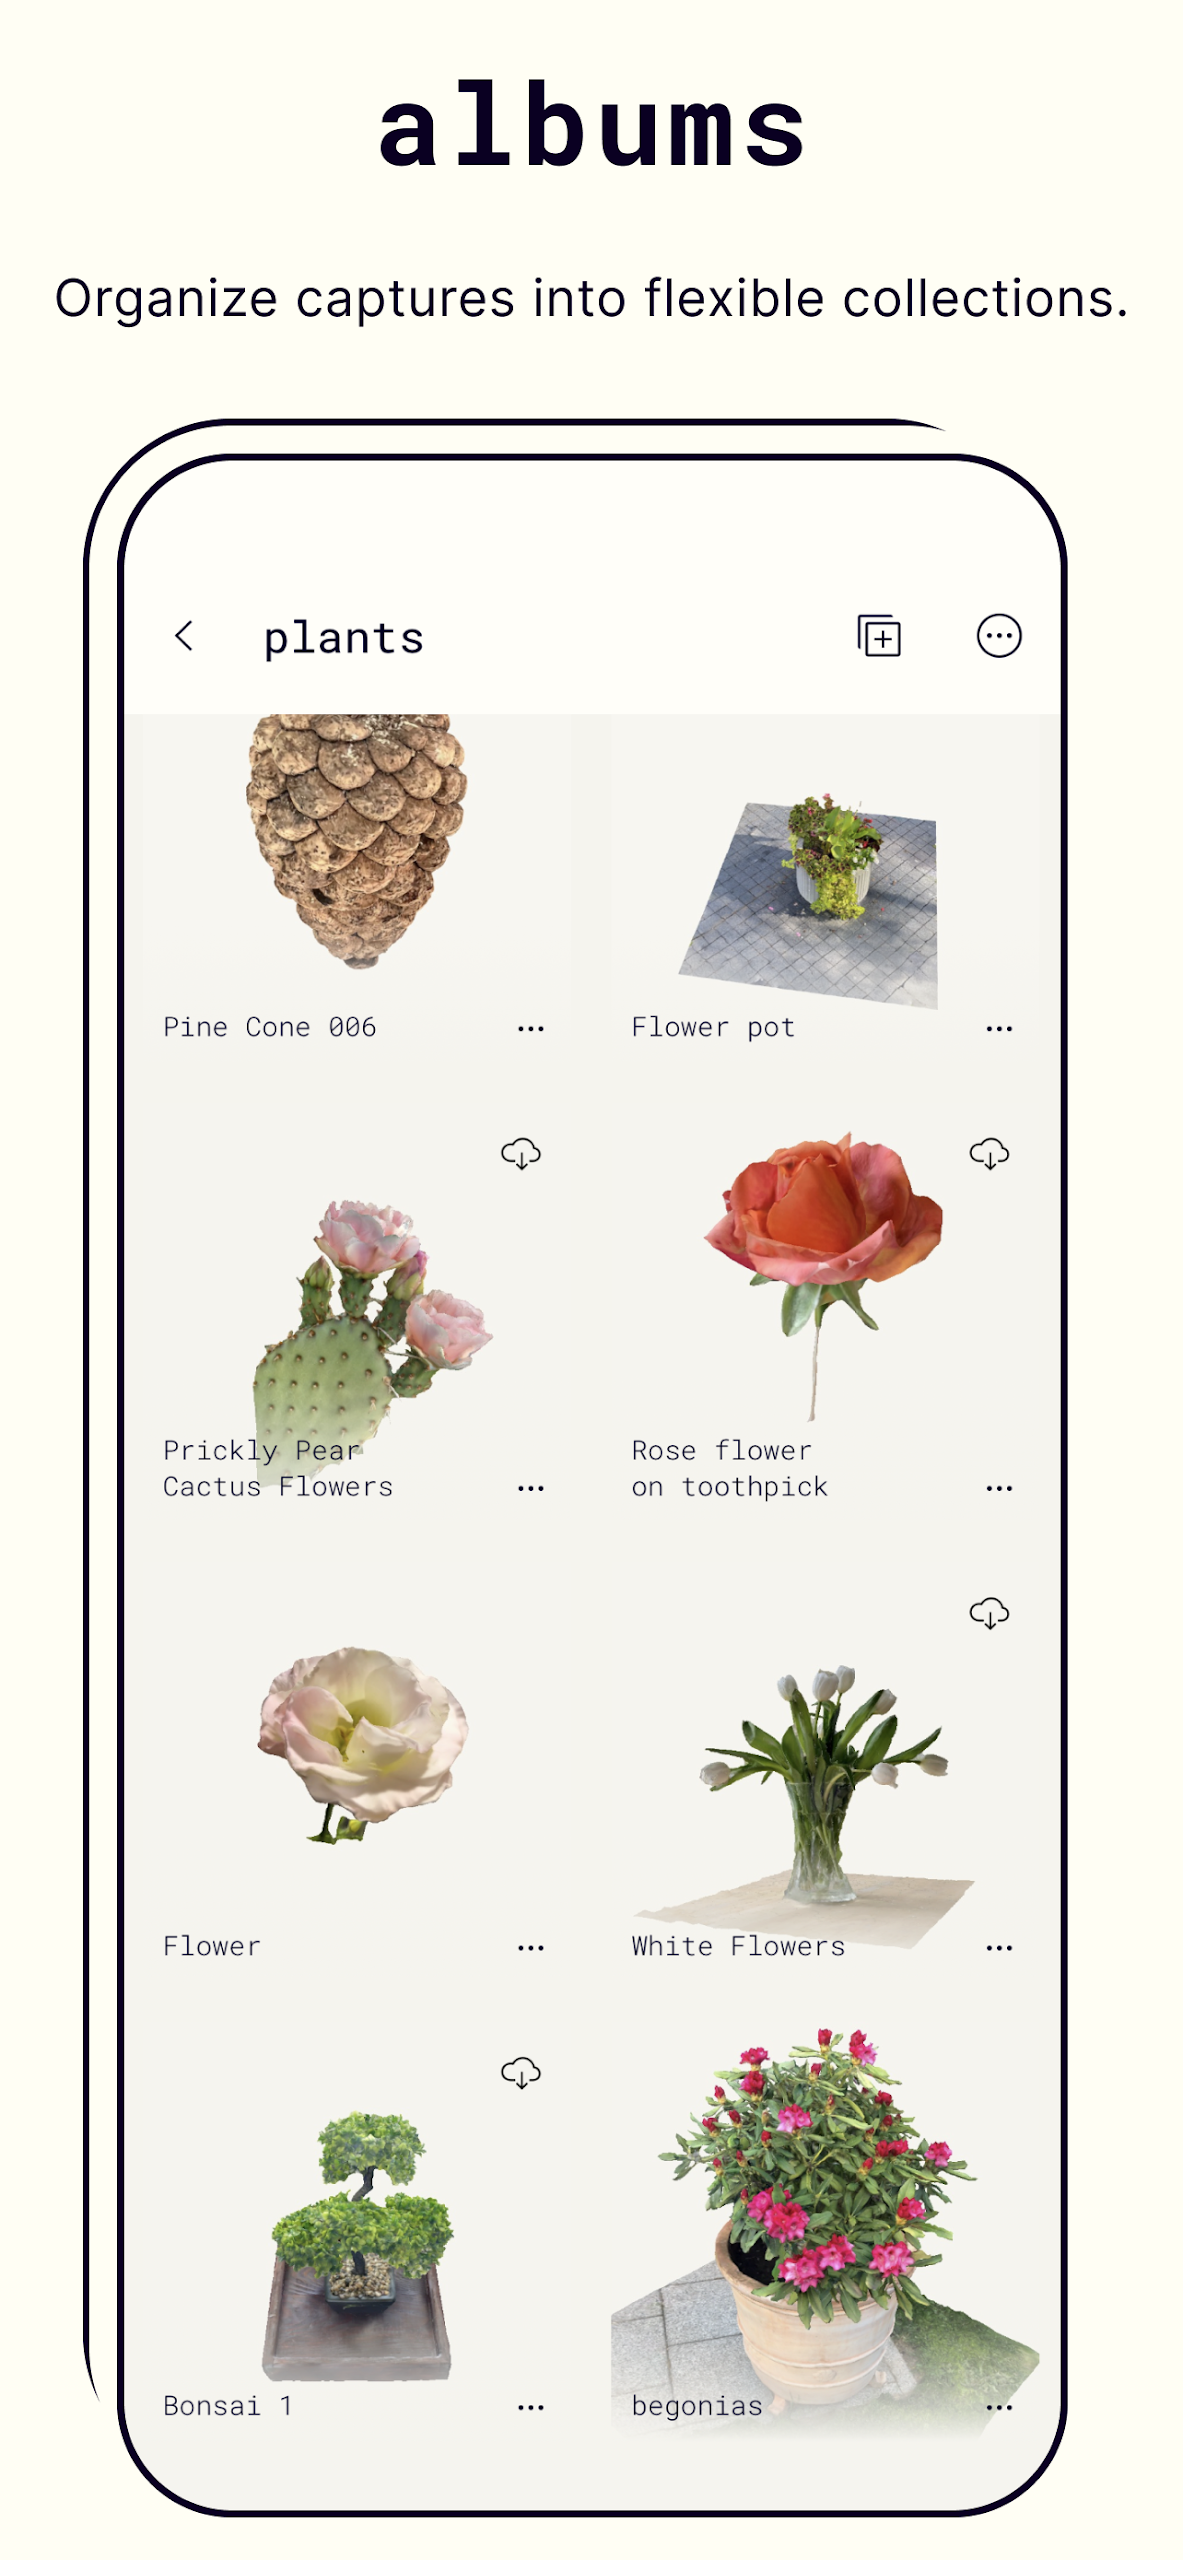
Connect and Share:
● Effortlessly share 3D models with friends and colleagues
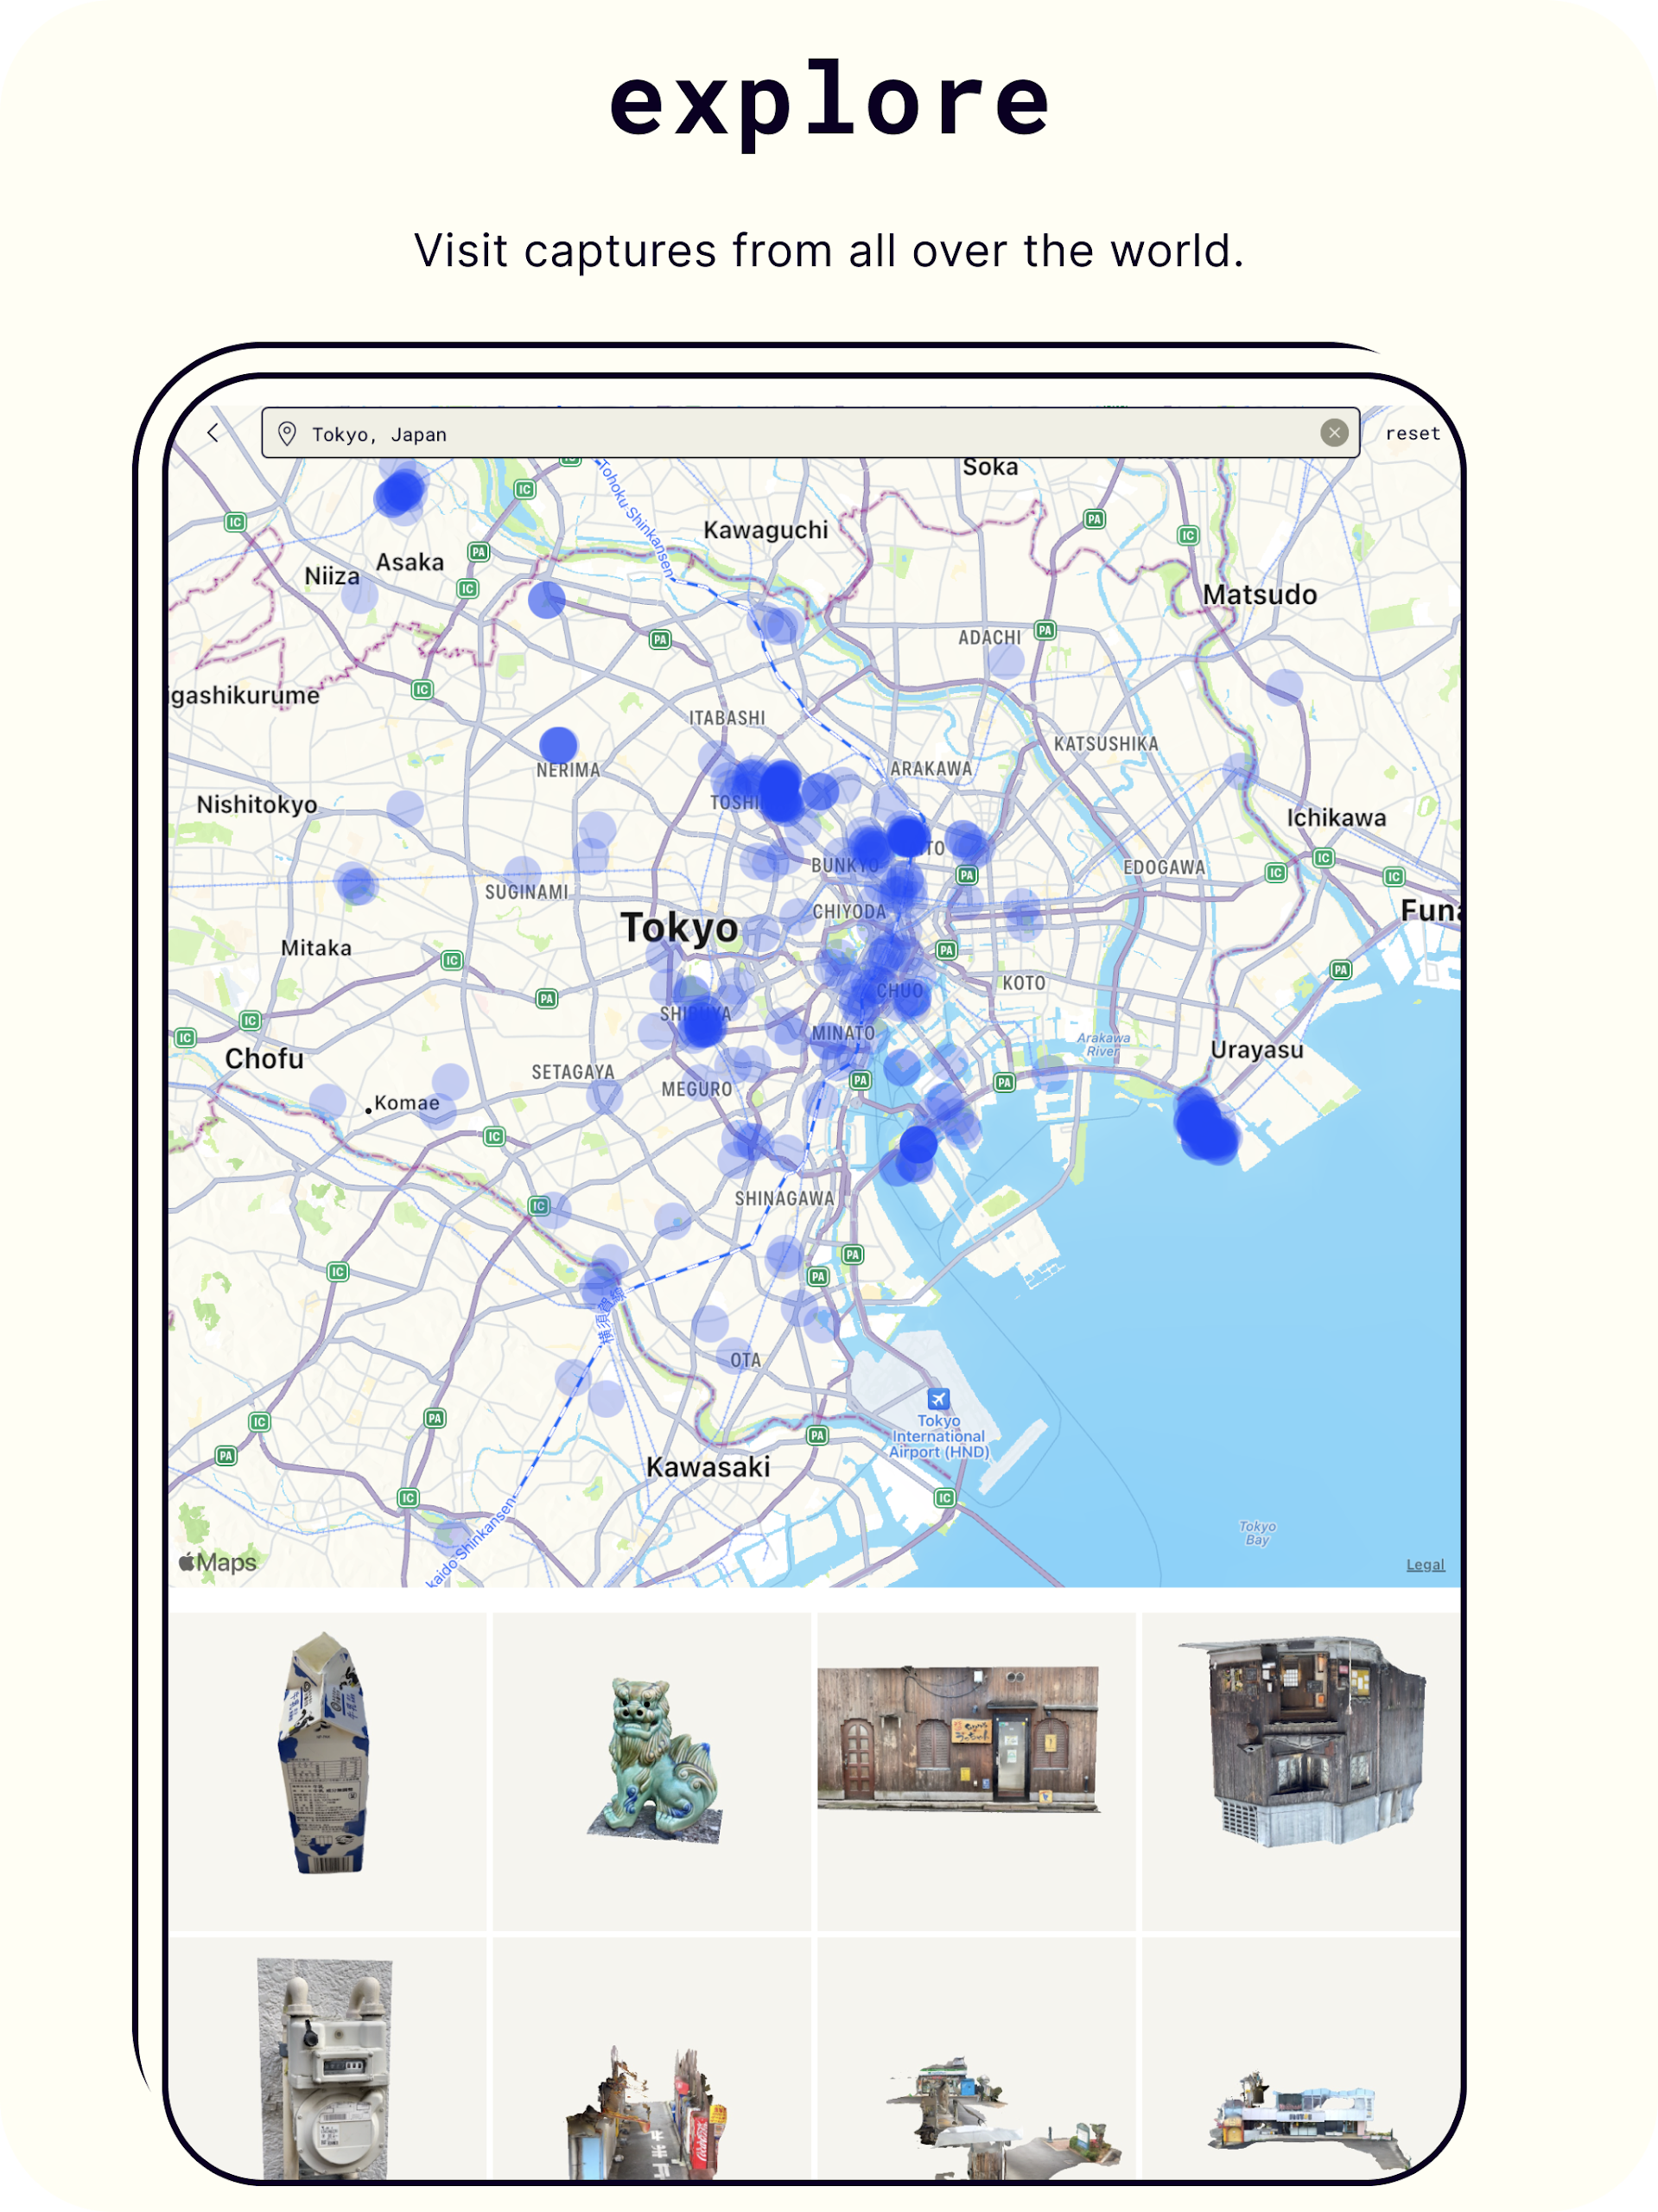
● Engage with the global Polycam community and explore captures from different corners of the world
● Showcase your 3D scanning expertise and creativity within the community
FAQ
Exporting & Workflows
Exporting
What File Types Can Polycam Export?
Pro and Enterprise Polycam subscribers can export various file types, although some formats are limited to the capture mode you used. The chart below will outline what file export formats are available for each capture mode:
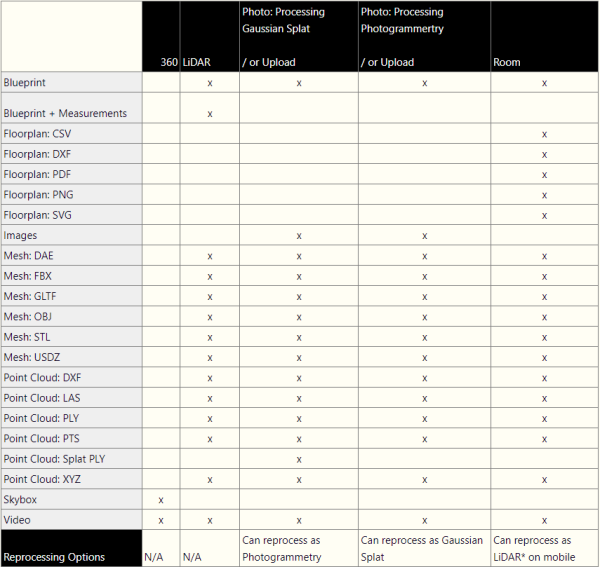
If you'd like to request a different export file type, you submit a feature request.
Please note that Polycam's product team prioritizes feature requests, and we cannot provide a specific timeline for additional export file types.
How to Export Captures in the Right Scale
All exported data has units of meters, so in your 3D viewer or editing tool one unit = 1 meter by default.
However, some 3D editors adjust the scale of data when they import it, so you will need to refer to the import protocol for your specific program if it doesn't seem like 1 meter = 1 unit for you.
For example, for 3DS Max we have heard that you need to apply a uniform scaling up by a factor of 3800 to achieve a 1 unit = 1 meter ratio.
Getting Started
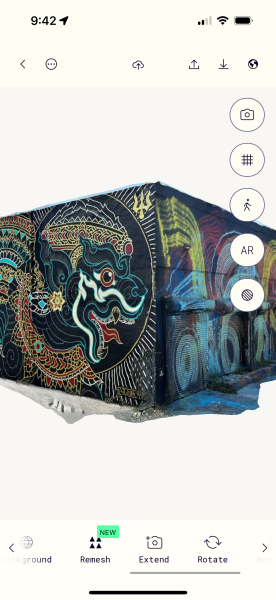
Editing a capture’s background
Customizing the background of your Polycam captures can improve how your 3D models are displayed. You can choose from options like a solid color, a specific hue, or a 360-degree background to fit your needs or preferences. This guide will walk you through the available options for adjusting your background.
How to Change the Background
1. Navigate to Your Capture: Open the Polycam app and select the capture you want to customize.
2. Access the Background Options: Swipe through the bottom navigation bar until you find the Background button.
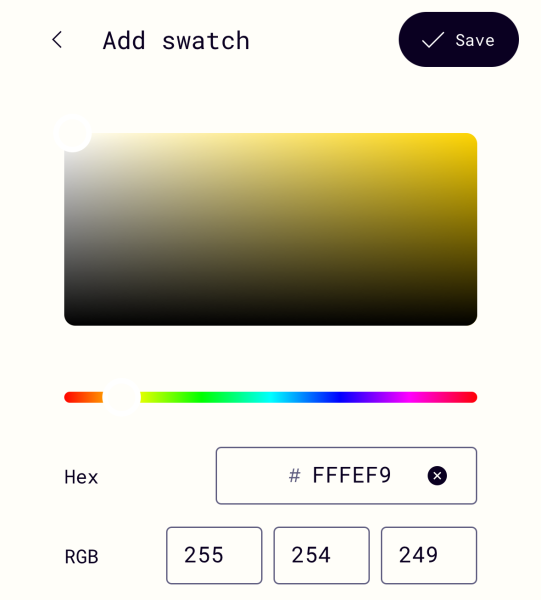
3. Select a Background Color: Tap the Background button to open the background options.
- You can choose from the default colors provided or create a custom color. To select a default color, simply tap on one of the available options.
- To choose a custom color, tap the plus icon (+). This will open a color picker where you can select your desired color.
How to use 360 Captures as a Background
1. Select a 360 Background: Follow the same steps to access the Background button in the bottom navigation bar.
- Choose the option for 360 backgrounds, and select between a skybox or a snow globe.
2. Remove the 360 Background: If you wish to remove the 360 background and revert to a solid color, tap the red Remove 360 button. This will clear the 360 background and return you to the default background options.
Using Polycam With a Drone
This guide explains how to capture drone scans of buildings and large objects, then feed the images or video into Polycam to create photogrammetry meshes and splats. These can be scaled, measured, shared and exported, just like regular models you create with your phone.
Steps to Capture a Drone Scan
1. Make sure you’re allowed to fly your drone in the location.
2. Choose the object or area you want to scan.
Tip: Drone scans work best if you choose one central building or feature, and fly around it
3. Fly your drone around the object at least three times, at 3 different altitudes, aiming down at the object.
Tip: You can record either photos or videos. Videos will work best if you capture them in 4K. Photos will be higher resolution, but you must be very careful and patient, and fly the drone much slower to make sure there is enough overlap between images. Most drones can only take 1 photo every 2 seconds, during which time the drone may move too far for Polycam’s algorithm to turn your images into a model.
4. On a computer, download your video/photos off the drone
5. Go to poly.cam in any web browser.
6. Login or Sign Up
7. Click Add
Tip: depending on the size of your browser window, this might be called Create Capture

8. Click Gaussian Splat
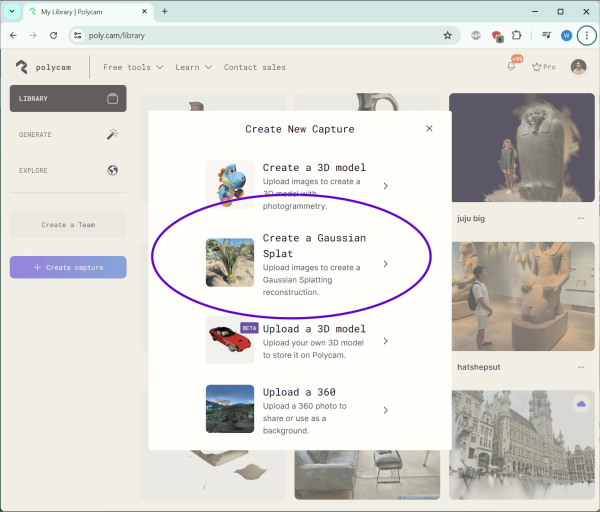
Tip: You can also process your drone capture as a photogrammetry mesh if you want, by clicking Create a 3D model
9. Upload the photos and wait.
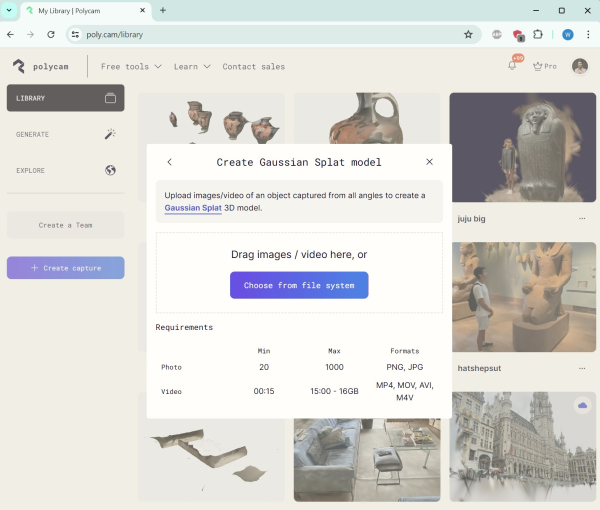
Tip: Don’t click anywhere on the screen during upload, or you may close the upload window, which can cancel the upload.
10. Once your scan is completed, you can edit it, crop it, rotate it, or rescale it like any other 3D capture.
11. You can also export it.
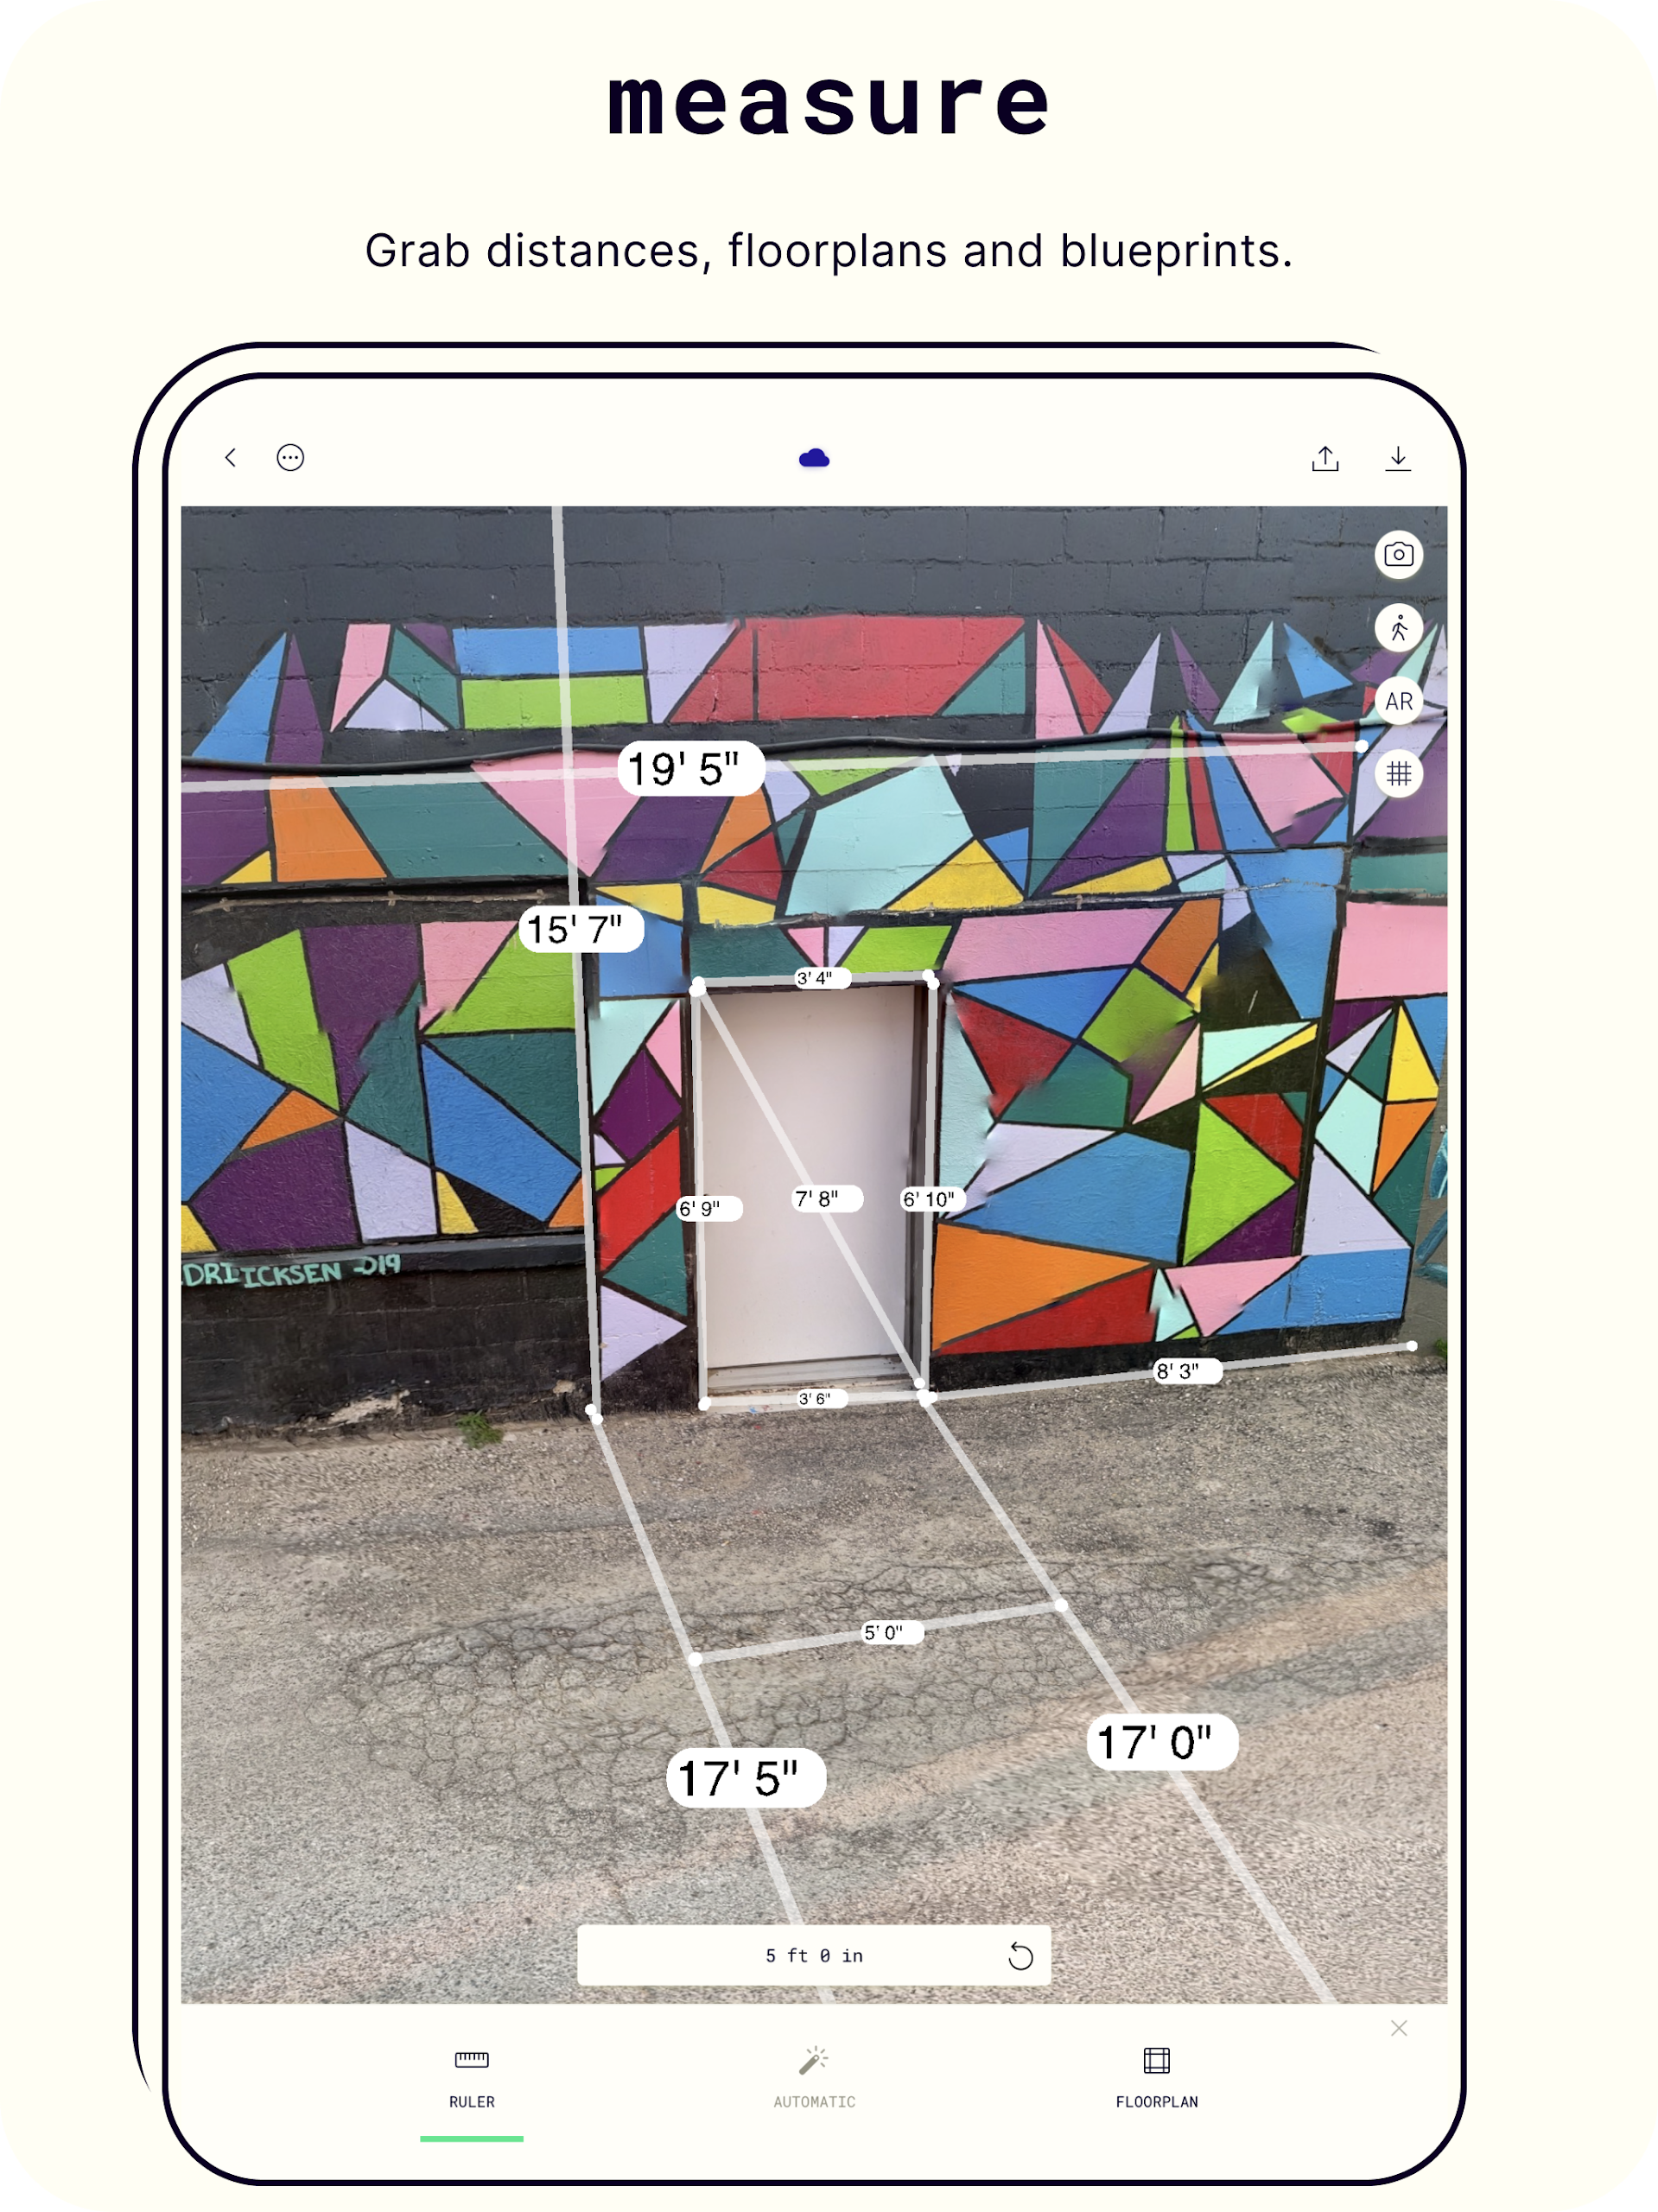
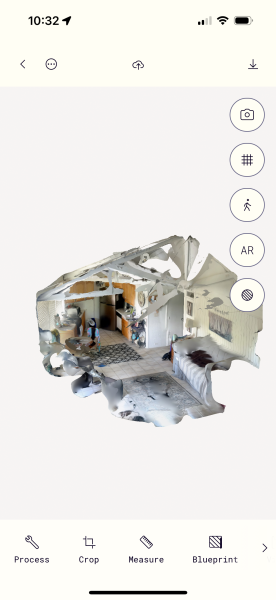
Creating Floorplans and Blueprints
Start scanning any room and interior by downloading the Polycam app on your LiDAR-equipped Apple device. Polycam quickly creates an accurate 3D representation of any interior space. Furniture and appliances are automatically detected, as well as wall color, windows, and cabinetry. Curved walls and ceilings (if present) are also captured and represented while you scan.
How to Make a Floorplan and Blueprint
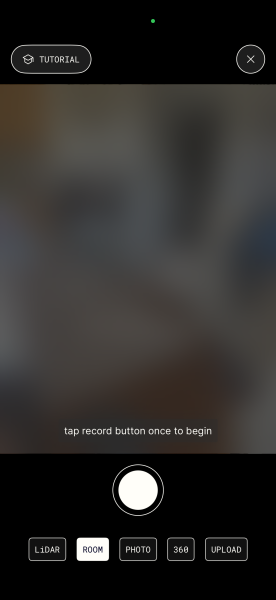
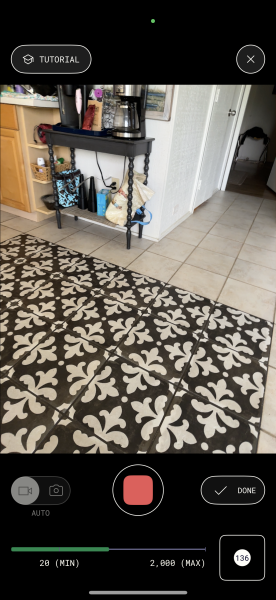
1. Open Polycam on your iPhone or iPad
2. Tap Room
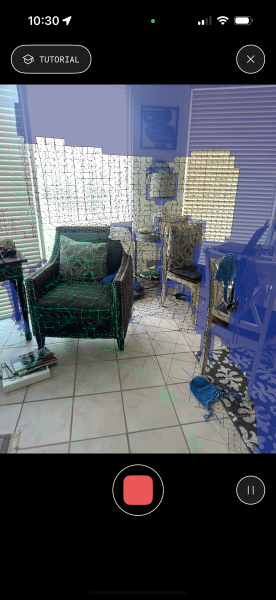
3. Tap the white circle to start recording
4. Aim the camera at a corner of the wall
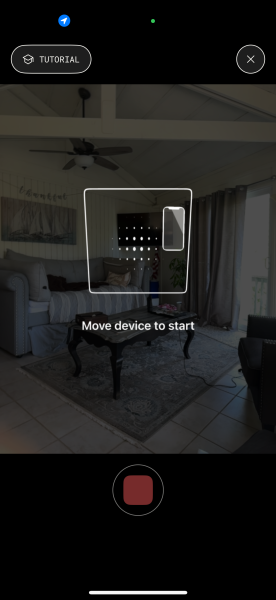
5. Slowly walk around the space aiming the phone at everything and waiting for our algorithm to identify walls and furniture
6. When you're done tap the red square to stop recording
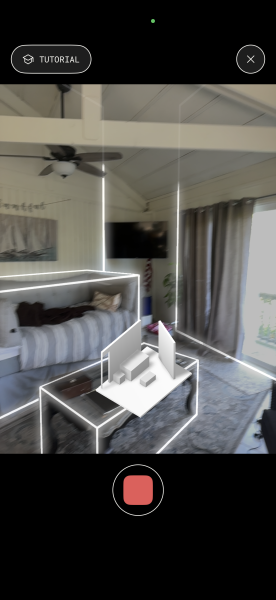
7. Polycam will process the scan and turn it into a 3D reconstruction
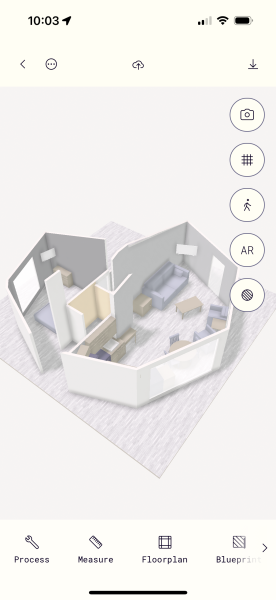
8. To see the floorplan and download it for use in other software, tap Floorplan
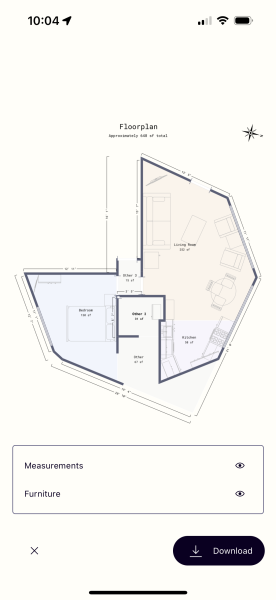
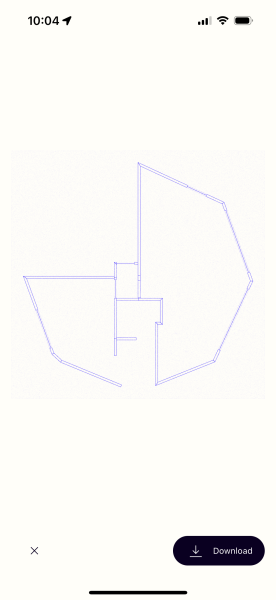
9. To see the blueprint and download it, tap Blueprint
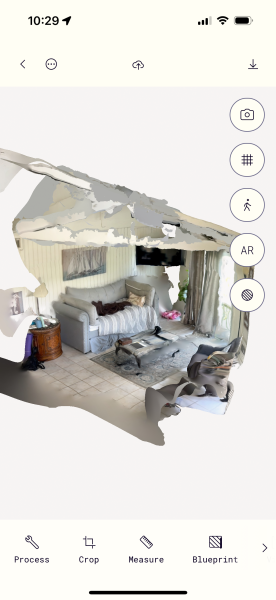
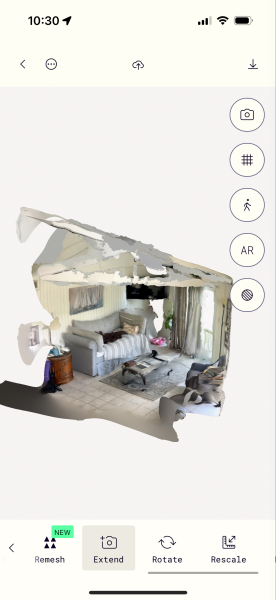
How to Extend a Capture
Sometimes you need to make a capture even bigger -- to add an extra room in a house, or a new wing of a building, for example. Here is how you can make captures that you can extend later, even after you've processed them.
Steps to Extend a LiDAR Capture
1. Use LiDAR mode to make a capture on your iPhone or iPad
2. Process the capture
3. View the capture
4. At the bottom, scroll the toolbar all the way to the right and click Extend
5. Aim the camera at the same part of the room that you originally captured -- this will help Polycam figure out how to extend it with your new scan
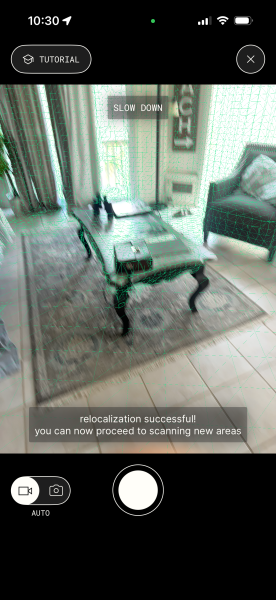
6. Scan the new part of your room.
7. Click process.
8. View your extended scan as one mesh.
Steps to Extend a Photo Mode Capture
1. Use Photo mode to make a scan
2. Process your scan as Photogrammetry
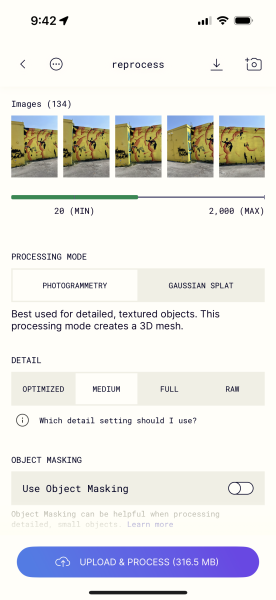
3. View your capture
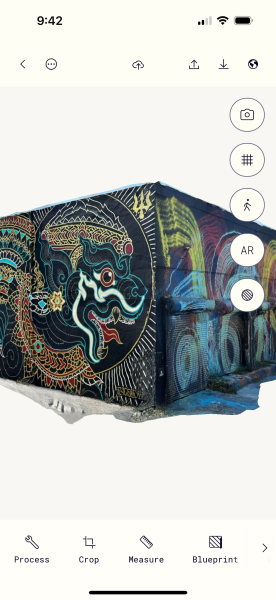
4. Scroll to the right on the bottom toolbar until you see Extend
5. Tap Extend
6. Take more photos of your scene

💡Tip: Make sure you take lots of photos of the edge of your last scene, to "glue" your new set of photos to the old set
7. Tap Upload & Process
Using Polycam’s AI Texture Generator
Polycam's AI Texture Generator provides a sophisticated solution for creating textures based on text descriptions. Polycam's AI Texture Generator is particularly beneficial for designers, developers, and artists seeking to quickly prototype and integrate high-quality textures into their projects without the need for extensive manual creation. Accessible to all users at no cost and without the need for a Polycam account, it facilitates an efficient workflow for texture generation directly from descriptive input.
How to use the AI Texture Generator tool
1. Visit the AI Texture Generator Tool: Go to Polycam’s AI Texture Generator.
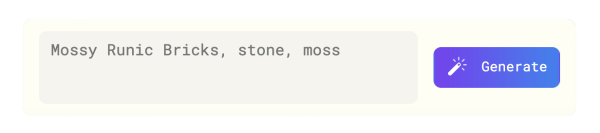
2. Enter Your Prompt: Type a descriptive prompt into the text box to specify the type of texture you want to generate.
3. Generate Textures: Click the Generate button. The tool will create four unique 3D AI-generated textures based on your prompt.
4. Download Your Textures: Once the textures are generated, you can download them for immediate use.
How to Create a Texture from an Image
In addition to generating textures from text prompts, Polycam’s AI Texture Generator allows you to upload an image to create a custom 3D texture file.
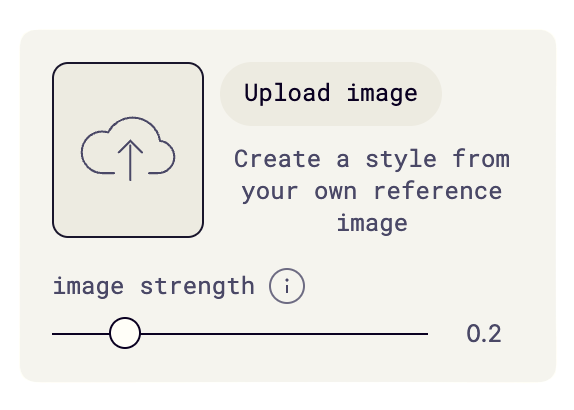
1. Access the Upload Feature: Visit Polycam’s AI Texture Generator and locate the image upload section.
2. Upload Your Image: Click on the Upload Image button and select the image file from your device that you want to use as a basis for your texture.
3. Adjust Image Strength: A higher value for image guidance will more strongly guide the output, while lower values will allow for a more creative interpretation of your prompts.
4. Generate Texture: After uploading, the tool will process your image and generate a 3D texture based on its visual characteristics. You may need to adjust settings or prompts to refine the output to your preference.
5. Download the Generated Texture: Once the process is complete, you can download the generated texture file for immediate use in your projects.
How to Create a Negative Prompt
To refine your texture generation process, you can use negative AI prompts to exclude specific elements or characteristics from your results. This technique helps tailor the output more precisely to your needs.
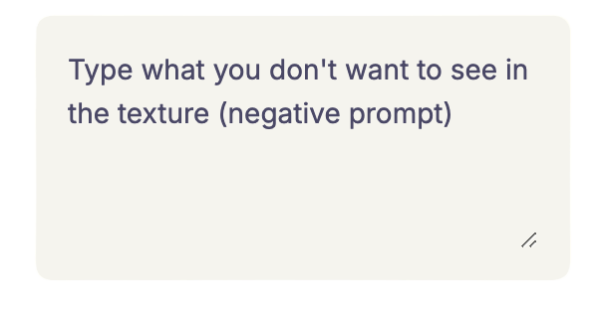
1. Understand Negative Prompts: A negative AI prompt specifies what you don’t want to appear in the generated texture. For example, if you want to avoid certain colors or patterns, you can indicate these in your negative prompt.
2. Formulate Your Negative Prompt: In the text box, include phrases or keywords that describe what should be excluded. For instance, if you want to generate a wood texture without any knots, you could use a prompt like, “draped cloth, no wrinkles.”
3. Generate and Review: Click the Generate button to create textures based on your combined prompts. Review the results to ensure they align with your specifications and adjust your prompts if necessary.
How to Change the Texture Resolution
Polycam's AI Texture Generator offers various resolution options to suit different project requirements. Adjusting the resolution allows you to balance between detail and file size. Here’s how to select the resolution that best fits your needs
1. Access Resolution Settings: Navigate to the resolution settings section on the right-hand side of the AI generation page
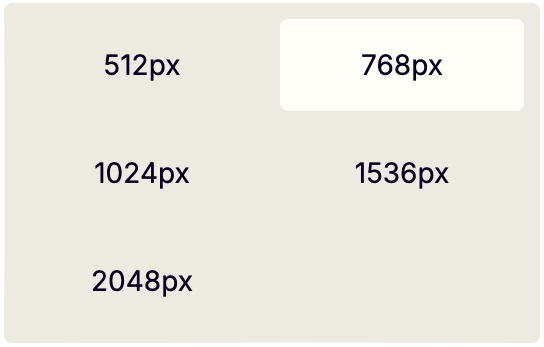
2. Choose Your Desired Resolution: Select from the following resolution options:
512px: Ideal for low-detail or smaller-scale applications where file size is a concern.
768px: Suitable for medium-detail textures and standard use cases where a balance between quality and file size is needed.
1024px: Provides a higher level of detail, making it suitable for most general applications and medium-sized projects.
1536px: Offers enhanced detail and is great for more intricate designs or larger projects requiring higher quality.
2048px: Best for high-detail textures where the highest quality is essential, suitable for large-scale projects or close-up views.
How Accurate Are Polycam Captures?
On most scans, Polycam can ensure accuracy up to 2% assuming that the scan was made under good conditions.
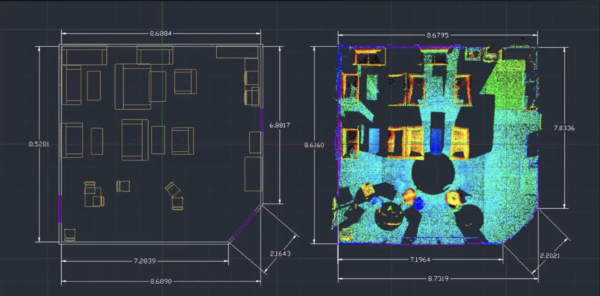
Above ou can see a comparison of Polycam's room scanning app, which automatically generates a floor plan in .dxf to one, low density, @FARO_TechInc 3d laser scan - converted to .rcp.
Data collection on app in this video is at x4 speed, App running on an #iPhone13ProMax. #3dscan #bim #laserscan.
Troubleshooting
App Crashing While Processing Captures
Almost always, crashes while processing are caused by your mobile device running out of memory as it attempts to generate the 3D reconstruction. Polycam has incomplete information about your device’s memory capabilities, so there is no way to fundamentally prevent out of memory crashes without severely limiting the app’s processing capabilities.
Troubleshooting Crashing When Processing Captures
Crashing issues during capture processing are often related to very large LiDAR captures. To help prevent these issues, we recommend limiting your capture sessions to 30 minutes or less. If you encounter problems with a specific capture, follow these troubleshooting steps to resolve the issue:
1. Update Your App: Ensure that you are using the latest version of the app. Updates often include bug fixes and performance improvements that can resolve processing issues.
2. Close Unnecessary Apps: Force-close all open applications, particularly those that may be using memory, such as those downloading data, playing audio, or using location services.
3. Restart Your Device: If closing apps doesn’t help, try restarting your device to clear any temporary memory issues
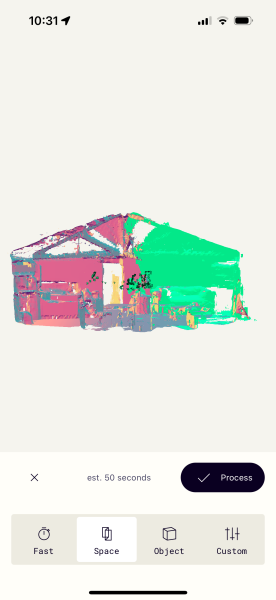
4. Use the ‘FAST’ Processing Preset: FAST’ processing preset in the app and attempt to process your capture. This preset is optimized for quicker processing and may resolve the issue with minimal adjustments.
5. Adjust Custom Processing Settings
Simplification Slider: Go to the ‘CUSTOM’ processing section and set the “Simplification” slider to 80%. This setting mirrors the ‘FAST’ preset and can help improve processing success.
Voxel Size: If your capture is processed successfully with the ‘FAST’ preset, you can gradually adjust the simplification and voxel size settings to fine-tune the results.
Reprocessing: If the capture did not process successfully with the ‘FAST’ preset, incrementally increase the simplification and voxel size settings and attempt to reprocess the capture.
6. Tweak Custom Settings: Continue to adjust the CUSTOM sliders and reprocess until you achieve a successful result. Make small adjustments to find the optimal settings for your specific capture.
7. File a Bug Report: Once you have followed these troubleshooting steps and the capture still fails to process, especially if your capture session was under 30 minutes, please file a bug report. Mention that you followed the recommended steps from the FAQs to assist with resolving the issue.
Why Are My Images Failing to Upload on Polycam's Web App?
If you have issues uploading photos using Polycam’s web app, it may be because the images you’re attempting to upload are too large for your web browser.
We attempt to compress images before they’re uploaded, and this compression step takes a certain amount of browser memory.
☝️ Try scaling your images down a bit (try a 12 MP resolution if they are larger than that initially, or an 8MP resolution if 12 fails), and attempt to upload again.
We are continually improving this feature, so if you encounter issues, please file a bug report and include information about the size and quantity of images you were attempting to upload.
Unleash your imagination and elevate your photography skills to greater heights with Polycam, the leading 3D capture app available. Get your download now!
Contact Support
Need Help? Our support team is available Monday through Friday from 10 a.m. to 5 p.m. EST and tries to answer all messages within 1 business day.
📨The best way to get in touch is to fill out this form or email contact@polycam.ai
You'll immediately receive a confirmation that your message has been received and when you can expect a response. You can also submit:
📥 Feature Requests
🐛 Report a Bug
Polycam Communities
We also invite you to join our communities on Discord and Reddit to connect with fellow creators.
- Version1.3.15
- UpdateSep 06, 2024
- DeveloperPolycam
- CategoryPhotography
- Requires AndroidAndroid 8.0+
- Downloads1M+
- Package Nameai.polycam
- Signature9222df488ba9c1584c67e4e356a9f1fa
- Available on
- ReportFlag as inappropriate
-
NameSizeDownload
-
21.10 MB
-
74.02 MB
-
74.63 MB


Fast process
export issue