Voice Recorder Audio Sound MP3 - Record & save audio
Record crystal clear audio notes and interviews on the go.
- 2.4.4.1 Version
- 3.2 Score
- 5M+ Downloads
- In-app purchases License
- 3+ Content Rating
Are You:
🧐 Seeking a top-notch voice recorder with exceptional sound quality?
✍️ Want a convenient way to record voice notes or meeting minutes?
😊 Desire a professional voice recorder that supports sound-to-text conversion and audio editing?
🤨 Need to transcribe speech to text while recording your voice?
🎉 Congratulations! Your every wish can come true with Super Recorder 🏆 - an app for voice recording, voice memos, and audio transcription!
🏆 Super Voice Recorder is a user-friendly tool for audio recording, voice memos, and audio transcription. It helps you capture voice memos, phone sounds, transcribe interview audios to text, convert speech to text, record lecture notes, music ideas, voice-overs, and more.
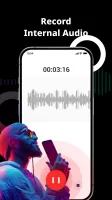
😍 This high-quality voice recorder has no time constraints, allowing you to freely record voice memos, conversations, or share recordings.
This handy tool can enhance your productivity, boost study efficiency, and safeguard musical inspirations
👔 Work Voice Recorder
Super Voice Recorder, Voice Notes assist in efficiently documenting meeting minutes without missing any crucial details. This easy-to-use tool can record meeting notes continuously and also convert speech to text in real-time. 📜 You can encrypt recordings for privacy and organize them into categories.
✍️ Study Voice Recorder
A top-notch voice recorder helps intelligibly record class notes, even from a distance. You can mark key moments in your recordings for repeated listening. 📼 Recording in the background lets you keep up with lectures hands-free.🙋♀️
🎵 Music Voice Recorder
This music and song recorder aids in effortlessly capturing musical inspirations. Visualize sound waves in real-time while practicing guitar 🎸 or other instruments. Whether singing karaoke or playing music, Super Voice Recorder can simultaneously capture music and vocals.
👩 Voice Recorder for All👨
Super Voice Recorder, Sound Recorder documents sleep talking or dream voices while asleep 😴. This versatile audio recorder can swiftly capture conversations, meeting notes, and convert sound to text with a single tap. It's not just a basic voice recorder or phone recorder; it's a helpful memo tool, audio converter, and transcription app.
🏆 Don't overlook this remarkable voice recorder, voice memos, and audio transcription app! You won't find another app with such robust voice recording capabilities, audio transcripts, and user-friendly interface.
Easy-To-Use Voice Recorder, Voice Memos
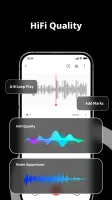
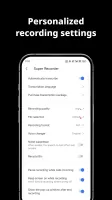
✅ High-Fidelity Sound Quality: Record voice memos at up to 128KHz sampling rate
😍 No recording time limits for voice memos
✨ Various recording formats: AAC, WAV, MP3...
🎙️ Various recording sources: Bluetooth microphone, internal sound, stereo microphone
📲 Automatically pause recording during incoming calls
Professional Voice Recorder, Audio Editor
📌 Mark important points in recordings
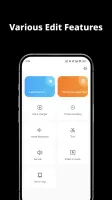
✂️ Audio Editor, MP3 Cutter: Trim audio recordings
🔊 Increase Volume: Enhance audio volume
😊 Voice Changer: Diverse effects for recordings
▶️ Audio Player: Skip silent parts during playback
🏷️ Add tags for easy access
🔔 Set Ringtones: Create ringtones from recordings
🎹 Video to Audio: Convert video to MP3
Useful Audio Transcription, Sound-to-Text Converter
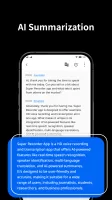
👏 Transcribe audio to text, convert speech to text
💬 Convert voice to text in real time
📜 Record meeting minutes, voice notes, memos
✍️ Live audio transcription, dictation
🚀 If the Super Voice Recorder enhances your life, please spread the word about this app to your friends! We would be grateful!
How to Use
01
Click the "Record" button to record audio.
02
Speak into your device's microphone and make sure the animation shows that audio is being recorded.
03
Click "Pause" whenever you wish to stop the audio.
04
Click "Preview" to play back your audio with a waveform, where you can listen to your entire recording. You can fast forward, rewind, trim your audio, and play your audio in this view.
05
Click "Transcribe" to transcribe your recording to text. Click the "Download" icon to download the recording as an MP3. Click the trashcan icon if you'd like to delete your recording and start over.
06
"Transcribe" adds the recording to your Rev cart in a new tab where you can purchase a transcript. "Download" gives you your recorded MP3 file!
The Importance of Audio Quality
Whether we’re aware of it or not, we judge videos and other recordings based on the quality of their audio. So, anything less than high-quality audio can turn people away from listening to your recording. Your audio quality also gives your audience an impression of your professionalism.
High-quality audio shows the person responsible for recording has taken the time and effort to record good audio. Verbal communication, including that done via audio recordings, is one of our main methods of communication. Therefore, it is crucial any audio you record is clear and easy to listen to.
In more technical terms, high-quality audio can be determined by bitrate levels. Bitrate refers to the quantity of data that is transferred into audio. Generally speaking, a higher bitrate signals higher audio quality. Audio files under 90 kilobits per second (kbps) will have a noticeable drop in quality, even for listeners with no formal audio training.
The ideal bitrate level will depend on the audio file type used and the method for listening to the audio. For example, the ideal bitrate for streaming services, such as Apple Music and Spotify, ranges from 96 to 160 kbps. Meanwhile, an MP3 file ranges from 96 to 320 kbps.
What Can Cause Issues With Audio Quality?
While recording audio may seem like an easy task, there are a few things that can impact your audio quality. Once you’re aware of the common mistakes to avoid when recording audio you can feel more prepared to prevent these issues and know how to improve your audio quality.
Microphone Placement
How far away you place your microphone will have a noticeable impact on sound quality. Ideally, you should remain around 3-5 inches from the microphone. The further you are from the microphone, the harder it is for it to pick up clear sound. Additionally, a microphone should be placed in line with the speaker’s mouth. Placing the microphone too far above or below will lead to the microphone picking up background noise and other distracting sounds.
Once you start recording, it is essential to keep your microphone at the distance and height you started with. Moving the microphone mid-recording changes how loud and clear the audio is. Reflect on your own experiences. Have you ever been watching TV and noticed that commercials are playing way louder than the actual show? It’s annoying, inconvenient and not fun to listen to. Providing listeners with consistent audio makes the experience more enjoyable for them.
Background Noise
Background noise distracts from your message. After spending time and money producing audio recordings, you want to make sure your audience actually listens to your message. Background noise can come in the form of other people speaking, a dog barking, wind and many other noisy occurrences.
If you’re recording in your home, office or somewhere else you spend a lot of time, you may have become used to these background noises and not notice them. However, your listeners will pick up on them. If you do not have access to a professional recording space, take time to identify any potential background noise producers in the space you will use.
Equipment Quality
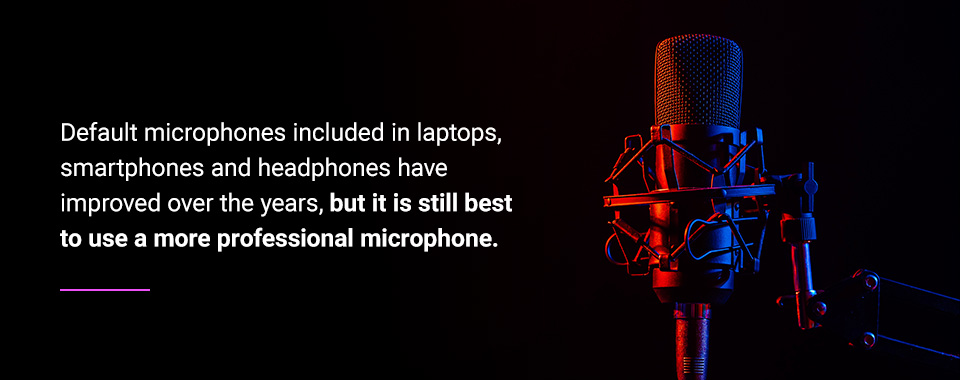
Of course, your equipment is one of the biggest factors in creating high-quality audio. When listening back to your audio, it will be obvious if you’ve used old or poorly made equipment. The audio may be fuzzy, muffled or not as clear as you’d like.
Default microphones included in laptops, smartphones and headphones have improved over the years, but it is still best to use a more professional microphone. If you need to use your laptop or another default microphone, make sure you have access to good editing software to help clean up your audio.
How to Improve Audio Quality: 9 Tips
Audio recording systems are valuable for all industries. From the entertainment industry to education, business and religious organizations, recorded audio will be necessary at one point or another. To get the best results from your audio recording, it’s a good idea to follow the tips and tricks listed below.
1. Invest in a Quality Microphone
A quality microphone leads to quality audio. One of the most effective and easiest ways to improve your audio recordings is to invest in a quality microphone.
Choosing which microphone is best for you will depend on the type of audio you plan to record. Are you recording a podcast, making music or recording a live sermon or presentation? Would you benefit from choosing a wireless microphone?
Other key considerations for finding the right microphone include:
- Frequency of use
- Reliability and life span
- Operating range
- Added features
2. Record in a Quiet Space
A recording studio is always the most ideal place to record audio. However, they are not always accessible. If you cannot get into a recording studio, it’s critical to make your own recording space as quiet as possible. First, you’ll want to ensure the room you’ll be recording in does not have an echo. Typically, the smaller the room, the better. Carpet, wall decorations and furniture can also help prevent echoes.
Next, identify distracting background noise. Some common noise producers to look out for include:
- Cars
- Electronics
- Fans
- Furnaces
- Open windows
- Phones
- Refrigerators
3. Use a Microphone Stand
Unless a handheld microphone is necessary, it’s best to use a microphone stand because you want to try to keep the microphone at the same distance throughout the recording. Using a stand helps keep the microphone in the same place and is especially helpful for animated speakers who tend to move their hands around while talking.
Different types of microphone stands include:
Tripod stands: Tripod stands are standard microphone stands that have a three-pronged base and an adjustable vertical pole with a microphone mount on top.
Round base stands: Round base stands are another common, basic microphone stand. These stands are ideal for live performances on stage as their base is compact and offers fewer opportunities for tripping compared to tripod stands.
Tripod boom stands: A tripod boom stand has the same base as a normal tripod stand but with the added boom arm on top. A boom arm is a pole that extends from the main vertical pole. Boom arms tend to provide better mic angles.
Overhead stands: The sturdiest and most complex microphone stand is the overhead stand. This stand has a boom arm that can reach longer distances and wheels, so the stand can easily be moved without having to lift its weight. These wheels do lock to add security and ensure the stand stays in place.
Desktop stands: As the name suggests, this microphone stand is a small stand that can be placed on a desk. These stands can be attached to the desk via screws if desired.
4. Record Separate Tracks
If you’re recording will have two or more speakers, you should record each speaker’s audio separately. The recordings can all happen at the same time as long as each speaker is being recorded on their own track. This allows you to create a consistent audio level.
For example, if one speaker naturally talks much louder than another, you might face an imbalance. If each speaker has their own audio track, the louder speaker’s audio can be toned down in editing or the quieter speaker’s audio can be turned up to maintain a consistent level.
5. Wear Headphones While Recording
Wearing headphones while recording is especially crucial if you have two or more speakers recording together. Using headphones keeps your microphone from picking up the other speaker’s audio as background noise. Headphones also allow you to hear how you sound to the microphone.
Microphones pick up audio slightly differently than the way our ears pick up audio. You may think you sound great, but after listening to your audio back, you may find the recording doesn’t sound the way you want. Wearing headphones allows you to hear what the microphone hears in real time so you can address any issues while recording instead of trying to fix things in editing or, even worse, having to rerecord the entire session.
6. Use a Pop Filter
A pop filter is a screen that is placed in front of or around the microphone to reduce plosives. Plosives are bursts of air, or popping noises, that we expel when pronouncing consonant sounds like “p,” “t” and “k.” Pop filters keep these air bursts from hitting the microphone and causing audio distortion, giving you the best sound quality.
Pop filters may come as a few layers of woven nylon or as a fine mesh metal screen. The type of filter you prefer to use is up to you. Unlike microphones, you don’t need to do much research on the pop filter you use, as they all tend to have the same quality level. However, some microphones come with a pop filter included so you could avoid having to shop for a pop filter altogether if you opt for this type of microphone.
7. Set Your Gain
Gain is the decibel (dB) input volume level of your audio. If your gain level is not properly set, you’ll end up with distorted audio. Make sure your gain is not set too loud. Having your gain too high will make the audio uncomfortably loud and distorted for your audience.
To make sure your gain level is set correctly, do a practice run of talking into the microphone. During the test run, make sure to speak at the volume level you plan to speak at during the real recording. Look at your recording software to see if your audio input is hitting the red part of the scale. If it is, you’ll want to lower your gain setting until you see your audio input stay within the green.
8. Warm Your Voice
This tip may seem self-explanatory, but you mustn’t forget it. Great audio recording equipment can’t fix a cracking voice or a speaker who seems uninterested. Bringing your A-game will help your audio sound even better.
Before recording, do some light vocal warmups. Practice the tone you want to use during your recording. After warming up, remember to keep water nearby and stay hydrated so your voice maintains its quality, especially through long recording sessions.
9. Take Time Editing Your Audio
Editing brings your audio quality from good to great. Editing allows you to remove any background noise that snuck its way in and level out volume inconsistencies to keep the audio sounding clear. Editing also lets you remove any extended pauses to help the audio flow better. Any mistakes or unnecessary parts can also be removed. Finally, if needed or desired, you can add sound effects or music.
As editing is an extremely vital step, you’ll want to make sure you have high-quality editing software. If you’re new to editing or feel unsure of your editing abilities, hire professional help. Professional editors can bring your audio to top-notch quality and provide pointers on how to record better audio in the future.
If you’re interested in editing your audio yourself, take some time to research audio editing software options. There are multiple to choose from, so find software that has all the features you need with an easy-to-use setup. During the editing process, remember to address the following:
Audio equalization: Equalization balances the volume for different frequencies, leaving you with a more harmonious, good sound.
Audio normalization: Audio normalization adjusts the overall volume of the whole audio file. This helps keep the audio level consistent throughout the whole recording.
Awkward or long pauses: For audio recordings of conversations, lectures or other talking-based recordings, you’ll want to include natural pauses so the content doesn’t seem rushed. However, long pauses seem out of place and boring to listeners, so make sure to edit down any excessive pausing.
Illuminated Integration Can Improve Your Audio Quality
As an audio, visual and lighting company, Illumination Integration has the tools and team to meet any project size. We design and install AVL solutions and even train clients on performance systems. With our knowledge and expertise, you can learn how to improve the audio quality of recordings.
Our team of creative audiophiles is ready to design the best sound system to meet your unique goals and needs. From design to installation and training, we’ll be with you every step of the way. Reach out to us today to see how we can help build a complete high-quality audio recording system for your business or organization.
- Version2.4.4.1
- UpdateOct 20, 2024
- DeveloperVideo Screen Recorder, Voice Audio Editor, Cut MP3
- CategoryMusic & Audio
- Requires AndroidAndroid 5.0+
- Downloads5M+
- Package Namecom.tianxingjian.superrecorder
- Signature9b03e01129d88b27611804c618338e7c
- Available on
- ReportFlag as inappropriate
-
NameSizeDownload
-
43.98 MB
-
57.64 MB
-
34.00 MB








very effective in recording and playing voice conversations
handful of features free of charge
can't use on another devices
speech to text conversion not so intellectual